
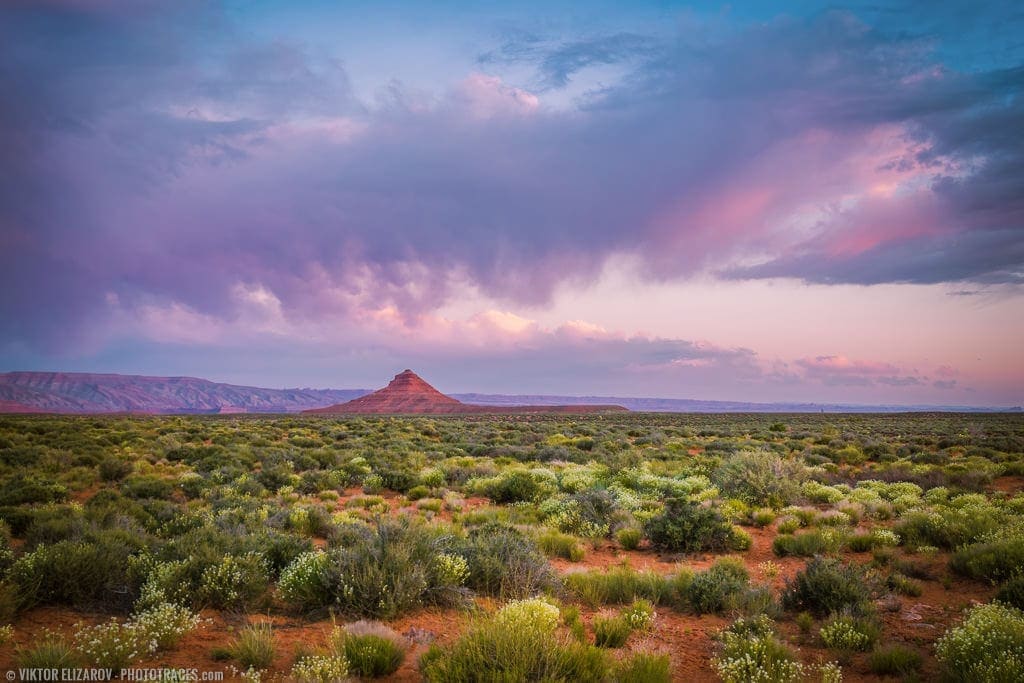
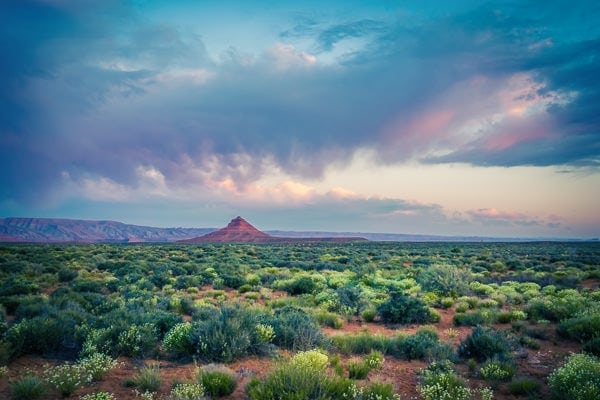
I took the featured photo a few years back in Southern Utah when I was still shooting with Sony. The place is called the Valley of the Gods, and it is located close to Monument Valley and the Four Corners Monument.
The place is beautiful on its own and offers some fantastic landscape opportunities. But I also use it as a strategic location during my travels.
The Valley of the Gods is vast and resided on public land, which means you can find free camping spot even during the busiest tourist season, and you need no reservation. Priceless.
Shooting
The day I took the featured photo, I was driving along the 17mile dirt road through the Valley of the Gods during the golden hour.
I kept stopping every few hundred meters to photograph the countless landmarks of the valley. And at the end of my drive when the sun already below the horizon and it was getting dark, the sky suddenly was illuminated again with the extremely bright colors. I knew it was my last chance to capture golden hour colors.
The composition’s goal was to emphasize the patterns and textures of the vegetation of the desert in the foreground and the sky colors in the background.
Since it was getting dark fast and I absolutely needed a tripod to shoot at 1/6s and slower.
Editing & Processing
It was a single RAW processing workflow.
To process the featured photo, I used my brand new Travel Pro Kit workflow.
The Travel Pro Kit is a collection of Lightroom presets, profiles, and editing adjustments that allow you to edit photos fast without touching the program’s editing tools. In total, the Travel Pro Kit has 7 components.
To learn more about the Travel Pro Kit’s components, check here.
Lightroom (80%) – 15min
Step #1 – Composition
My first goal was to improve composition.
I used the Crop Overlay tool to make composition tighter. I kept the original aspect ration of 3:2.
I also used the AUTO function to straighten the horizon.

Step #2 – Preset Editing
Next, I moved to my standard preset based workflow by applying the 01. Napa preset from the Travel Pro Kit – Landscapes Collection to the original image.
Step #3 – TOOLKIT Adjustments
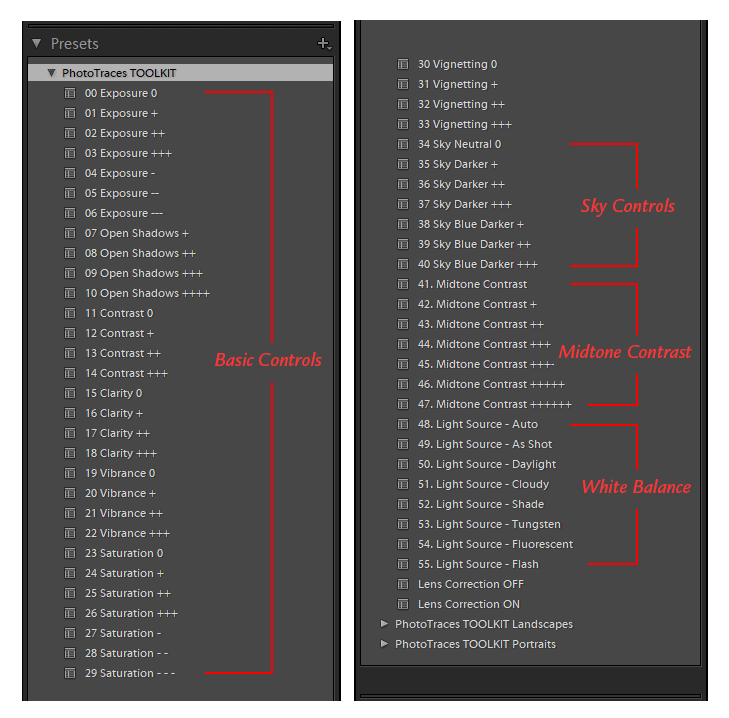
Next, I opened to the TOOLKIT and applied the following adjustments:
10. Open Shadows ++++
20. Vibrance +
32. Vignetting ++
43. Midtone Contrast ++
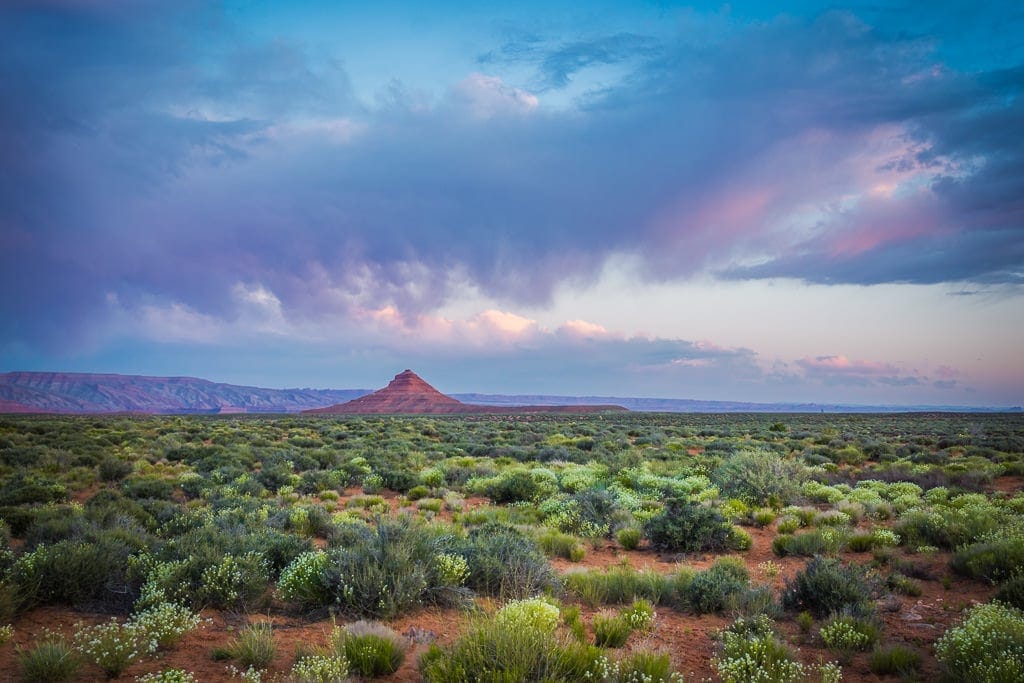
Below, you can see the result of the editing adjustments.
The Editing Formula: Napa (10, 17, 20, 32, 43)
The final element I used during my editing workflow was the Cross Pro Kit.
Step #4 – Creative Profile Editing
One of the 7 components of the Travel Pro Kit is the Cross Pro Kit, which is the collection of Creative profiles. If you are not sure what the Creative Profiles are, check my in-depth article here: Demystifying Lightroom Profiles
You can access the Cross Pro Kit from inside of the Basic Panel by clicking the Profile Browser icon (see image below).
Inside of the Profile Browser panel, I located the PhotoTraces – Cross Pro Kit section and extended it.

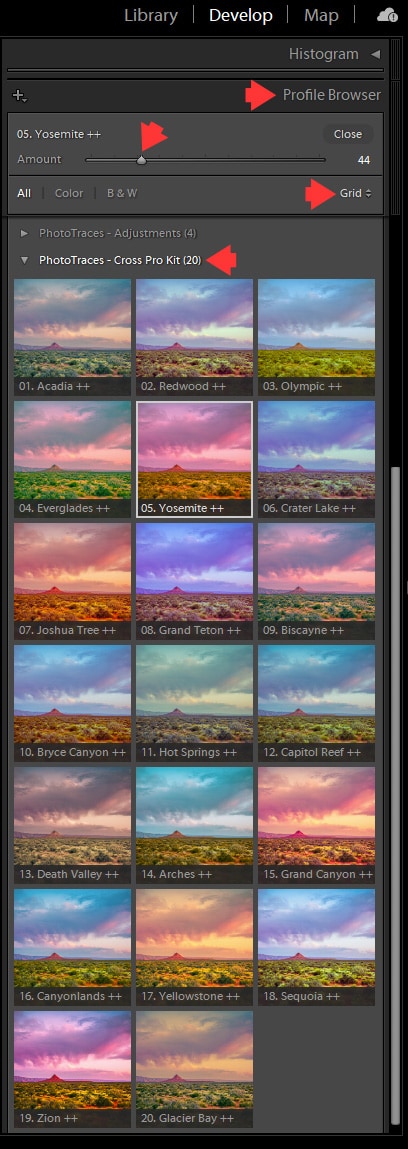
One of the most important advantages of the Profiles is the ability to adjust their editing effects by moving the Adjustment slider to the left or right. It acts as an Opacity functionality (see image above).
I started clicking through the different Profiles trying to find visually appealing versions. I used the AMOUNT slider to adjust the strength of the effects.
-
Profile: Acadia 66% -

Profile: Yosemite 44%
-

Profile: Arches 66% -

Profile: Biscayne 55%
And my favorite editing version was Yosemite Profile dialed down to 44%.
To summarize the Travel Tool Kit editing workflow:
- I applied the Napa preset from Landscape collection.
- I used the following adjustments to fine-tune the image: Open Shadows ++++, Vibrance+, Vignetting ++, Midtone Contrast ++
- I used the Yosemite Profile from the Cross Pro Kit at 44% opacity.
Photoshop (20%) – 5min
Step #5
In Photoshop, I used the Spot Removal tool to clean up the foreground by removing visually destructive debris.
And finally, I used the Topz DeNoise AI plugin to reduce digital noise.
And that was it.