
Perspective in photography may seem like a technical topic, but don’t be fooled; you can use perspective to enhance pretty much any composition.
You see, perspective is what allows you to convey depth in your images–so through careful use of perspective, you can create compelling photos that draw the viewer straight into the scene (and never let them leave!).

And in this article, I’m going to share with you everything you need to know about perspective, including the different types of perspective, how you can use perspective to improve your photos, plus a lot of helpful tips for perspective photography.
Are you ready to become a perspective expert?
Let’s get started!
Definition of Perspective in Photography
What is perspective in photography? Perspective in photography refers to methods used to create a sense of depth in a scene. It relies on the position of the photographer relative to the scene, as well as the position of the compositional elements relative to one another. Ultimately, by adjusting the perspective, you can create a scene that’s full of depth–or you can create a scene that’s completely flat.
Types of Perspectives in Photography
In photography (and in two-dimensional art more generally), there are a number of different perspectives and perspective techniques used to convey depth in a scene.
Let’s take a look at each one in turn:
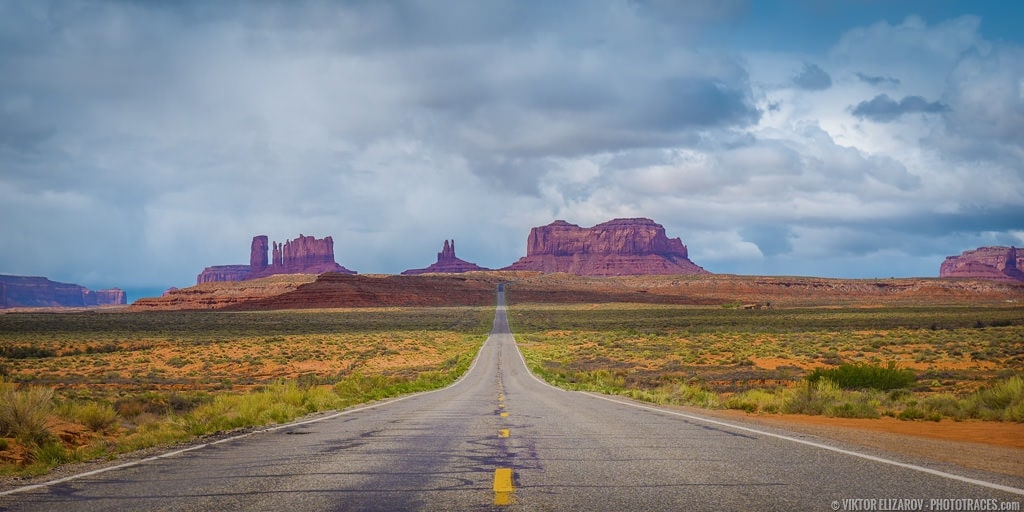
One Point Linear Perspective Photography
A one point linear perspective relies on a group of lines, and a single vanishing point at which they all converge, like this:
Therefore, to create one point linear perspective photography, you need at least two lines, and you need a point at which they come together.
This is a popular technique in landscape photography, where leading lines often converge on the horizon.
Two Point Linear Perspective Photography
Two point linear perspective is a slightly more complex technique, which creates depth through two sets of lines, converging on two different points.
The two vanishing points are generally positioned along the horizon, and the simplest example of two point linear perspective photography involves a photographer shooting on a street corner, so the streets fade back on the right and left side of the scene.
In fact, it’s rare to find two point linear perspective used in landscape photography. But you will often find it in architectural photography, city photography, and even street and portrait photography, where streets converge at two vanishing points behind the main subject.
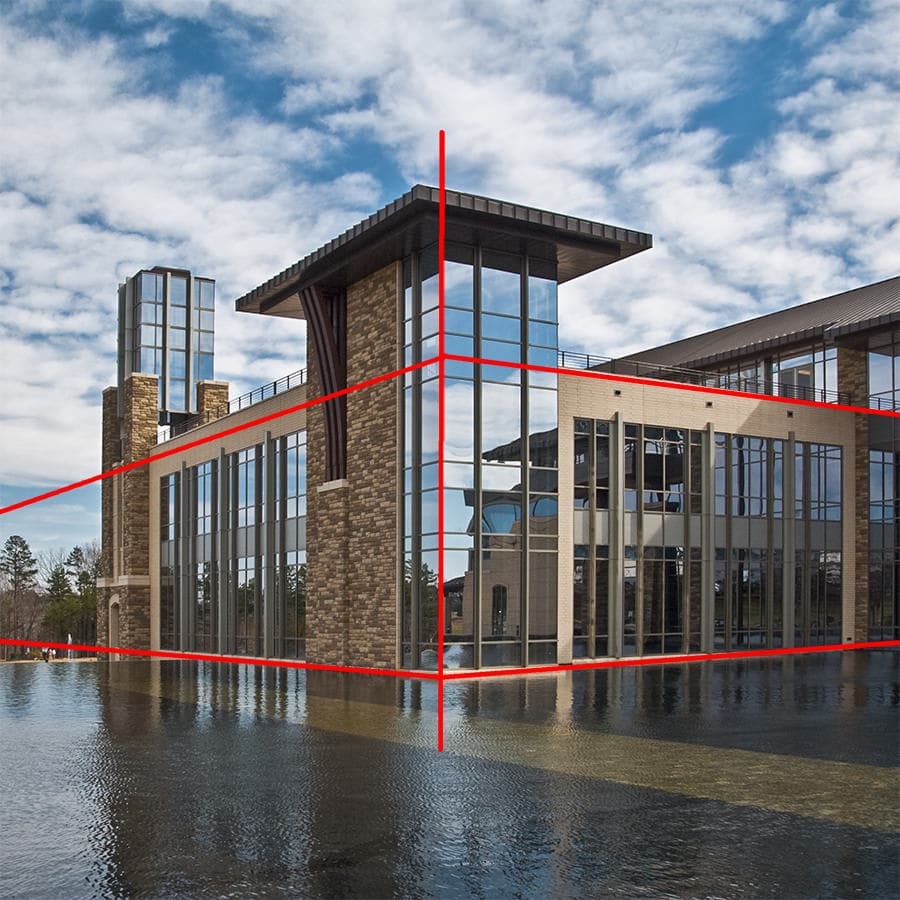
Three Point Linear Perspective
Three point linear perspective is probably the most complex perspective you’ll use in photography (technically, you can increase the number of vanishing points further, but it’s very complex and not often done!).
Here, you have three vanishing points, which is what you’ll see if you stare up the corner of a building from close distance.
You’ll occasionally see this in architectural shots, but it’s pretty tough to find examples of three point linear perspective in, say, landscape photography.
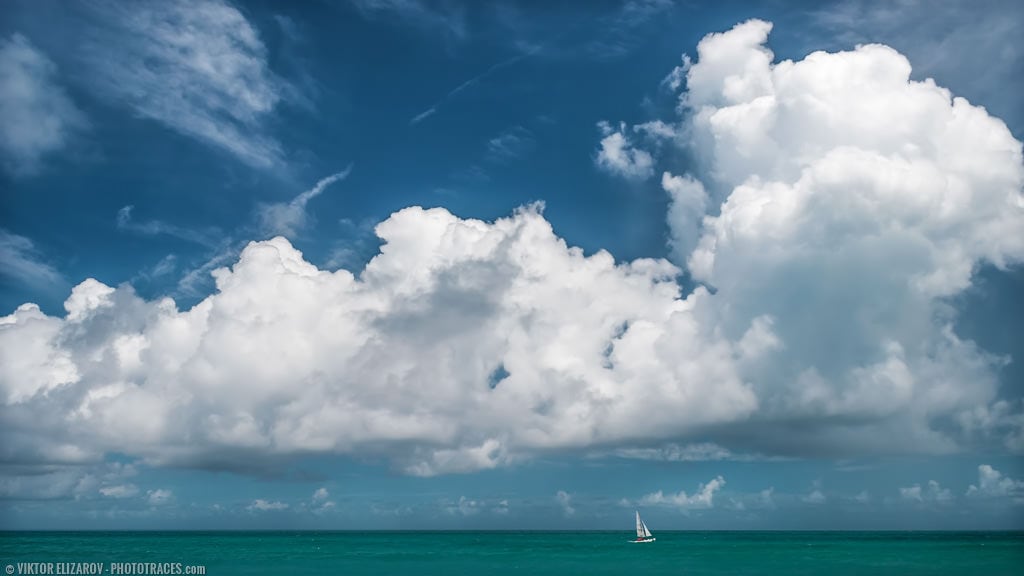
Aerial or Atmospheric Perspective Photography
Aerial perspective, also known as atmospheric perspective, focuses on a fundamental observation:
Distant objects look blurry, whereas close objects look sharp.
Now, when you take a photo and look at it later, you may notice a small amount of atmospheric perspective, especially if the photo was taken on a foggy day.
However, if you want to really enhance depth in your photos, you can add atmospheric perspective in post-processing (by simply reducing the clarity of distant elements).
The sharp foreground elements will appear to pop, while the distant elements will recede.
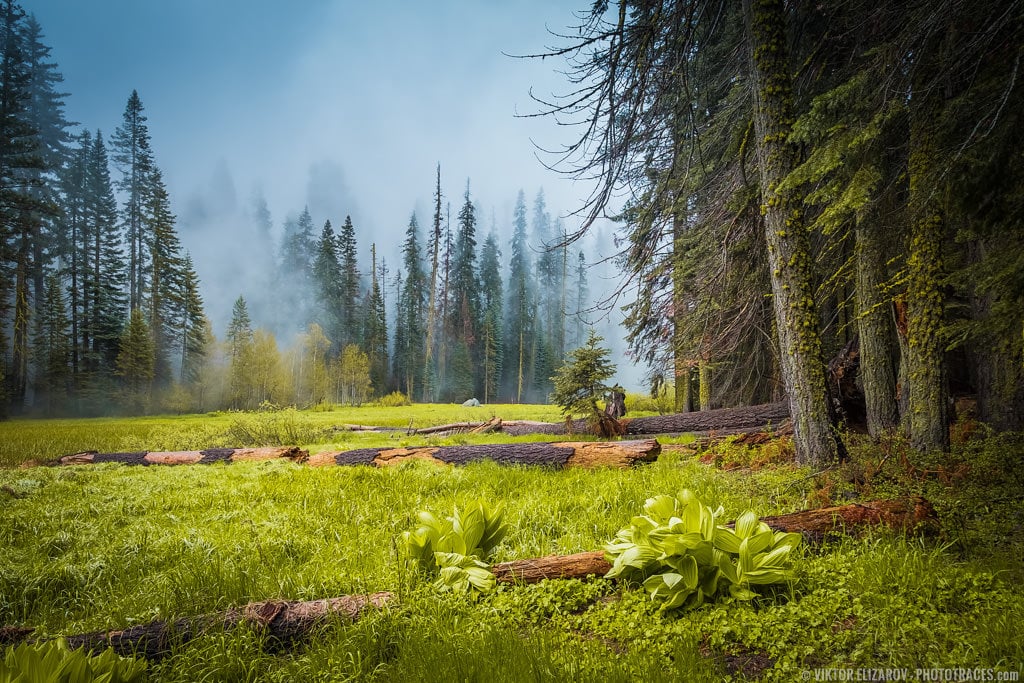
Overlap Perspective
Here’s another simple perspective technique to create depth in your photos:
Add overlap.
By positioning objects so they overlap with one another, the foreground objects will appear much closer than the background objects.
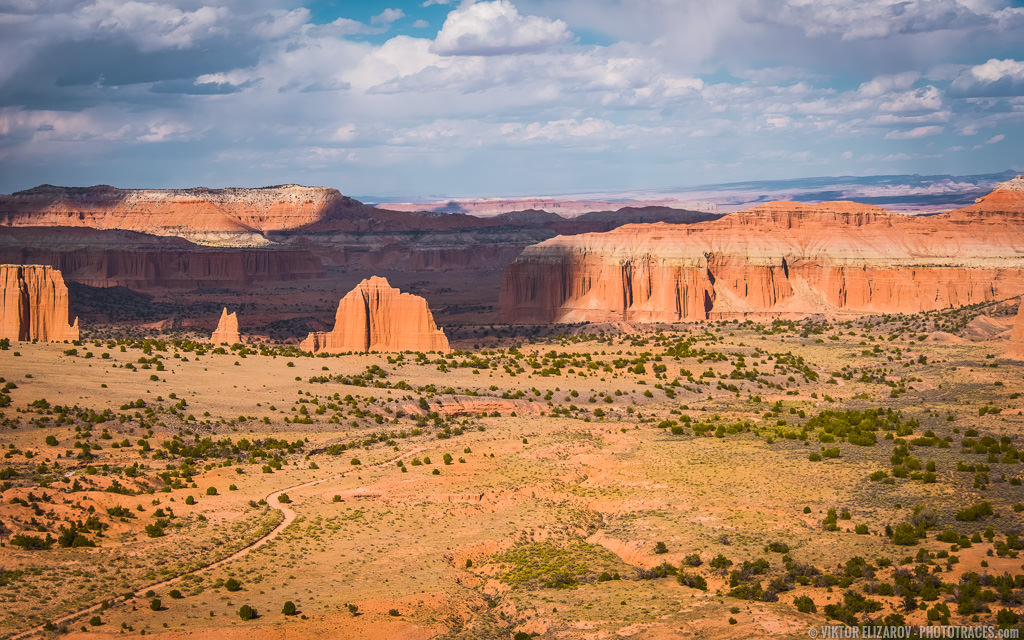
In landscape photography, you’ll often see foreground elements, which overlap with middleground elements, which overlap with background elements. Each overlap serves to create more depth, and a multi-layered photo will instantly draw the viewer inward.

So if you’re struggling to produce depth in a scene you’re photographing, try to overlap a few foreground and background elements. It’s a quick way to increase the sense of space in an image (and it generally turns out great!).
Bird’s Eye Perspective (Drone Photography)
Bird’s eye perspective comes from shooting down on a subject from above.
You’ll often find it in drone photography or other forms of aerial photography (e.g., photos shot from helicopters).
But you can create a bird’s eye perspective by shooting down from high vantage points, such as mountains or skyscrapers.
A bird’s eye perspective tends to make objects below look very flat–but by getting close to your subject from above, you can actually do the reverse and enhance depth.
Diminishing Scale Perspective
You probably already know about diminishing scale perspective–you just don’t realize it!
You see, diminishing scale perspective simply refers to the tendency of distant objects to look small and near objects to look large.
To see diminishing scale perspective in action, hold up one of your fingers, and compare it to something far in the background. Your finger should be able to cover the background object–because it appears much larger than life!
Now, diminishing scale perspective often comes about naturally in photography, because near objects look larger than far objects. But if you get too far away from your foreground subject, the effect will be reduced.

So if you want to convey depth through a strong diminishing scale perspective, make sure you position your foreground subject close to the lens.
Make sense?
Tips to Use Perspective in Photography
Now that you’re familiar with the ins-and-outs of perspective, I’m going to share some easy tips for enhancing perspective in your photos, starting with:
Use Foreground Elements to Emphasize Depth
Remember how I talked about diminishing scale perspective above?
If your aim is to increase depth, you can use foreground elements, combined with your knowledge of diminishing scale perspective, to create a very deep image.
Here’s how it works:
First, find a foreground subject.
Then get close to your foreground subject (I recommend using a wide-angle lens), and position it prominently in your photo’s foreground.
Simply by including a strong foreground element, your image will have enhanced depth. And by making sure there’s a clear background element, depth will be enhanced further!
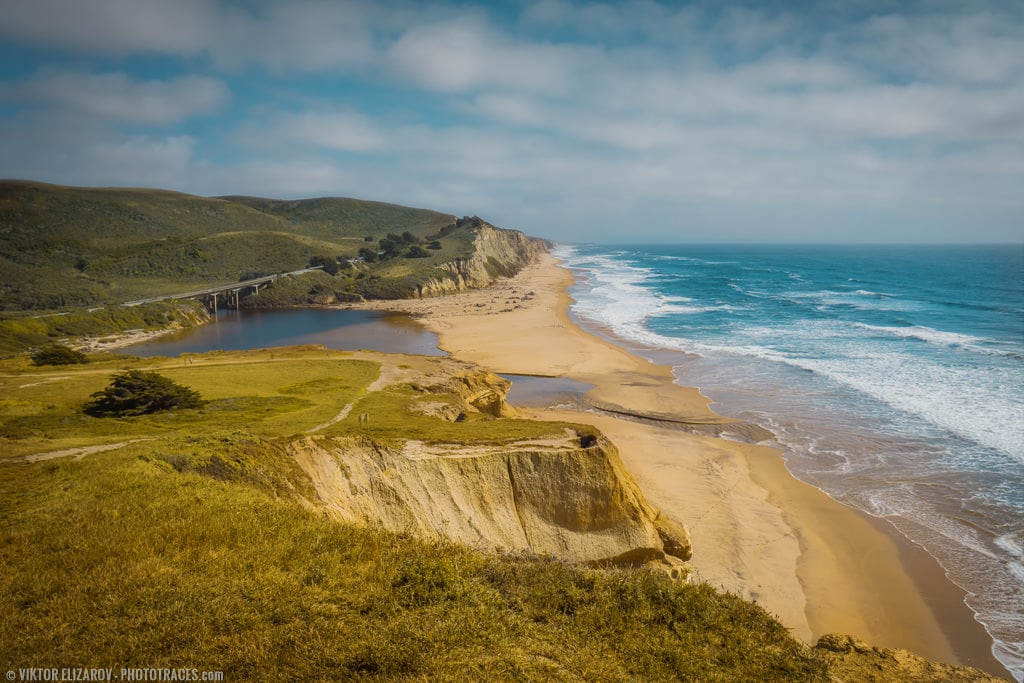
Add Reference Elements to Stress Scale
One of the easiest ways to create dramatic, breathtaking landscape photos…
…is to photograph large subjects, but while including reference elements to enhance the viewer’s sense of scale.
For instance, if you photograph a giant archway, you might position a person down at the base–that way, the viewer can instantly see how massive the arch truly is.
And if you photograph a mountain, you might put a small cottage at the bottom, so the viewer can understand the sheer scale of its peak.

Experiment With Different Focal Lengths
Different focal lengths lend your images varying amounts of depth.
So to create interesting perspectives, why not try shooting with all different focal lengths?
You see, telephoto lenses reduce depth by compressing the scene. All objects tend to look more similarly sized.
Whereas wide-angle lenses emphasize depth by making foreground elements larger and background elements smaller.

Neither one of these looks is necessarily better–it depends what you’re trying to create. But for gorgeous results, I recommend you experiment with several options, then pick the composition you like best!
Experiment With Horizon Placement
Here’s a perspective technique many photographers neglect:
By positioning the horizon line in different parts of the scene, you can create or reduce depth.
For instance, if you position the horizon toward the top of the frame, you’ll often enhance depth (because you’ll give your leading lines a lot of space to run through).

But by positioning the horizon toward the bottom of the frame, you’ll generally do the opposite, causing the viewer to focus on the sky and miss the depth conveyed by the foreground elements.
Note that you don’t have to position your horizon randomly within the composition. You can play with putting your horizon along a rule of thirds gridline (or a golden ratio gridline).
That way, you can enhance or reduce depth while also emphasizing the interesting parts of the scene.
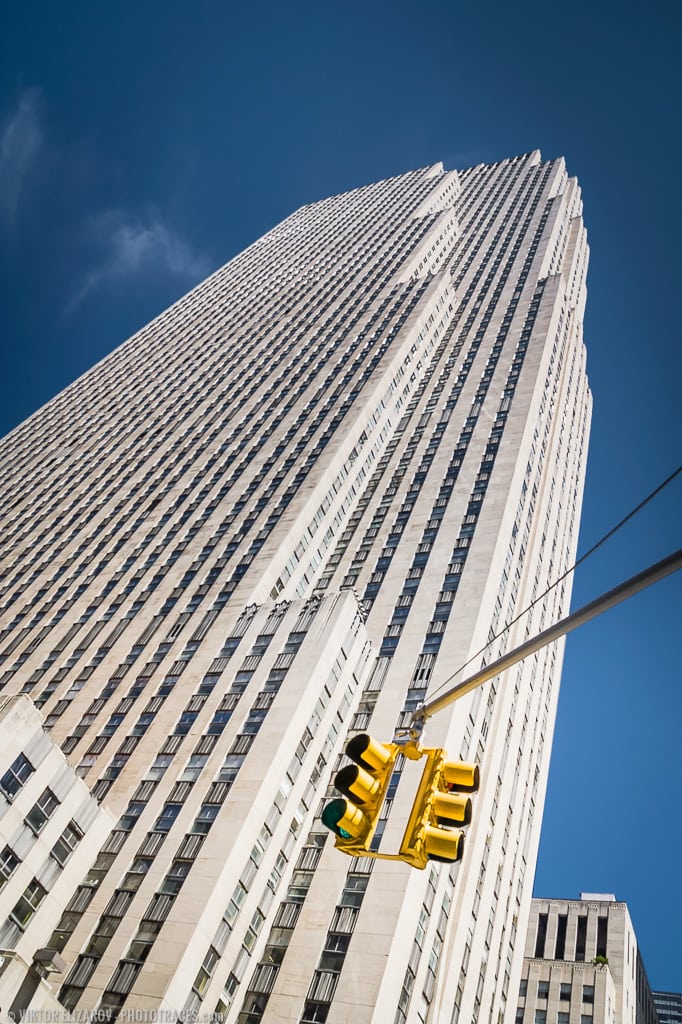
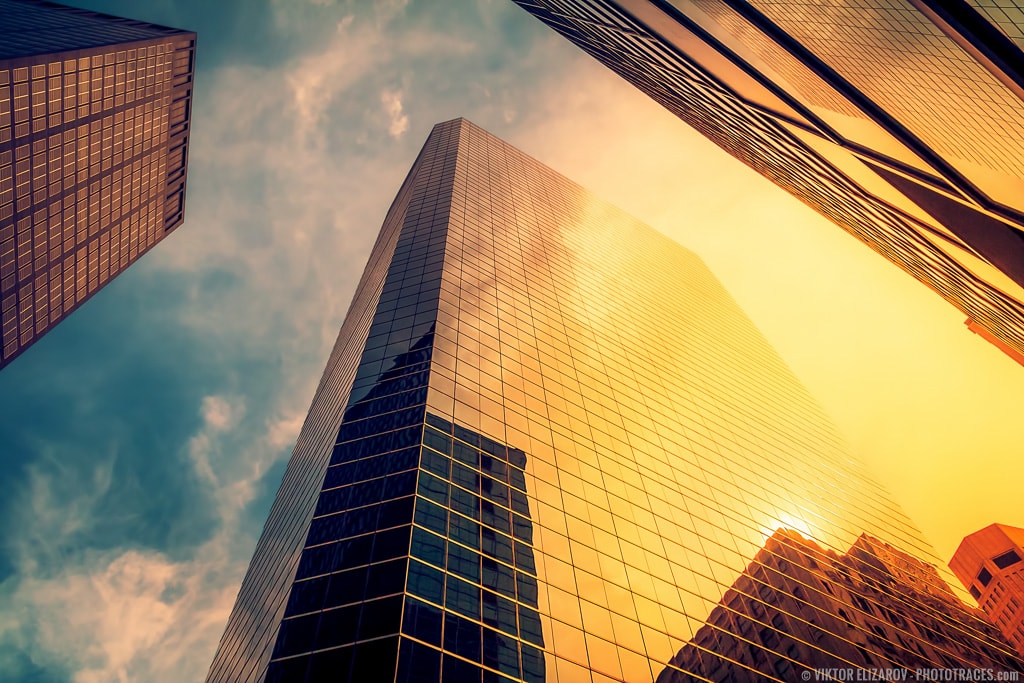
Shoot Looking Up
Most photographers never look up. But this is a huge mistake!
You see, by shooting upward, you’ll end up with a unique perspective that most viewers will have never encountered before.
Plus, shooting upward offers a nice way to create depth. You can often find a vanishing point above you, especially if you’re photographing near tall elements.
For instance, if you photograph in a forest, the trees above you will often come together at a vanishing point.
And if you photograph among tall buildings, the skyscrapers around you will often converge at a vanishing point.
While you won’t always find interesting shots by looking up, it’s a neat little trick that you can use to instantly enhance your portfolio.
Use High Vantage Points
In the last tip, I talked about the importance of looking up when out shooting.
But you can also create great images by doing the opposite:
Using a high vantage point to shoot down!
What makes this such a great technique?
For one, shooting downward will give you unique images that you’d never capture otherwise. And they’ll be the type of images that nobody has ever taken before because photographers rarely think to shoot down from up above.
Plus, shooting down gives you the option to flatten your photos (if you shoot down from a distance, the objects in your scene will look tiny), or to increase depth (if you shoot down from close up, the objects in your scene will recede away, like a leading line).
If you like shooting from above, you can even consider purchasing a drone. These will allow you to capture stunning aerial images, though you’ll want to make sure you follow the proper procedures and regulations before flying; you don’t want to break the law by mistake.
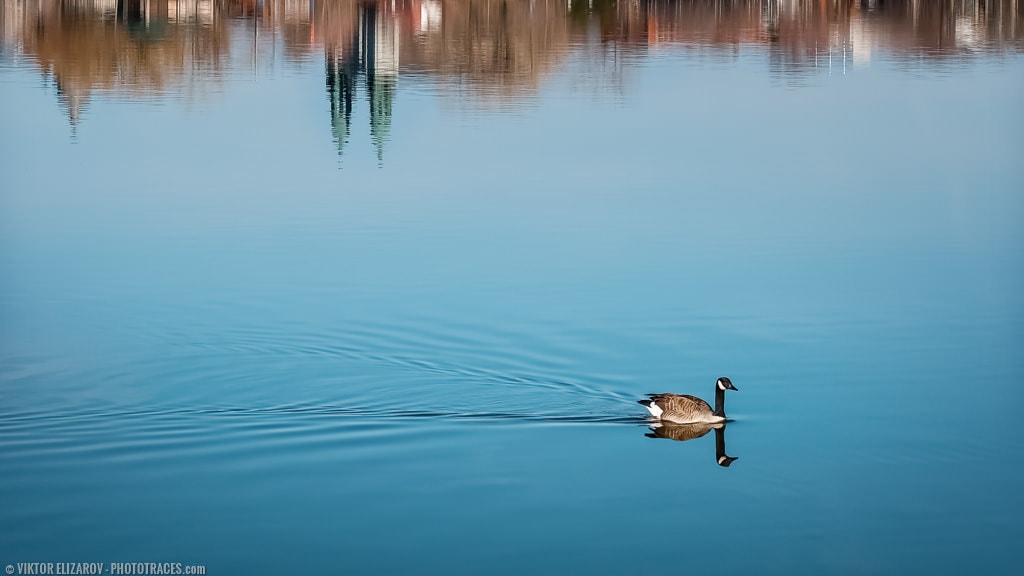
Use Water Reflection Strategically
Here’s another quick tip for using perspective in photography:
Don’t be afraid to incorporate reflections into your compositions.
In fact, reflections can be a good way to create false perspective, because by including distant elements reflected in foreground water, you’ll disorient the viewer. For instance, if you have a foreground puddle that reflects a distant mountain, the puddle and the mountain will seem unusually close together, causing instant confusion.
While a lot of confusion can be bad, a bit of confusion–which soon resolves itself into understanding–is a great way to tease the viewer!
Shoot From a Low Angle
Photography is generally done at eye level.
But if you’re willing to break the mold a bit and get down low, you’re often able to find a unique composition–plus, you’ll emphasize foreground elements, as discussed in the section on diminishing scale perspective, above!
In fact, I recommend you compose every photo by testing out a few unconventional compositions from below eye level. Try getting on your knees. Even consider lying on the ground!

It’s a great way to change things up, and to get truly stunning results!
Conclusion
If you’re looking to create powerful landscape photos that really draw in the viewer, then understanding perspective is a must.
And now that you’ve finished this article, you know all about perspective in photography–and how you can use different types of perspective to enhance and reduce depth in the scene.
So go ahead and experiment with depth. See what you can come up with. I bet you’ll love the results!