
If you want to learn how to add watermark in Lightroom to protect your images, you need to follow this tutorial.
In the last article, I addressed the issue of using Copyright Presets to embed copyright information into every photograph we take. I like the metadata approach for image protection because it is not intrusive, nor does it affect the aesthetics of our photographs, and, depending on your needs, you can include plenty of information. The downside of using metadata copyright information is that many online platforms do not respect it.
Facebook is the worst offender with regard to user images. When you upload an image to Facebook or post to Instagram, it strips all the metadata from your photo. On top of that, it recompresses the image with extremely aggressive settings. I despise Facebook for that but consider it a necessary evil since I have to use it to promote my business.
Google Plus was the friendliest for photographers because it compressed images using a very smart algorithm that preserved all the metadata included in each photo. The bad news is that Google Plus is dead while the biggest offender flourishes. This is absolutely unfair but, it is what it is, and we must deal with it.
Related: Lightroom Import Presets: Optimizing the Workflow
What this means is that using metadata copyright presets is not enough when posting our images to social media.
Reasons for Using Watermarks
The second solution for protecting our photos is watermarks.
In general, I am not a big fan of watermarks. I believe that 99% of photographers misuse watermarks. My biggest complaint is that the majority of watermarks on the web ruin the artistic aspect of the photograph. They are too intrusive. When I come across such a photograph, all I can see is the ugly watermark and I cannot enjoy the actual photo.
In my photography, I try to maintain a balance between protecting the image and the aesthetics.
Once again and similar to how I use copyright metadata, I do not use watermarks solely for image protection. I strongly believe that if a person wants to steal my photo, there is nothing I can do. The metadata can be stripped, the watermark can be cropped or masked.
I add watermarks mostly for discovery purchases. If someone wants to buy my photo or simply learn more about me as a photographer, the watermark provides that opportunity. If someone steals my photos, which does not happen often, I treat it as a cost of doing business and try not to worry about it too much.
Today, I want to show you how you can add watermarks to your photos and how I approach watermarks in my photography.
How to Add Watermark in Lightroom
Since Lightroom uses non-destructive RAW editing, it is not possible to add a watermark to existing RAW files. There is no way to add watermarks in the Library or Develop modules.
The only way to add watermarks in Lightroom is during the export process:
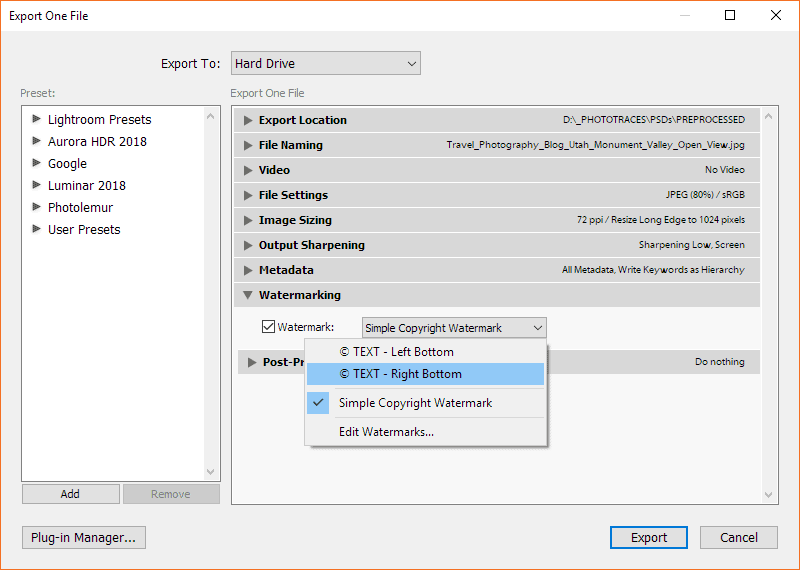
- When you are ready to export a photo or a group of photos from Lightroom, right (option) click on the selected photo(s) and choose Export from the menu. You will be presented with the Export dialog box.
- In the second to last export tab, you will find the Watermarking options.
- When you select the Watermark checkbox, the default value is selected—Simple Copyright Watermark.
- You can hit the Export button and your photo will be exported with a watermark.
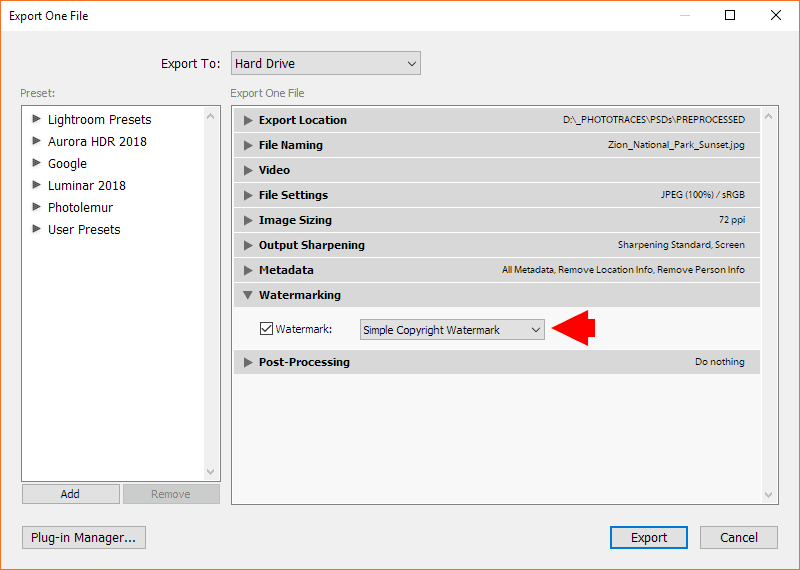
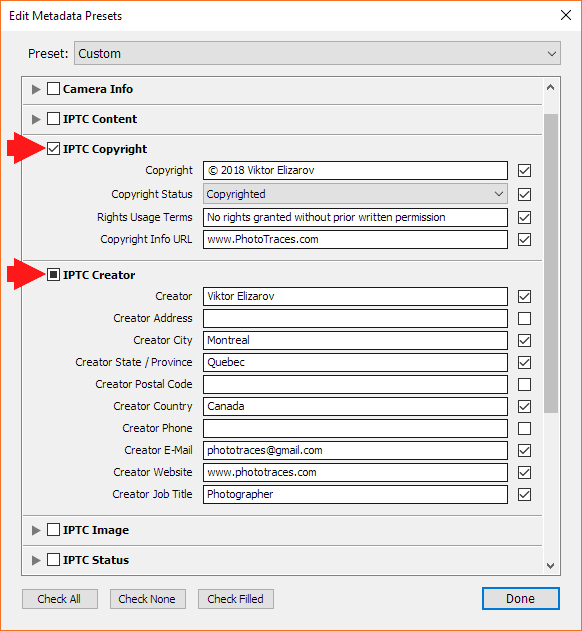
What the Simple Copyright Watermark option does is take the information from the IPTC Copyright > Copyright field of metadata (see the previous challenge) and applies it to the bottom left corner of your photo using the default style (semitransparent white text).
It never looks good, but it is a quick way to add a watermark to your image.

How to Create Custom Watermark in Lightroom
If you are not happy with the default watermark, you can create your own using a Watermark Template.
From the Watermark drop-down menu, select the Edit Watermarks… option.

You will be presented with the Watermark Editor.
The first option in the Watermark Editor is what type of watermark you want—Text or Graphic. In my case, I always use the Text option. But, you can always select the Graphic version and use a PNG image with a transparent background as a watermark.
I have never felt the need for a graphic option.
As you can see, the Watermark Editor gives us plenty of settings to customize the watermarks, which can be overwhelming in the beginning.
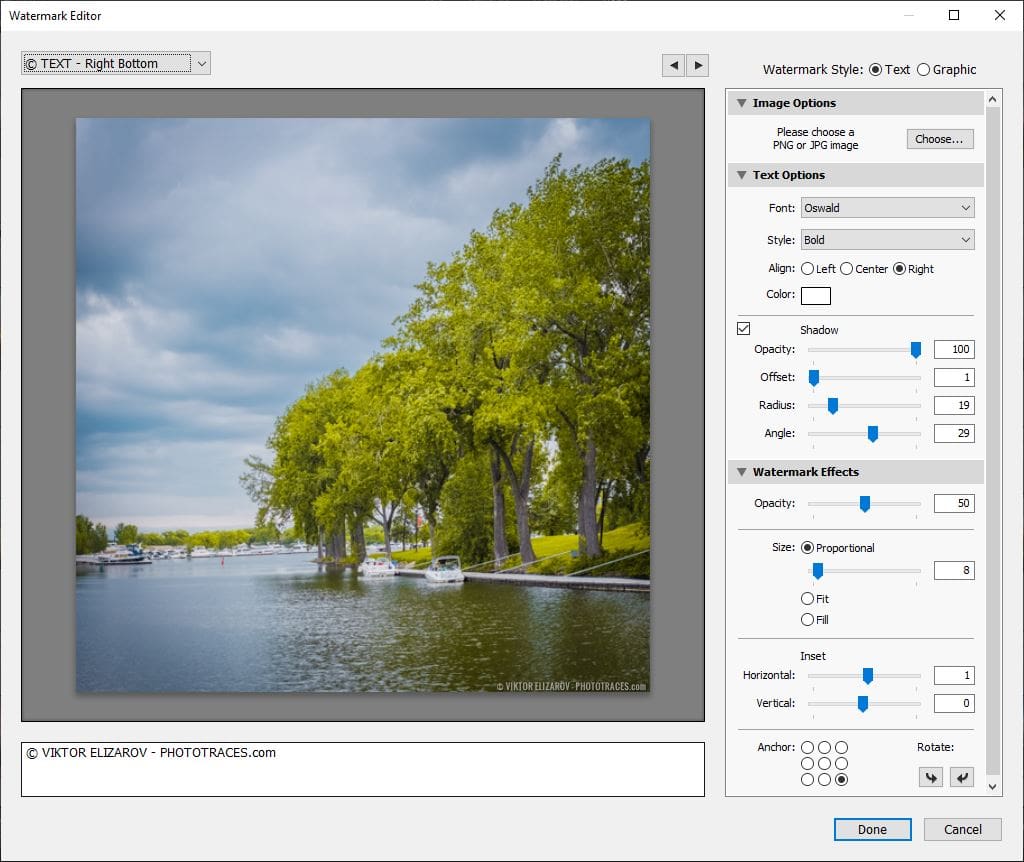
I suggest starting with the settings I use in my template and, later, you can customize it to your liking.
When you are happy with the watermark design, you can save all the settings as a custom Watermark Preset.
In my case, I have two Watermark Presets—one for the bottom left corner and another for the bottom right corner of the image. When I am ready to add a watermark to the photo, I can always select between the two. My selection is based on visibility and intrusiveness. I want to make sure the watermark is readable but not too intrusive.


How to Add Custom Watermark in Lightroom on Export
To apply a custom watermark to a photo, you must select a previously saved Watermark Template in the Export dialog.
When you do not have custom watermark presets, the only option you have available for you is the Simple Copyright Watermark. But after creating your own custom watermark presets, the newly created presets will be available for you in the Watermark drop-down menu.
How to Add Watermark in Lightroom: FAQ
How Do I Create a Logo Watermark in Lightroom?
To be able to use your logo as a watermark, you need to create a Custom Graphic Watermark Preset first.
In the Watermark Editor, you need to select the Graphic option instead of Text.
The next step is to select the graphic you want to use as a watermark.
The graphic can not be created in Lightroom; you will need an image editor like Photoshop.
The logo graphic needs to be with a transparent background. Don’t use JPEG format for your logo because it does not support transparency; use PNG format instead.
In the Watermark Editor, you can adjust the positioning of the logo graphic, scaling, and transparency.
When you are happy with the look, save it as Custom Preset.
How Do I Watermark Multiple Photos in Lightroom?
To apply a watermark to multiple photos in Lightroom is not very different from exporting multiple images.
- You select a series of images in Library or Editing modules.
- Right (option) click on any of the selected images and choose the EDIT option. The Export module will be activated.
- Locate the Watermarking Tab and open it.
- Click on the WATERMARK checkbox.
- From the drop-down menu, select the watermark you want to apply.
- Hit the EXPORT button, and all your selected photos will be exported with the watermark.
Can I Add Watermark With Adobe Camera RAW?
The short answer is not.
Even though the Adobe Camera RAW (ACR) Photoshop plugin is an almost identical application to Lightroom’s Edit Module, it lacks the watermark functionality.
You need to rely on Photoshop instead. You can create Photoshop Actions for batch watermarking to speed up the workflow.
How to Add Watermark in Lightroom: Conclusion
To summarize my workflow, in order to maximize the discovery and copyright protection of my photos, I add Copyright Metadata to all my photos and apply Watermarks to selective images I post on social media.