
Do you want to know the best night photography settings for amazing images? Do you want to capture stunning photographs at night?
You’ve come to the right place.

In this article, I’m going to tell you
everything you need to know about settings for night photography:
What settings to choose, why you should choose them, and how you can use the same settings to consistently capture gorgeous night photos.
Because here’s the thing:
Selecting the right settings for night captures is really, really easy. You’re working with a lot of restrictions, and you’re working with similar conditions night after night.
This means that you can just figure out the optimal settings and use them repeatedly without worrying about things such as changing light or tracking fast-moving subjects.
Make sense?
In other words:
Once you’ve finished this article, you’ll know
exactly what your night photography settings should be–before you even pick up
your camera.
Let’s dive right in.
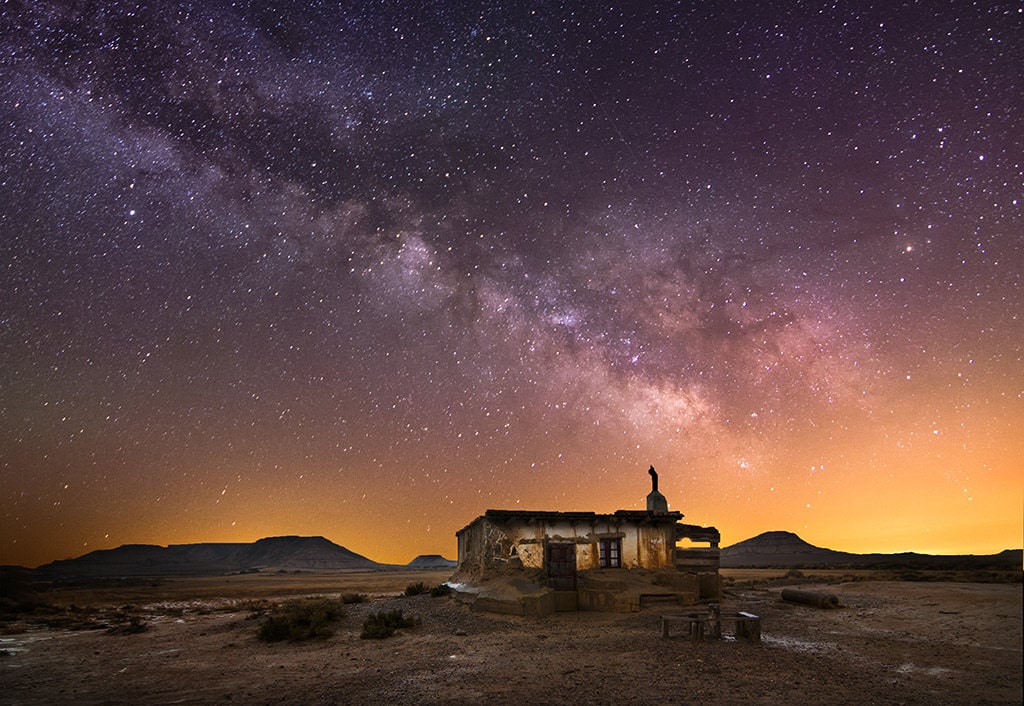
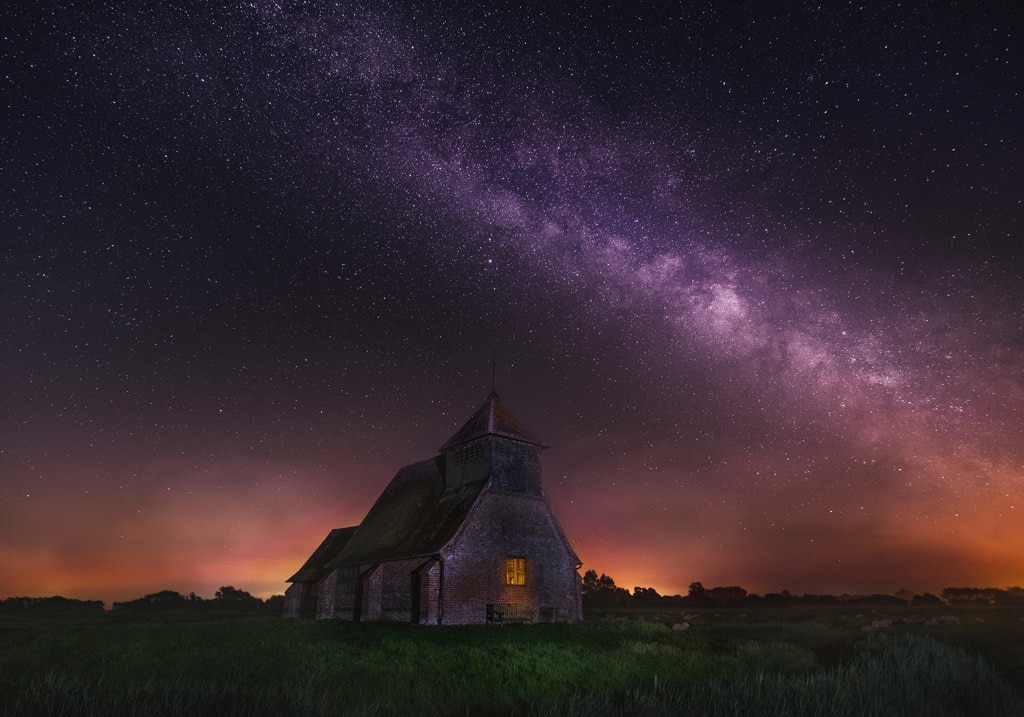
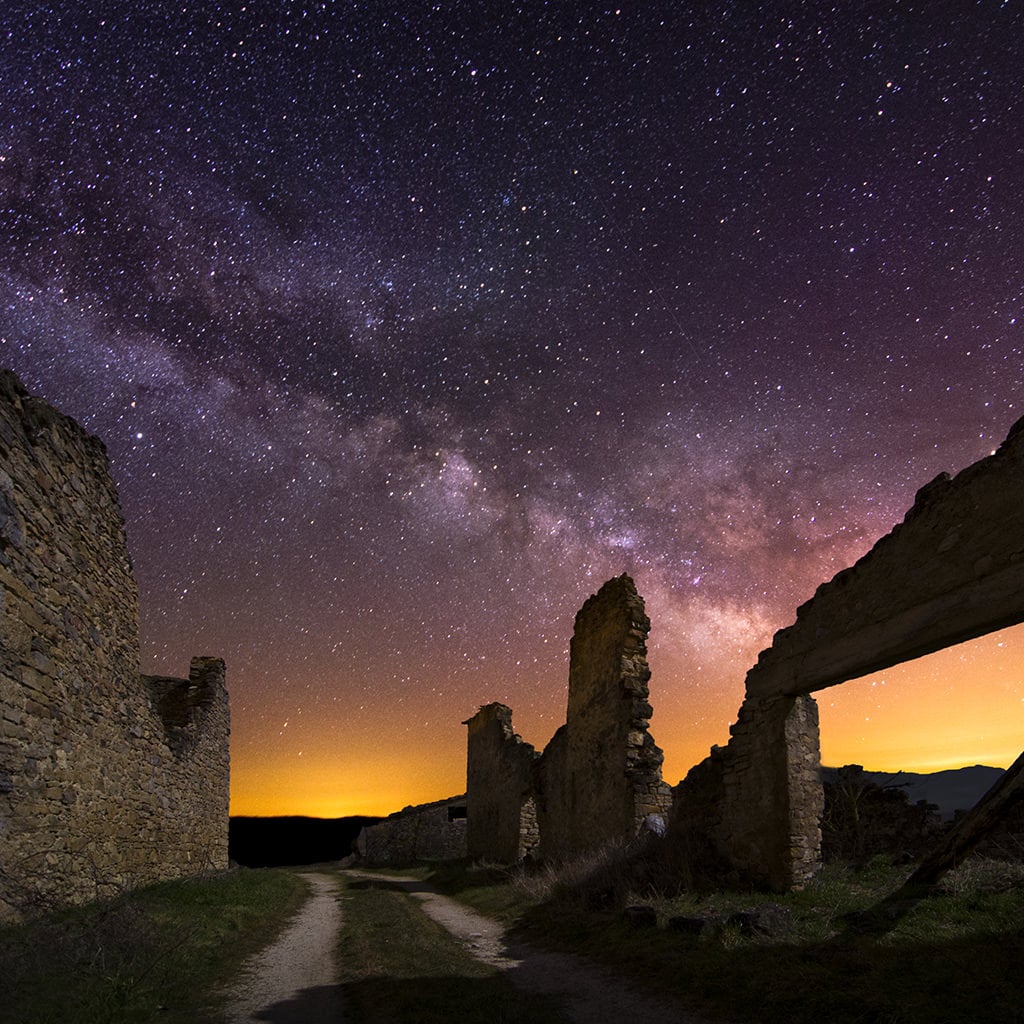
Night Photography Settings
Below are the settings I use most often when shooting the night sky:
- Focal Length: 10-20mm range
- Focus Settings: manual focus set to infinity
- Aperture: at least f/2.8 or faster
- Shutter Speed: around 20 to 30 seconds
- ISO: start with ISO 3200
- Shoot RAW
Now, let’s do a deep dive and cover each parameter in detail.
1. Focal Length
When you’re shooting skies at night, you’re
going to need a wide lens.
After all, the sky is vast, and you often want
to include as much of it as possible.
Plus, wider lenses allow you to use longer
shutter speeds without producing blurry stars.
Therefore, lenses in the 10mm to 20mm focal
length range are best, with wider generally performing better.
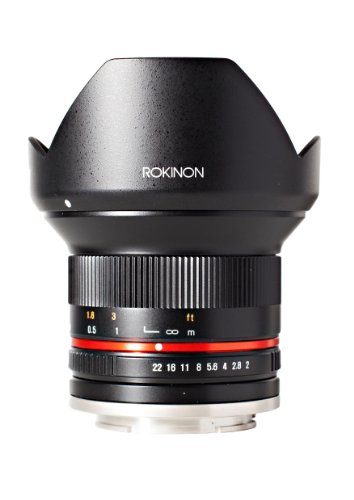
In my case, I have a specialty lens dedicated to photographing the night sky – Rokinon 12mm f/2. It is a compact lens designed explicitly for crop (APS-C) cameras. It has an effective field of view on 18mm (12mm x 1.5 crop factor).
2. Focusing Settings
If you’ve ever tried to use your camera’s
autofocus in the dark, you’ll know that the AF just doesn’t work. It’s made for
daytime, not night.
Which is why you should never use your
camera’s AF system at night. Instead, you should switch your lens over to
manual focus, and carefully focus to infinity.
Note that this is not always as easy as
turning the focus ring until it reaches the end of its rotation. Some lenses
focus beyond infinity, which means that pushing your lens to its most distant
focal point will result in a soft image.
Instead, you should test out your lenses in daylight and make note of the point where your lens reaches infinity.
In my case, I have a very simplified focusing routine. Since I have only one lens dedicated to night photography, I know exactly where infinity is on it. But, to ensure the perfect shot each time, I made a small permanent marker on the lens as a reminder.
3. Aperture Settings
In general, you want to use the widest
aperture your lens allows. An f/2.8 aperture is a good place to start, but if
your lens goes to f/2, f/1.8, or wider, then use those settings instead.
Why?
Because whenever you shoot skies at night,
you’re going to need to keep your shutter speed as fast as possible.
(I’ll explain why in the next section.)
And in order to counterbalance the fast shutter speed and prevent the shot from being too dark, you must use a wide aperture.
In my case, I do not have to think about aperture settings. When I shoot night sky I always use the widest aperture of f/2.
4. Shutter Speed Settings
While selecting the right night photography
settings is pretty easy, choosing your shutter speed can be a bit more
complicated.
This is because you need a shutter speed
that’s fast.
Fast enough to prevent star blur, which is caused by Earth rotating on its axis. While motion in the stars can be interesting in very long exposures, it’s rarely desirable to capture a shot with a small amount of movement.

At the same time, you want to avoid using too-fast shutter speed, because this will either
- a) cause your shot to become underexposed, or
- b) force you to use a higher ISO and risk producing a noisy image.
Note also that wider lenses are better able to cope with blur because the stars appear smaller and are made up of fewer pixels on the sensor. This means that any blur is less noticeable with a 10mm lens compared to, say, a 500mm lens.
Hence photographers invented a way to
determine the longest night photography shutter speed you can get away with:
The 500 Rule for the Night Sky
Here’s how you determine what actually counts
as a good shutter speed for night photography:
You use an old guide, known as the 500 Rule, which states that you should
take your focal length and divide it out of 500.
This will give you your lengthiest shutter
speed without star blur, the one that you should use to photograph the night
sky.

So if you’re shooting with a 10mm lens, you
can divide 500 by 10 to get 50, or 50 seconds; in other words, you can use an
exposure of up to 50s, but no higher, if you want to prevent blur in the stars.
- To clarify, on a full-frame camera, you can use the formula:
500/Focal Length - On an APS-C camera you’ll need to account for the crop factor, giving you a formula of
500/(Focal Length x Crop Factor) - And on a Micro Four Thirds camera, you’ll also need to take the 2x crop factor into account, giving you the formula:
500/(Focal Length x 2)
That said, given the high-resolution cameras and lenses available today, the 500 Rule is a bit too lenient. Instead of using the 500 Rule, I prefer using the 400 Rule – which shortens the allowable shutter speeds to prevent any noticeable blur.
For the 400 Rule, just change the number ‘500’
to ‘400’ in the formulas above, and you’ll be all set.
In my case, if I use the 500/(Focal Length x 1.5 (Crop Factor)) formula for my 12mm lens, I get the following result: 500 / (12 x 1.5)=28 seconds.
But, I prefer to use the formula closer to 400 instead of 500: 400 / (12 x 1.5)=22 seconds.
To summarize, when I shoot night sky I always use aperture value between 22-24 seconds.
5. ISO Setting
When it comes to night photography, the only
setting you’ll need to change on location is the ISO.
Start by setting your ISO to 3200, then take a
test shot. Based on the result, you may need to raise or lower your ISO.
At most, it should take three shots to
determine the proper exposure, and then you can focus on shooting.
In my case, I always take the first test shot at ISO 3200. Next, instead of changing the ISO settings, I use exposure compensation. I use the front dial, which is customized on my Fujifilm camera to exposure compensation, to fine-tune the final ISO value.
The Main Challenge of Night
Photography
I’ve talked a lot about the best settings for night photography–and by now you should see that it’s pretty easy to pick the perfect aperture, shutter speed, and even ISO.
But the chief struggle of night photography
isn’t dealing with settings.
It’s finding a good composition.
Because at night, it’s almost impossible to see relevant composition elements such as leading lines, curves, and interesting shapes.
That’s why I recommend scouting during the day
and picking a good composition in advance.
I always use my phone for taking simple snaps when scouting locations during the day. It helps me to visualize the future night shots.
Night Photography Settings: Conclusion
Now that you’ve finished this article, you
should know all about the best settings for night photography.
- You know how to pick the widest possible focal length (one in the 10-20mm range).
- You know how to focus to infinity using manual focus.
- You know how to pick the proper aperture, which should be the widest option available to you (at least f/2.8).
- You know how to pick the perfect shutter speed, which should be the longest shutter speed you can get away with using the 400 Rule (usually around 20 to 30 seconds).
- And you know how to choose the best ISO by starting at ISO 3200 and experimenting with a few test shots.
So now all that’s left…
…is to get out at night and shoot!