
If you want to learn how to duplicate a photo in Lightroom, you need to read this article.
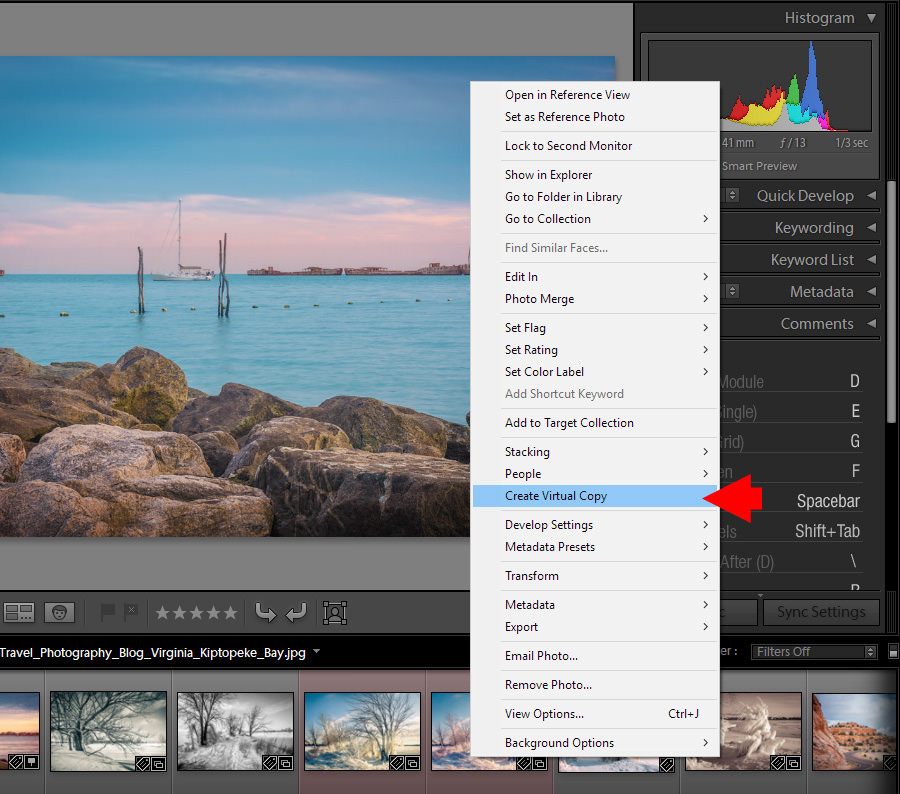
The most popular way to duplicate a photo in Lightroom is to create a Virtual Copy. Select the image you want to duplicate in the Library or Develop module, right-click and choose the Crate Virtual Copy option. Lightroom will create a new set of editing instructions called Virtual Copy without duplicating the original RAW image.

Most of my Lightroom articles are the result of me answering questions that I receive from readers on my blog. When I see a certain question asked repeatedly, I write a dedicated tutorial or an article on the topic. Today’s tutorial is no different as I address the frequently asked question, “How do I duplicate a photo in Lightroom?”
When I see this or a similar question, I immediately know the photographer who posted the question is relatively new to Lightroom and does not yet fully understand how the program works or handles images.
When we edit photos in Photoshop or a similar editing program and we want to create another version of our work, we normally use the SAVE AS command to duplicate the file before we start working on a new version.
In Photoshop, when you start editing a 25MB RAW file, you can end up with anywhere between three to five editing versions that are over 1GB each in size by the end of the process. This is exactly how the photo editing workflow ran before Lightroom was released.
One of the reasons Lightroom was created was to change the ineffectiveness of Photoshop editing because the program was not suited for processing a large volume of digital images.
Lightroom Non-Destructive Editing
Lightroom was built on the cornerstone of nondestructive RAW editing. The RAW file is a combination of voltage data collected from each pixel of the digital sensor. To see the representation of the data, you need a RAW converter. If you shoot JPEG, the camera’s image processor interprets the data collected from the sensor and converts it into a JPEG image.
When you shoot RAW, the process of converting data collected from the camera’s sensor is done by Lightroom. It takes the raw data and interprets it based on a set of parameters known as a profile and creates a visual representation in the form of a JPEG preview.
For example, when you move the Exposure slider to +1 in the Develop Module, Lightroom creates a JPEG preview that is one stop brighter. The original RAW file remains untouched; the only thing that is changed is the JPEG preview.
This is called Nondestructive Raw Editing.
Because of nondestructive raw editing, Lightroom users can enjoy some unique functionalities that replace image duplications.
How to Duplicate A Photo in Lightroom
Here are 3 methods of how to duplicate a photo in Lightroom, leveraging nondestructive editing.
1. How to Duplicate Photo in Lightroom With Virtual Copies
When you experiment with editing and want to create a different version of your image, Lightroom creates a virtual copy instead of duplicating the image. The virtual copy is nothing other than a new set of editing instructions for the original image.
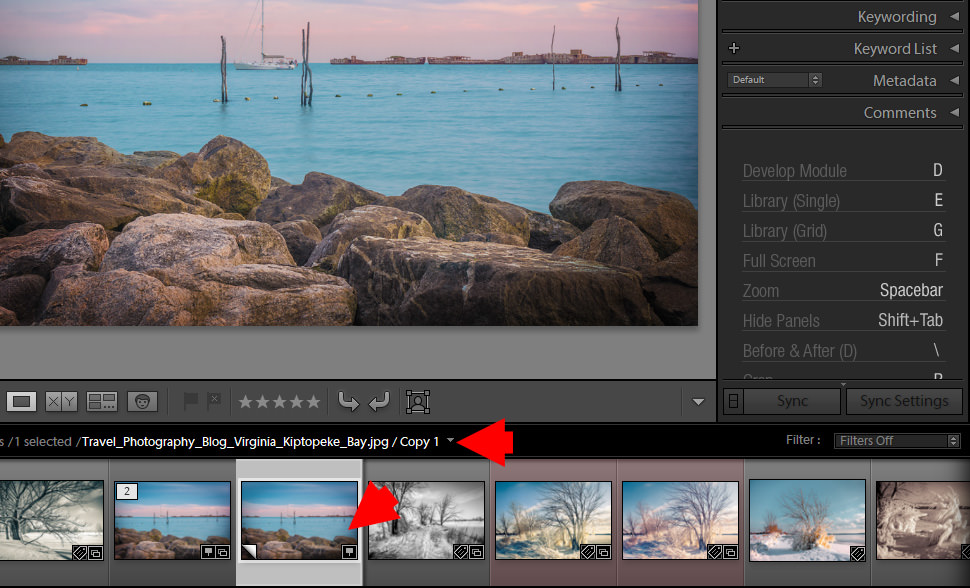
In Lightroom, select any image, Right Click (Option-Click on Mac), and select the Create Virtual Copy option. In the filmstrip, the virtual copy will appear next to the original file.
You can now edit both versions independently and create different editing variations. Instead of duplicating the original RAW file, Lightroom creates two sets of instructions and creates the JPEG previews based on those instructions.
What is a Virtual Copy?
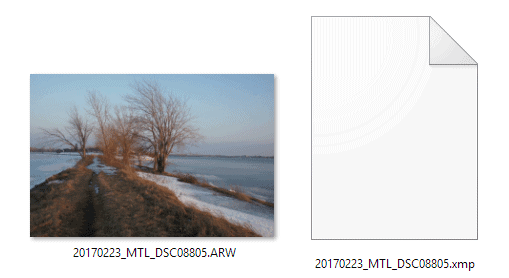
Virtual copy in Lightroom is a feature that lets you save your work as a new version without duplicating the original image. Instead, Lightroom creates a new version of the XMP sidecar file where it keeps editing instructions. When you jump from one virtual copy to another, the original image stays untouched rather Lightroom loads appropriate XMP sidecar instructions.
You can create an unlimited number of virtual copies for the same image. Because of nondestructive editing, the original RAW image never changes; what changes are the editing instructions that are saved in the text file (.XMP), which you can find next to the original RAW image.
2. How to Duplicate A Photo in Lightroom With Snapshots Panel
Even though the Virtual Copy is a very useful functionality, I prefer another option to create multiple editing versions—the Snapshot.
See also: Using Before and After in Lightroom
On the left side of the Develop Module, you will find the Snapshot Panel. At any time during the editing process, you can save all your editing steps and adjustments as a Snapshot.

The Snapshot functionality allows you to create intermediate steps during the editing process that you can jump back to at any time. In this case, the snapshots serve as milestones in your History Panel.
I use Snapshot functionality differently. I only save my complete editing versions as Snapshots. Once I finish editing and I like what I see, I save it as a Snapshot and rename it as “Lightroom Editing Formula.” Next, I hit the Reset button and start editing from scratch to create another variation by cropping it differently or using a different color treatment. When I am finished, I save it as a new Snapshot and start over again.
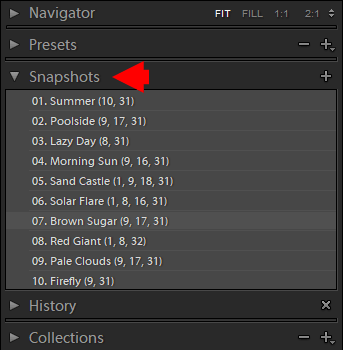
When using the Snapshot functionality, I can have 10 different editing versions of the same photo without ever creating a Virtual Copy. I find this approach much neater when it comes to image organization.
Bonus: Duplicating the Original RAW Photo On Export
If for some reason you want to duplicate the original image, there is an option in Lightroom for that as well.
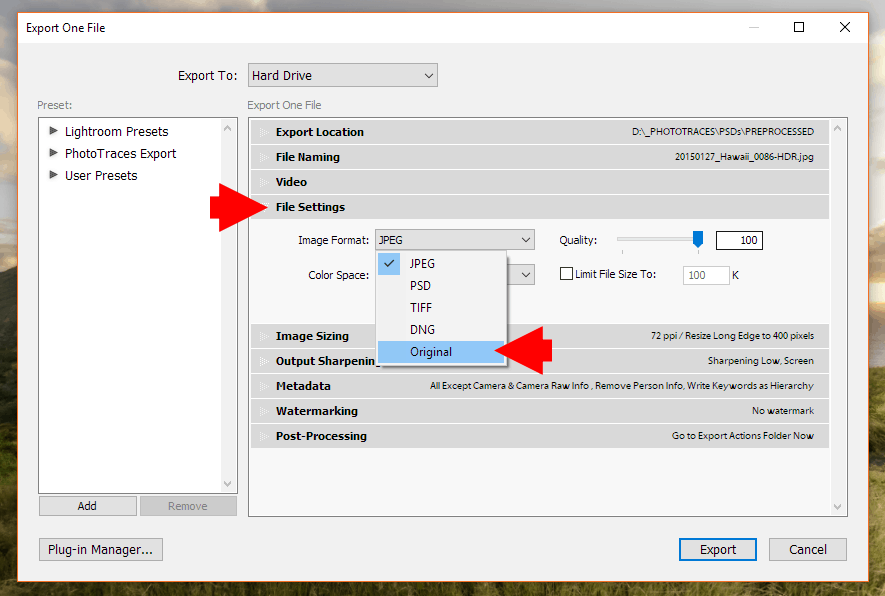
You must use the EXPORT command. Once the Export Module is activated, select the ORIGINAL option from the FILE SETTINGS section.
And hit the Export Button.
How to Duplicate a Photo in Lightroom: Conclusion
As you can see, Lightroom offers us 3 unique ways to duplicate any given photo in Lightroom. The Virtual Copy and Snapshot methods employ the power of nondestructive editings where the original image file always stays untouched.
The third method, duplication of an image on export, is based on traditional file handling when you replicate an original image.