
If you want to know how to use the Lightroom portrait editing to produce natural-looking portraits photos in no time, you’ve come to the right place. Because in today’s tutorial I will demonstrate my Lightroom portrait editing workflow.
Retouching portraits is an important subdivision of photo editing. Typically a complex and time-consuming process, it requires an intimate knowledge of Photoshop with some unique techniques specific to the field.
But, you do not have to be intimidated by a scary word like “retouching” because you can beautify any portrait directly in Lightroom without using Photoshop. In fact, I’ve been using Lightroom in my portrait retouching workflow for all my travel portraits and family photos.
Here is an outline of my people editing workflow.
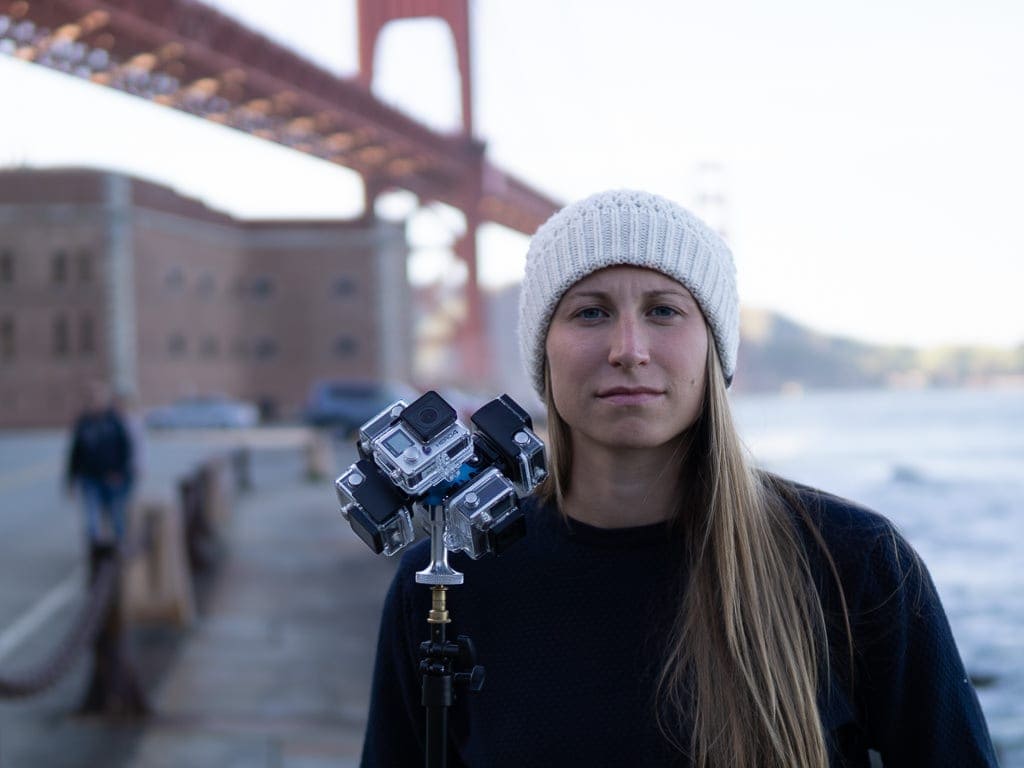
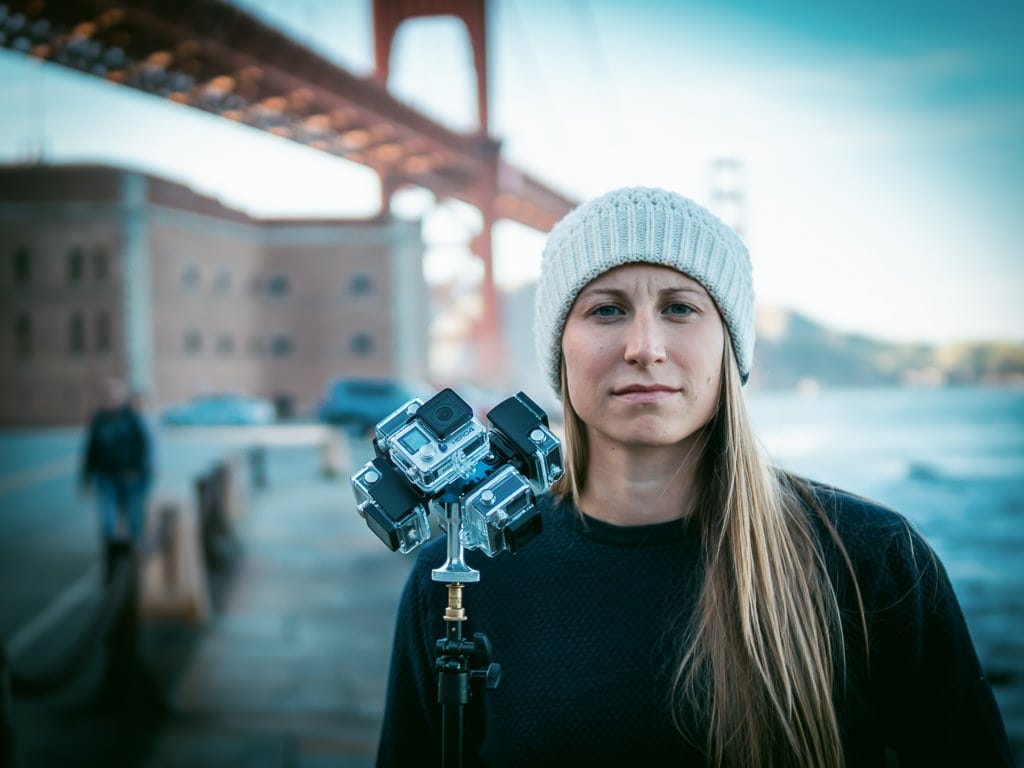
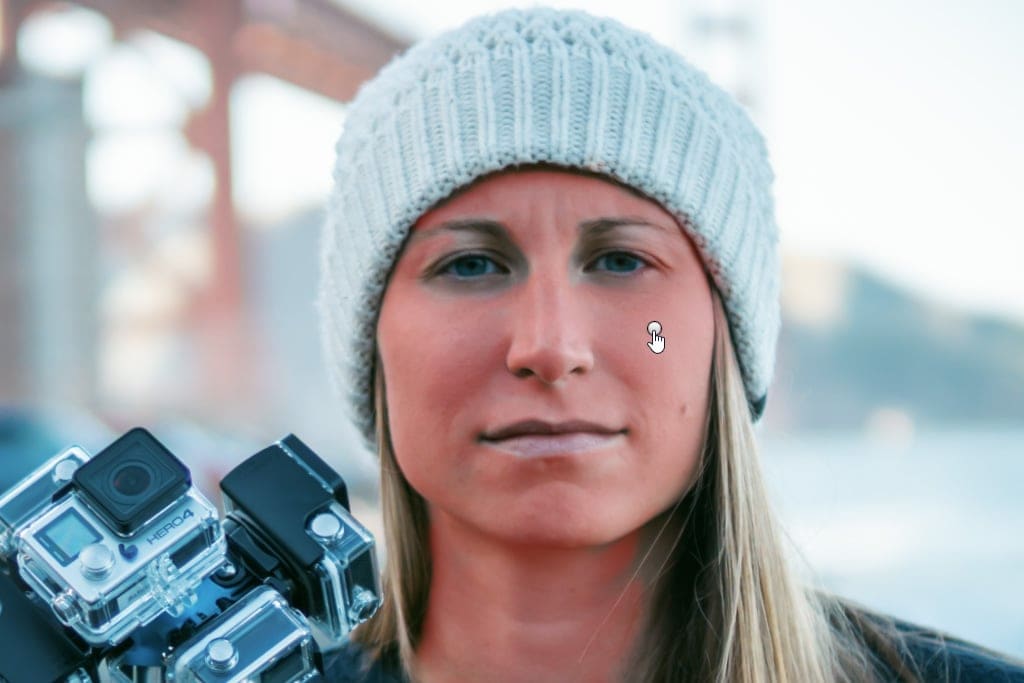
Here is a photo of my daughter. She is currently studying Virtual Reality at college in California and, when I visited, she needed a headshot for her new Virtual Reality Travel Blog.

We went to San Francisco to shoot 360 Videos and decided to take a few pictures at the same time.
When I composited this shot, I strategically placed the Golden Gate Bridge in the background.
Related: Understanding the Difference Between Saturation and Vibrance
The main issue with this shot is the difference in illumination between the background and the foreground. Prior to retouching, my daughter’s face is underexposed with dark shadows emphasizing various skin imperfections and casting dark shadows under her eyes.
The goal of editing is to brighten up the face and recover the shadows, fix any skin imperfections and adjust the skin color. Lastly, we need to balance the lighting by making the background darker.
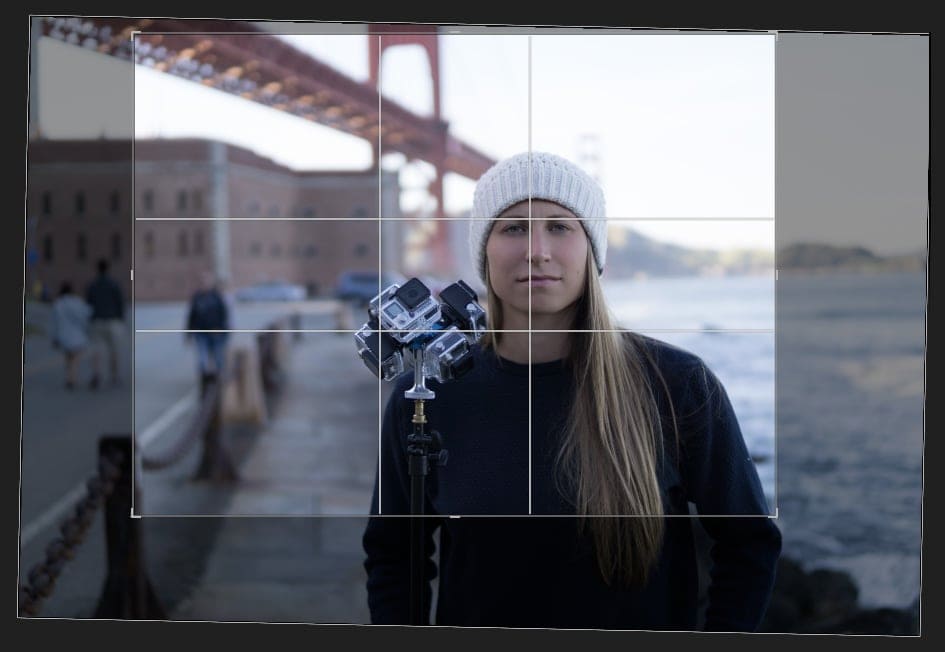
Step 1: Improving Composition
I always start my editing with the attempt to improve composition.
I used the Crop Overlay tool to make composition tighter. And at the same time, I changed the aspect ratio from the original 3:2 to more vertical 4:3.
Step 2: Lightroom Rapid Editing for Portraits
This is standard Lightroom Rapid Editing, which I previously outlined in great detail and, therefore, will not spend too much time explaining it here.
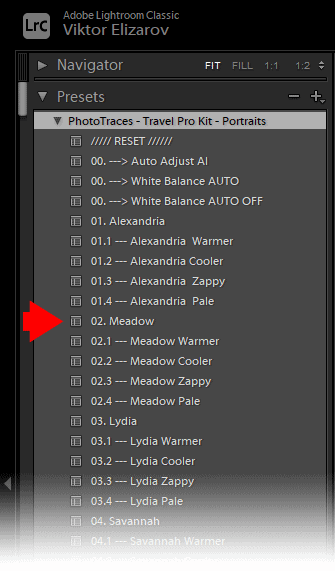
First, I applied the 02. Meadow preset from the Travel Pro Kit preset collection.
Next, I jumped to the TOOLKIT and applied the following adjustments:
- I brought down the exposure to recover the details in the background: 04. Exposure –
- I recovered the shadows by applying the 8. Open Shadows ++ adjustment
- Finally, I added stronger vignetting by using the adjustment preset, 33. Vignetting +++.

The Editing Formula for this shot is Meadow (4, 8, 33)
I was finished with the second step.
Step 3: Fixing Skin Imperfections
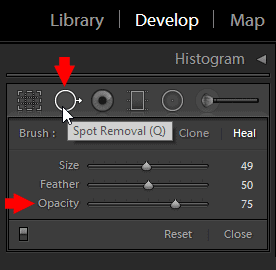
To clean up any skin imperfections, I used the Spot Removal Tool.
If you recall, I demonstrated how to clean up landscapes using the Spot Removal Tool in one of my previous tutorials. The process of cleaning up portraits is fairly similar.
I selected the Spot Removal Tool and set the opacity to 75%.
Next, I adjusted the brush size by using the keyboard shortcuts [ and ]. Then, I started stamping over the imperfections.
It only took me a couple of minutes and 20 to 30 stamps to clean up the face.

I then had to deal with the dark and unpleasant shadows under my daughter’s eyes. Shadows are caused when the natural light source (the sun) is too high, which is a common problem in nearly every portrait that is taken outdoors in bright conditions.
Related: My Top Tip to Speed up Lightroom Speed
I used the Spot Removal tool once again but, this time, I increased the brush size and reduced the opacity to 50%. Then, I simply used the brush to paint under the eyes.
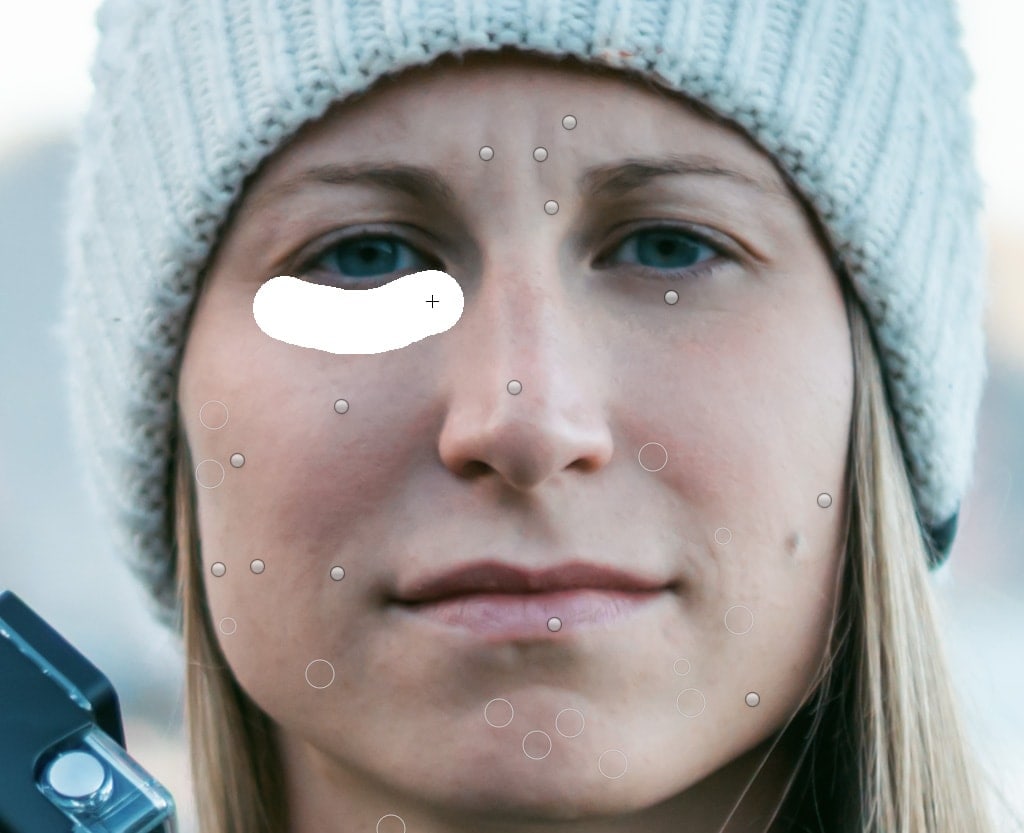
All I needed was two strokes—one for each eye.
Lightroom did an amazing job of sampling the skin from the face and then masking the shadows.

This was the final result of fixing skin imperfections.
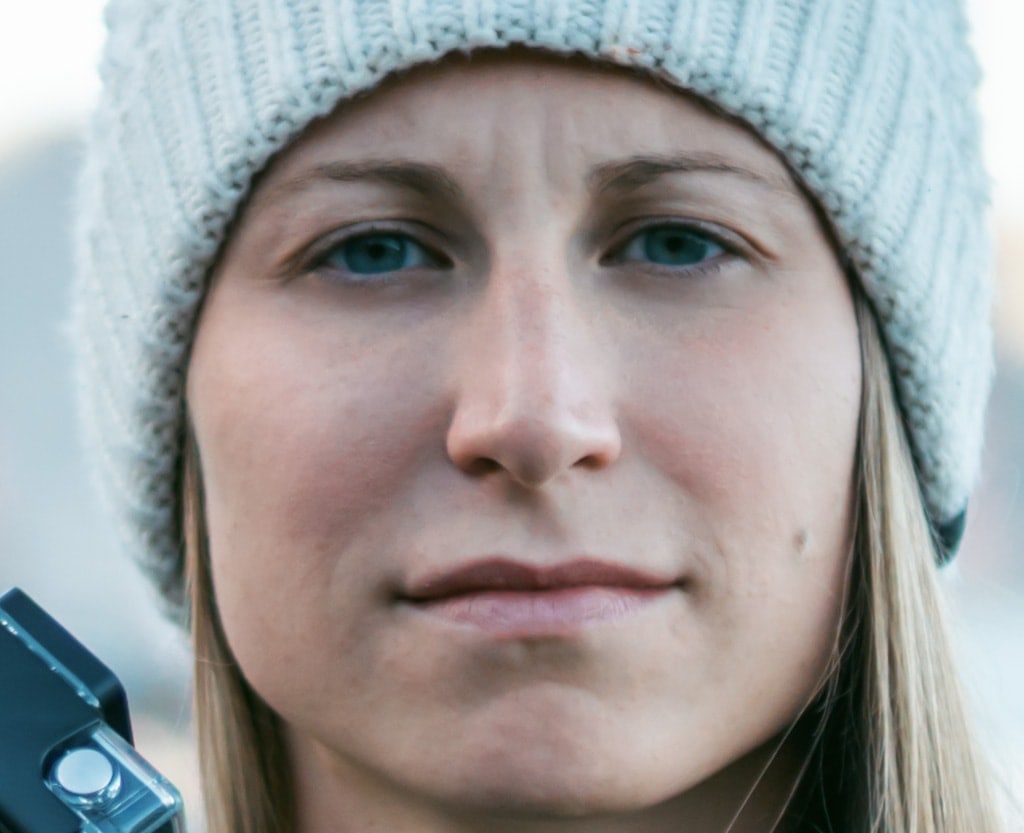
By keeping the opacity low (50%), I made sure that I preserved enough details to keep the portrait natural.
And this how the portrait looked after step 3.

Step 4: Smoothing Skin in Lightroom
Next, I took care of generally smoothing out the skin by using the Adjustment Brush Tool.
After activating the Brush Tool, I selected the Skin Smooth + option from the Effect menu.
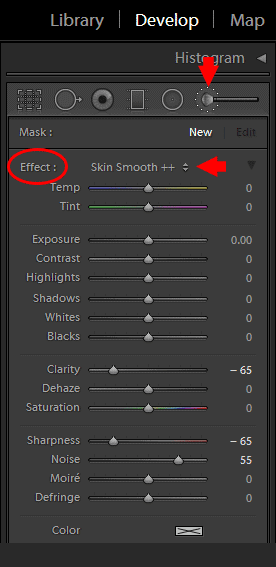
By pressing the “[“ and “]“ keyboard shortcuts, I increased the size of the brush and started painting over the skin with long strokes.

I was careful to not paint over the eyes, lips, and nostrils, ensuring that all the details remained intact.
By pressing the keyboard shortcut key “O“ you can preview the areas affected by brush tool.
And that was it.


Below you can see the Before & After transformation.
In total, It took me 10 minutes at most.
Don’t forget to run the photo through the Soft Proofing module, if you are planning to print it, to make sure you achieve accurate colors.