

Using Lightroom keyboard shortcuts allows us to speed up our photo editing workflow. Not only do the shortcuts save us time, but they also make the entire editing process more fluid by eliminating unnecessary interruptions.

At the same time, I find that using Lightroom keyboard shortcuts is more challenging compared to other applications like Adobe Photoshop.
Due to Lightroom’s modular structure, the same shortcut can carry different functions in various areas of the program. For example, using the shortcut “O” in the Library Module activates the People Mode; however, it does nothing in the Development Module and, in the Adjustment Brush Tool, it displaces the mask overlay.
As I said, it can be confusing.
My approach to using Lightroom shortcuts is to only memorize what is essential – the shortcuts that can help me streamline and simplify my editing workflow. I ignore the rest.
Below is a list of Lightroom keyboard shortcuts that are most valuable for my workflow and reflect how I use Lightroom. Different photographers use Lightroom differently, so shortcuts will typically vary from person to person.
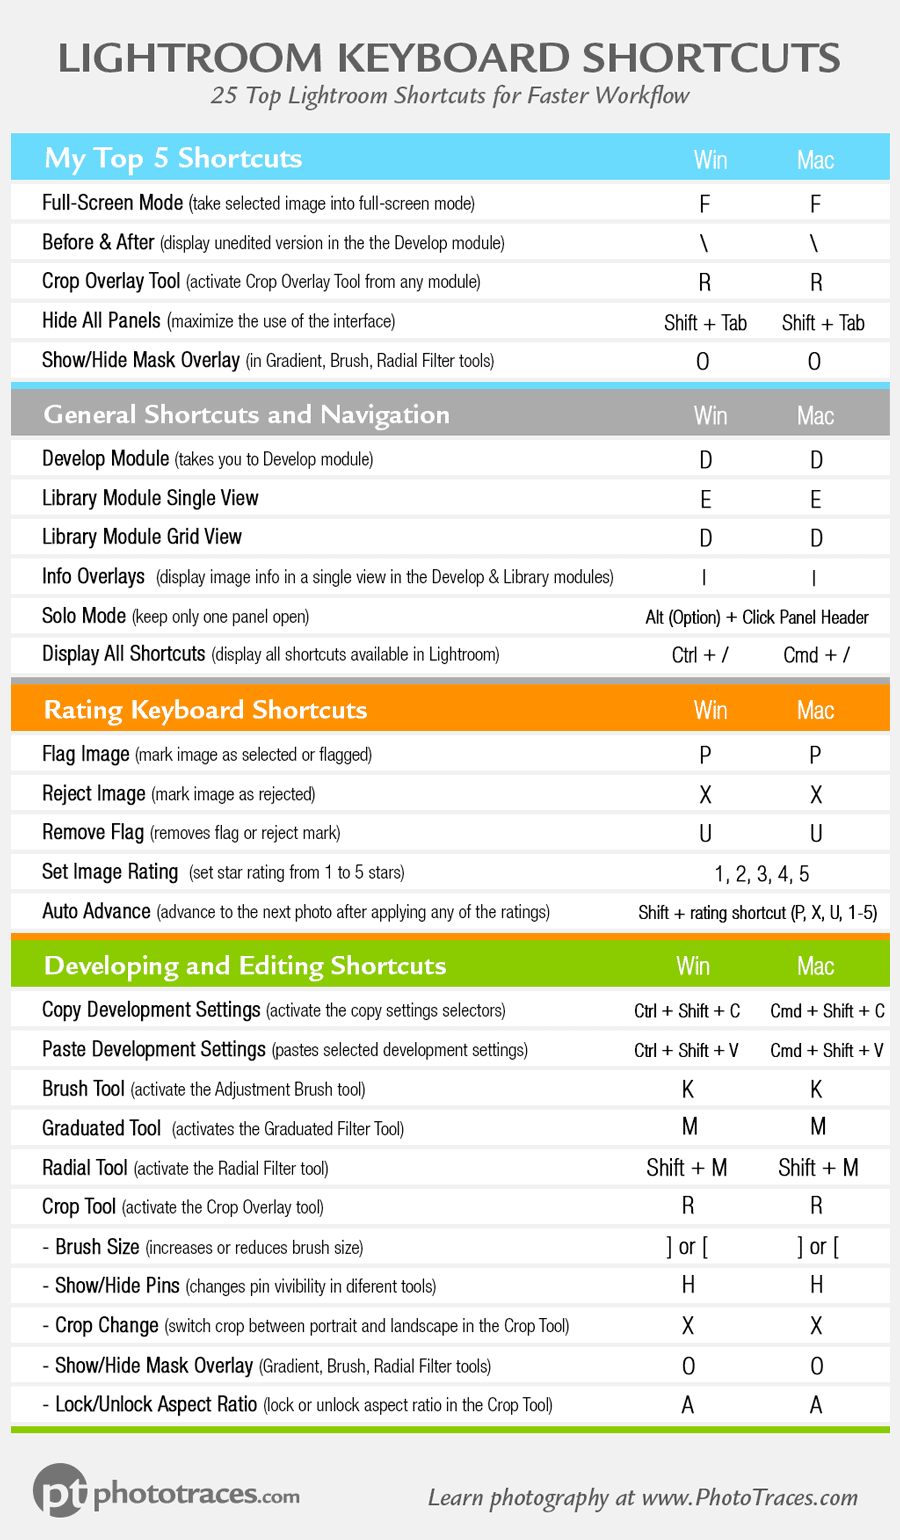
My Top 5 Most Used Lightroom Keyboard Shortcuts
- F – Full-Screen Mode –This takes the image into full-screen mode and allows us to preview the photo without the distractions of Lightroom’s interface.
- (Backslash) – Before & After – This shortcut allows us to compare the image before and after. By hitting once, it shows the unedited version of the photo and, by hitting it again, it returns it to its current state. (This only works in the Develop Module.)
- R – Crop Tool – This shortcut is most useful when starting in Library Mode. By hitting “R,” you first open the Develop Module and then activate the Crop Tool.
- Shift + Tab – Hide All Panels – I use this the most with the Crop Tool because it allows me to maximize the use of the interface.
- O – Show/Hide Mask Overlay – This shortcut shows the area affected by the editing tools (Gradient Mask, Adjustment Brush, Radial Filter). It is a very useful feature when retouching portraits.
General Shortcuts and Navigation
- D – Develop Module
- E – Library Module (single view)
- G – Library Module (grid view)
- I – Info Overlays (Single Image View in both Library and Develop Modules)
- S – Activate Soft Proofing. Make sure you are in the Develop Module.
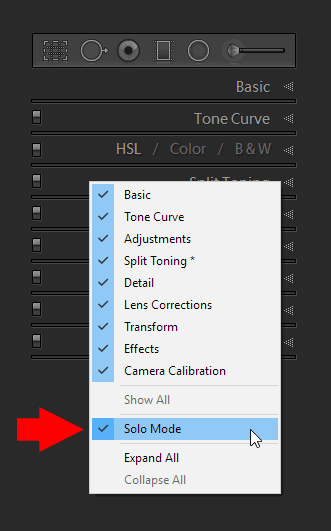
Solo Mode
When working in the Develop Module, the main editing tools are distributed across nine panels located on the right side of the module. It is easy to get lost when you have all nine panels extended, not to mention that it takes a lot of scrolling to navigate between them. Fortunately, Lightroom has Solo Mode, which allows us to keep only one panel open at a time.
Related: 6 Ways to Undo in Lightroom
To toggle the Solo Mode on/off, use Alt + and click on any panel header. Alternately, you can right-click anywhere on the right panel to access the selection menu.
Rotate Photo
Zoom In/Zoom Out
- Spacebar Down – Zooms in on the selected photo. Releasing the spacebar brings the photo back to default magnification.
I use this shortcut when evaluating a photo for proper focusing, sharpness, or noise. I hold the spacebar down while panning around the image with the help of the mouse.
Related: How to Zoom In Lightroom With Purpose and Style
Rating Keyboard Shortcuts
- P – Flag Image
- X – Reject Image
- U – Remove Flag
- 1, 2, 3, 4, 5 – Set Image Rating
- B – Add to Quick Collection
- Quick Collection is like a temporary holding container where you collect photos from different locations for further use. For example, when I need to select photos for my new tutorial, I go through various Collections and Folders marking potential images to consider using the “B” shortcut and they are saved to the Quick Collection.
Auto Advance
Shift + any rating shortcuts (P, X, U, 1-5, B). This advances to the next photo after applying any of the ratings, rather than staying on the same photo.
When I cull photos after the initial import, I always use the Auto Advance shortcut in combination with the “P” and “X” shortcuts to mark “keepers” and “rejects.”
Related: Adobe Lightroom Workflow Tips and Tricks
Alternately, you can permanently enable the Auto Advance feature in the PHOTO menu, but I prefer to always have a choice between the Auto Advance and default functionality.
Most Useful Developing and Editing Lightroom Shortcuts
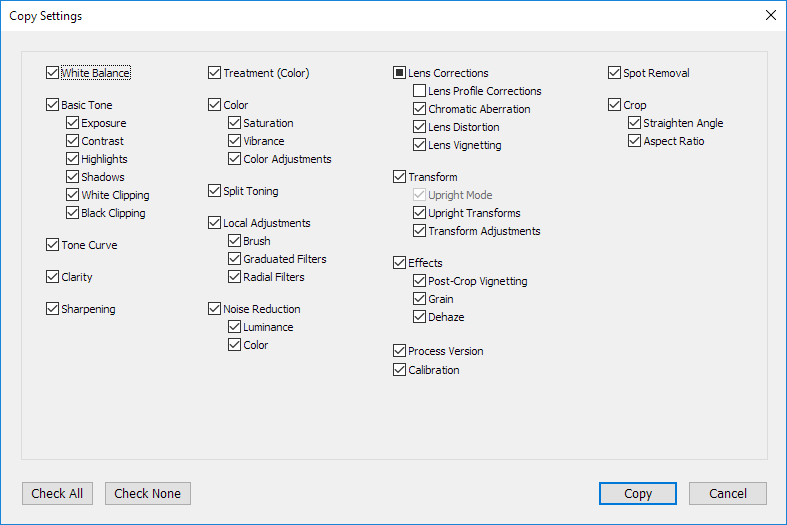
Copy/Paste Development Settings
Even though I often use the SYNC and SYNC SETTINGS buttons to apply the development settings to multiple photos, I find the dedicated shortcut to be extremely useful.
- Ctrl (Cmd)+ Shift + C – Activate the Copy Settings selectors.
- Ctrl (Cmd) + Shift + V – Paste selected Development Settings to the selected images.
- Ctrl (Cmd) + Shift + V – Paste Settings From Previous. If you do not use Ctrl + Shift + C to copy to the selective parameter, Lightroom will copy all the development settings from the previously selected image.
Crop Tool
The Crop Overlay Tool is one of my most used tools in Lightroom and is the starting point for every single image I edit. When I am done editing, I also create different crop versions for Instagram and Pinterest.
- R – Activate Crop Tool from any module
- When I am in the Library Module culling newly imported images, I often want to see if it is possible to improve the composition by cropping it differently. By using the “R” shortcut, it simultaneously takes me to the Develop Module and activates the Crop Overlay Tool.
- X – Rotate Crop
- Lightroom does not make it easy to change the crop orientation from landscape to portrait. This shortcut is a lifesaver when using the Crop Tool.
- Ctrl (Cmd) – Activate Straighten Tool.
- A – Lock/Unlock aspect ratio.
Adjustment Brush Tool
When Lightroom was first introduced, it had very limited selective editing capabilities. Most of the tools were designed to affect the entire image and, in order to affect a specific area of the photo, you had to jump to Photoshop. But with every new update, selective editing became more powerful and sophisticated. Now, with the Adjustment Brush Tool, you can create sophisticated masks that affect only specific areas of the image.
- K – Activate the Adjustment Brush tool.
- Alt – Switches from Brush to Eraser
- This is an extremely useful shortcut when fine-tuning the selection.
- O – Show/Hide Mask Overlay
- This shows the area affected by the editing tool.
- ] and [ – Increase/decrease the brush size
Spot Removal Tool
I use the Spot Removal Tool quite a lot. It rarely matters if I am editing a landscape, cityscape or portrait, there is always a need for this tool in my workflow.
Although there is a dedicated shortcut (Q) to activate the Spot Removal Tool, I hardly use it. I find it easier to activate it by clicking the icon.
However, the next shortcut is extremely valuable to me.
Related: How to Boost Color Intensity in Lightroom
When you start stumping with the Spot Removal Tool, Lightroom automatically chooses the sample area. In most cases, it does an exceptional job but, when it fails, the next shortcut comes into play.
- “/” – This shortcut forces Lightroom to use a different area for sampling
- H – Hides all Spot Removal Pins for an unobstructed view.
- ] and [ – Increase/Decrease the brush size
Here is my Spot Removal workflow
After activating the tool, I immediately use the “H” shortcut to make sure all the pins are hidden. Next, I use the Shift + Tab shortcut to hide all the panels and get the biggest possible image view. I start stamping areas I want to clean and, if/when I am not happy with the result, I use the “/” shortcut to force Lightroom to use a different area for sampling.
Display All Shortcuts
And finally, there is the mother of all shortcuts. By using it, you can display all available shortcuts.
Ctrl (Cmd) + / – Displays the complete list of shortcuts for the module you are currently working in.

Your Turn
Please share with us your favorite and most used Lightroom keyboard shortcuts.