
Often it feels that spring season does not exist in Montreal. The winter lasts until late April or even early May, and then in a couple of weeks, it transforms into summer. But not this year.
On the first calendar day of spring, it looked and felt that winter was over.
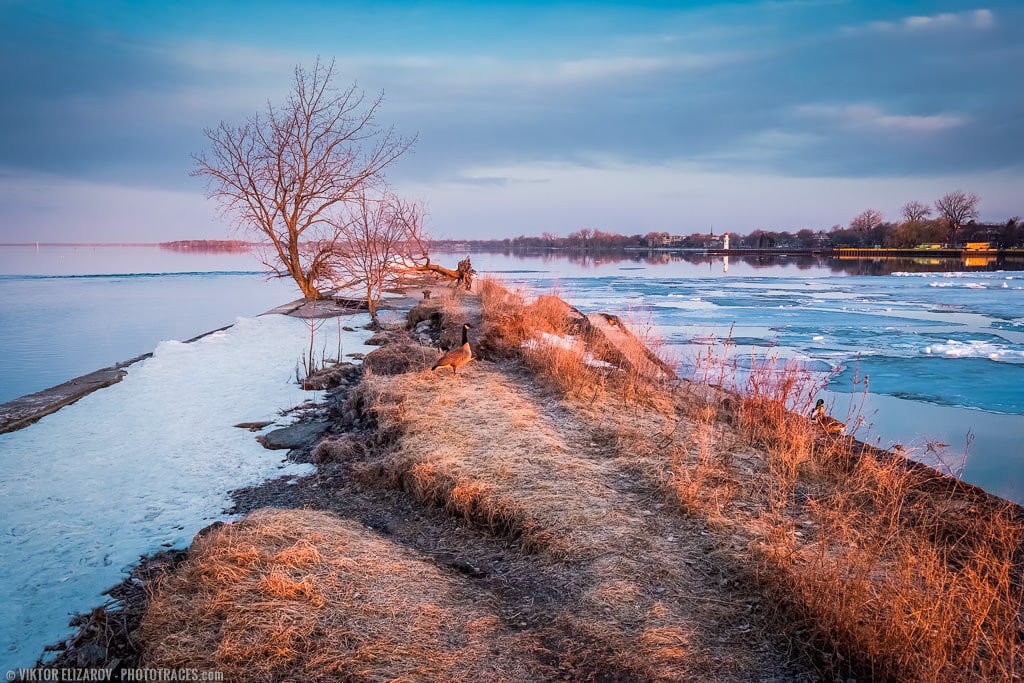
After hunting for а good sunrise for four days, I was finally rewarded with the perfect morning. The air was clear; the clouds were bright and light, helping diffuse the sunlight, and there was no wind. The color contrast between warm vegetation and cool ice in the river was stunning.
It was just perfect.
Plus, I spotted 2 pairs of birds, geese and ducks, hanging in last year’s grass. They were ready for a mating season. It was another sign that the spring is here, and I wanted to capture its atmosphere.
Shooting
When I go photo hunting for good light at sunset or sunrise, I always bring the tripod. It is expected to face difficult lighting conditions early in the morning or later in the evening. But, for some reason, this time, I left my trusted Fesol tripod in the car.
I had no choice but to use higher ISO values. I was shooting in aperture priority mode, as I do in 90% of cases. And I set the ISO dial to A, which indicates AUTO ISO.
When shooting handheld, I often use AUTO ISO mode. It lets the camera boost ISO value automatically to compensate for lack of light without using the shutter speed slower than preconfigured 1/125s value.
I ended up with an ISO value of 1250, which is high. But based on my experience shooting with Fujifilm XT2 for a long time, I knew that its APS-C sensor could handle it, and I will be able to remove excess of digital noise during post-processing.
I also intentionally overexposed the image by 1/3-1/2 stops. I use the “exposure to the right” technique, which originated from the concept that to get the best image quality from any digital sensor, you need to saturate it with light but without clipping the highlights (without introducing pure whites).
To achieve sensor saturation with light, I use the histogram and exposure compensation functionalities on my camera. I point the camera towards the scene I intend to capture and using the AE-L button, I lock the exposure. Next, I activate the histogram inside the EVF. Finally, I use exposure compensation to boost the exposure. I watch the histogram to prevent color channels from clipping.
Look at the histogram of the featured unprocessed RAW image.

Editing & Processing
Last week, I completely rebuilt my premium Spring Colors preset collection, which is part of the Four Seasons Collection Set.
To learn more about the updated Spring Colors collection’s main components, check the help article here.
Please note, if you purchased the Spring Colors collection or 4 Sessions collection set previously, you can download the upgraded version at no charge by logging into the members’ area.
Today, I want to show you how I use the new Spring Colors preset collection in my workflow.
It was a single RAW image processing workflow.
Lightroom – 15min
Step #1 – Cropping
I always start my Lightroom editing workflow with the Crop Overlay tool. I analyze the image and see if I can improve composition by cropping it tighter or changing the aspect ratio.
This time I was happy with the original, straight out of camera framing.
At the same time, I was not too fond of the distraction in the left corner of the frame in the form of a small tree.
After trying to crop it out, I realized it was not possible without ruining the composition. The only solution was to remove it later in Photoshop.
Step #2 – Lightroom Rapid Editing
Next, I moved to my standard preset based workflow I call Lightroom Rapid Editing.
I opened the Spring Colors preset collection and started to experiment with different looks, trying to find the most appealing one.
The Spring Colors preset collection was designed to recover the colors and textures in colorless and often dull spring landscapes.
I decided to use the Spring preset. I create it to use with landscape images featuring a wide-open sky.
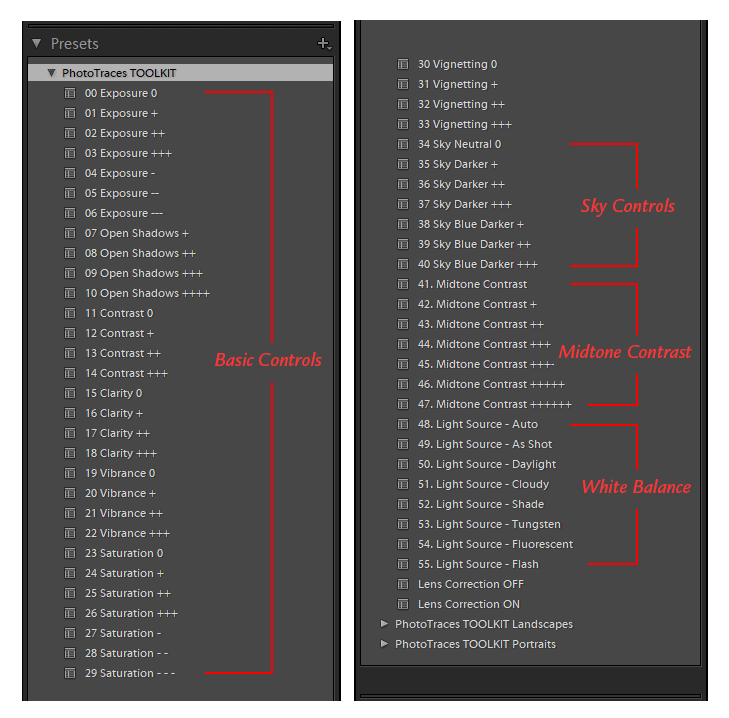
Below, you can find the screenshot of the new, updated structure of the Spring Colors preset collection.

Now, each preset has 4 additional variations: Warmer, Cooler, Zappy, and Pale.
For example, I used the Spring Warmer variation for my editing. When I selected the Spring Warmer preset, I got an additional editing option inside the BASIC panel.
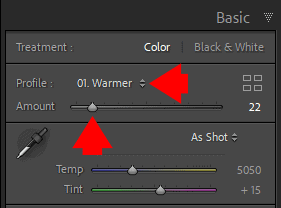
With the help of the AMOUNT slider, you can dial up or dial down the “warming” effect.
In my case, I used Spring Warmer at 28%.
Besides producing artistic style, the Point Lobos preset helps you to balance the exposure.
Step #3 – TOOLKIT Adjustments
The TOOLKIT is the collection of adjustment presets that allow fine-tuning of a photo without altering the style or creating any specific look. The adjustment presets help you to customize the look produced by the SPRING preset.
Note: Make sure you upgraded the TOOLKIT to the latest version (TOOLKIT v2).
Next, I opened the TOOLKIT v2 and applied the following adjustments:
04. Exposure –
09. Open Shadows+++
32. Vignetting ++
44. Midtone Contrast +++++
I used the Exposure and Open Shadows adjustments to balance the exposure. The Midtone Contrast adjustment preset was used to boost the contrast in the photo without affecting the darkest and brightest tones.
Photoshop – 20min
Step #5 – Cleaning
I try to simplify every photo I edit by removing distracting elements such as electric wires, fences, and debris. This time I had a more challenging task. I needed to remove a pretty big element, the tree.
I used the combination of the Clone Stamp and Spot Healing Brush tools to remove the distracting tree and it took me at least 15min.
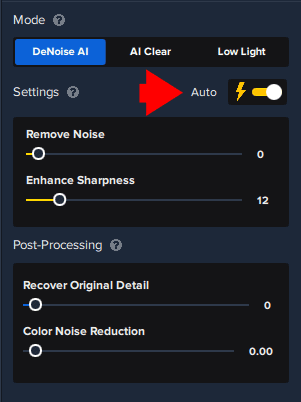
Step #6 – Noise Removal & Sharpening
Because of the use of a high ISO value (1250), the sensor produced plenty of digital noise and the goal was to remove or at least minimize it.

Typically, you need 2 different tools to remove noise and another to increase sharpness, but with the release of a brand new Topaz DeNoise plugin, you can complete both tasks in one step. I used the AUTO settings, and the plugin reduced the noise and increased sharpness in one step. Priceless.
To learn more about how I use Topuz Plugins in my photography check here: Topaz Software Review – How I use Topaz Plugins
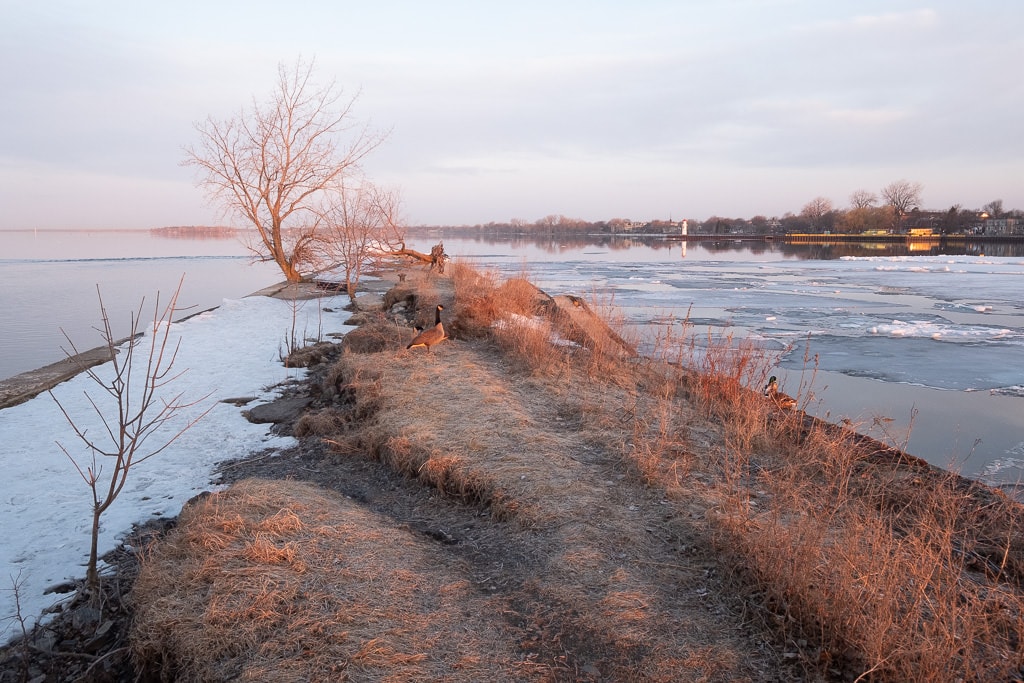
Before & After Transformation

“Spring Colors”
Lightroom Preset Collection
Lightroom workflow bundle includes Look Presets, Adjustment Presets, Opacity Presets, Reset Presets, Editing Formulas.

“4 Seasons”
Lightroom Preset Bundle
Lightroom workflow bundle includes Look Presets, Adjustment Presets, Opacity Presets, Reset Presets, Editing Formulas.