
Camping World donated this product for the purpose of review.
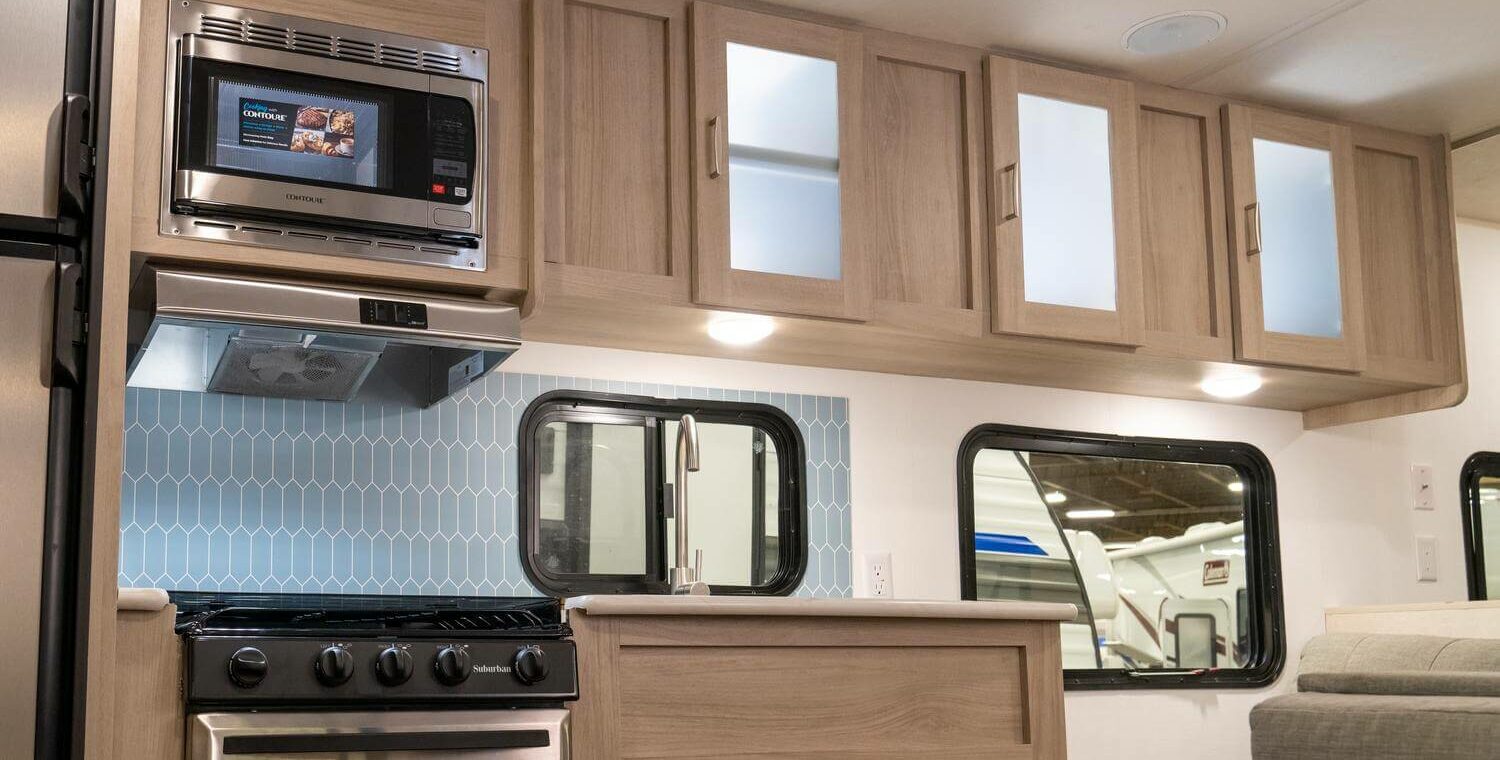
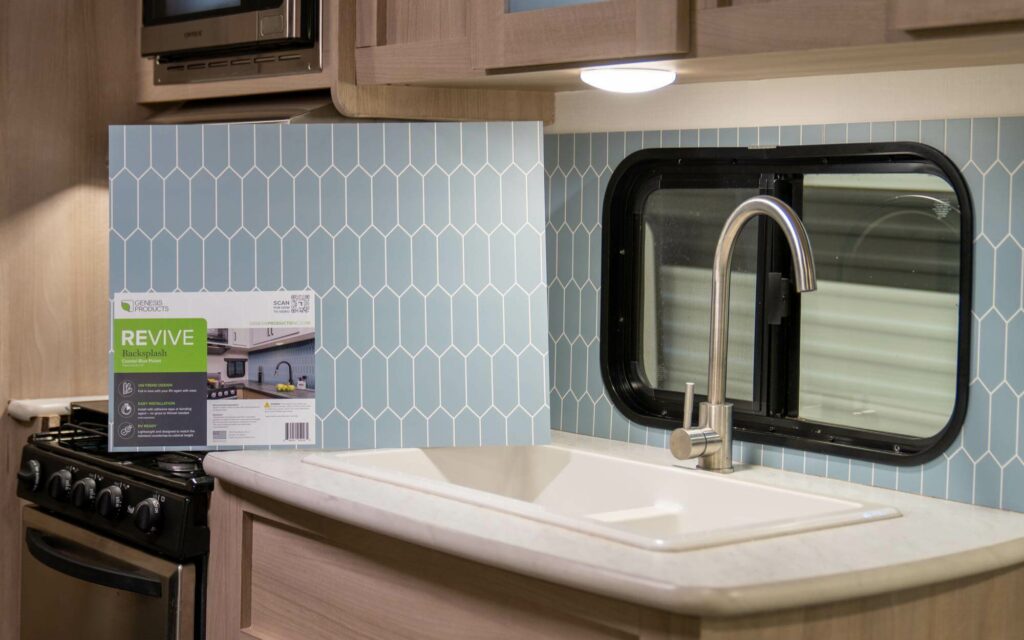
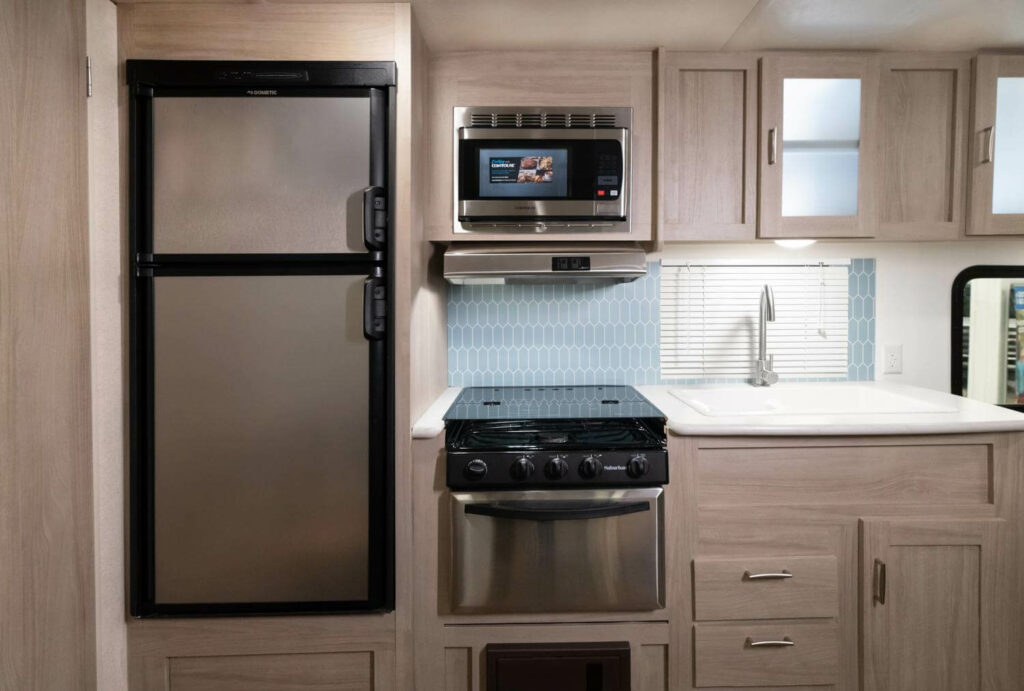
Let’s talk about a simple game-changer for your RV kitchen – the Genesis Revive RV Backsplash. My choice was the “Toasted Marshmallow” design, which boasts a bright marble pattern that brings modern sophistication and timeless elegance to any RV kitchen. This design blends well into most interior aesthetics.
If your goal is to update your RV kitchen with minimal effort, the Genesis Revive RV Backsplash is a great solution. This simple upgrade can be completed in less than a day, making it perfect for those seeking a quick yet impactful transformation. With its lightweight panels and straightforward installation process, you can revamp your kitchen space without the hassle of extensive renovations, instantly revitalizing your RV’s interior with minimal time and effort.
Genesis Backsplash Revive Kit At-a-Glance
Let’s explore the key specifications of the Genesis Backsplash Revive Kit, designed to effortlessly enhance your RV kitchen space.
- Size: 18” x 48”
- Fit: Sized to standard 18” countertop-to-cabinet height
- Adhesive: Tape or bonding agent
Learn more about this RV backsplash.
Who Is This For?
The Genesis Revive RV Backsplash is perfect for RVers seeking a hassle-free, stylish upgrade to their kitchen aesthetics. It is not recommended for those looking for a permanent or structural renovation.
Installing the Genesis RV Backsplash
Here’s a step-by-step installation process for the Genesis Revive Backsplash Overlay:
1. Prep the Surface
Ensure that the surface where you’ll apply the overlay is clean, smooth, and free of debris or grease. Use a mild cleaner to thoroughly clean the area and allow it to dry completely before proceeding.
2. Measure and Cut
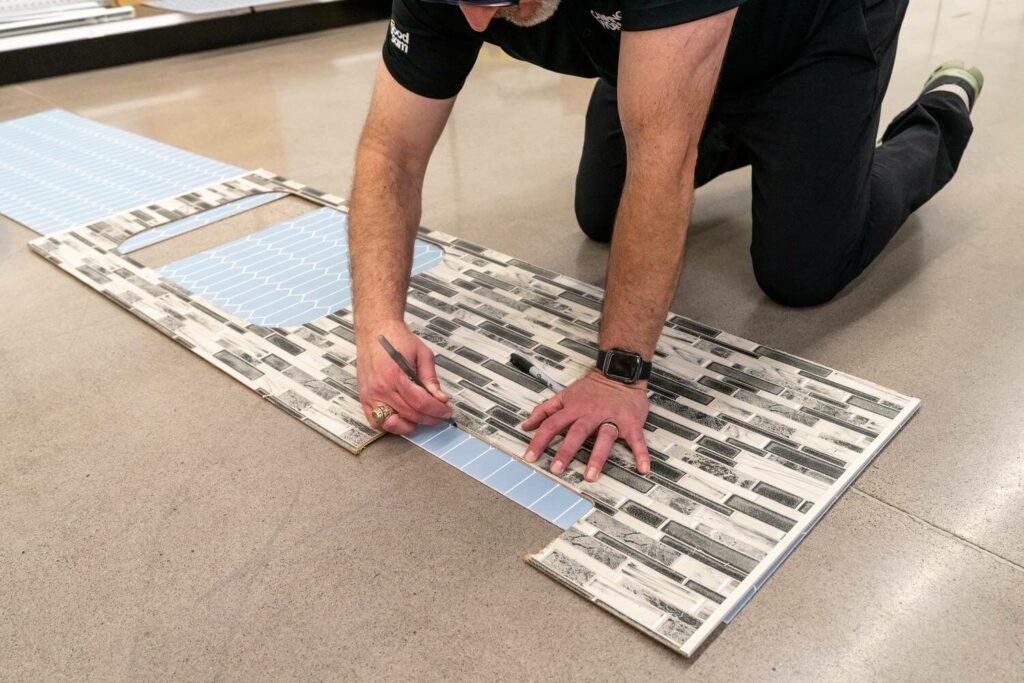
Measure the area where you plan to install the overlay and use a utility knife or scissors to cut the overlay to the desired size. Make sure to leave a little extra material around the edges to ensure a proper fit.
3. Test the Fit
Before applying any adhesive, test fit the overlay to make sure it aligns properly with the area you’re covering. Make any necessary adjustments to ensure a perfect fit. *Do not force the backsplash panel into place. It may crack and will be unrepairable.
4. Apply the Adhesive
Depending on the adhesive option you’ve chosen, apply it to the back of the overlay according to the manufacturer’s instructions. If using tape, apply it along the edges and in a grid pattern across the back of the overlay. If using a bonding agent or spray adhesive, apply it evenly across the entire back surface. *If using spray adhesive, wait 1-2 minutes for the adhesive to become tacky before applying the panel.
5. Position and Press into Place
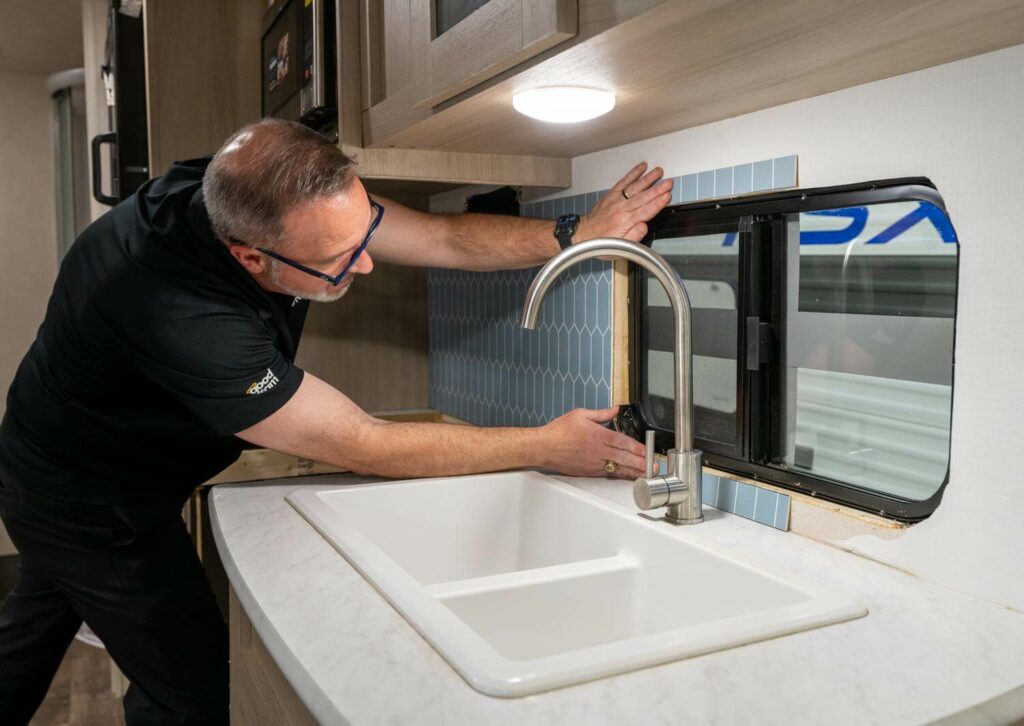
Carefully position the overlay over the prepared surface, starting from one corner and working your way across. Use a squeegee or a clean, dry cloth to press the overlay firmly onto the surface, ensuring that it adheres evenly and smoothly. Apply minimal pressure when pressing the panel into place.
6. Smooth Out Air Bubbles
If any air bubbles or wrinkles appear during the installation process, use the squeegee or cloth to smooth them out, working from the center towards the edges.
7. Trim Excess Material
Once the overlay is fully adhered to the surface, use a utility knife or scissors to trim any excess material along the edges for a clean and finished look.
8. Allow it to Cure
Allow the adhesive to cure according to the manufacturer’s instructions before using the area. This typically involves letting the overlay sit undisturbed for a specified amount of time to ensure a strong bond.
9. Enjoy Your New RV Backsplash
Once the adhesive has fully cured, your new Genesis Revive Backsplash Overlay is ready to use! Enjoy the refreshed look of your RV kitchen space.
What are the Pros and Cons of the Genesis RV Backsplash?

While this backsplash has a list of pros, I don’t think it’s the right solution for every RV. Manufacturers have recently introduced new designs and floorplans that may not fit the specifications of this backsplash panel. It’s a good idea to conduct proper research and take exact measurements for your individual RV kitchen needs.
Pros
- Lightweight panels crafted for easy installation and RV travel convenience
- Each panel is uniquely sized to fit standard countertop-to-cabinet height in RVs
- Beautiful design and colors instantly elevate the ambiance of any RV kitchen
- Lightweight panels ensure simple installation and convenience during RV travel
- Flexibility in installation – I used a 90-proof heavy-duty spray adhesive for a seamless finish
- Quick DIY project – no grout or thin set required
Cons
- Exercise caution during installation to avoid potential cracking of the panels, which may necessitate replacement for a flawless finish. You can’t fix a crack in the panel once it’s there.
Genesis Revive RV Backsplash Features
With the new competitive RV market and its updated aesthetics, it’s refreshing to see a product that integrates modern design with lightweight RV materials. Here are a few product features that stand out.
- Thoughtfully crafted panels blend modern sophistication with classic charm, making a statement in any RV kitchen.
- The lightweight construction ensures ease of installation and maintains durability for long-lasting use.
- Effortless application with no need for grout or thin set, saving you time and hassle.
Would You Recommend the Genesis Backsplash Revive Kit?

Would I recommend the Genesis Backsplash Revive Kit? Maybe. If you’re seeking a permanent and durable backsplash, comparable to tiled designs in a structured home, this may not be the best option for you. I’d prefer this panel to be slightly thicker and opt for real-quality textures for a kitchen backsplash.
However, the Backsplash Revive Kit is a great option if you want a quick update without the hassle of meticulously cutting tile or applying thick adhesives. This kit offers a convenient and visually striking solution to refresh your RV kitchen space. Just remember to take care during installation to avoid any potential issues with panel cracking.
In my experience, the installation process was relatively straightforward. I did encounter some challenges, particularly when it came to ensuring the panels were perfectly aligned while trying not to further crack the thin panel. Additionally, while the adhesive options provided flexibility, I found that using a heavy-duty spray adhesive yielded the best results for a secure hold.
Despite minor hiccups, the end result was impressive, and the refreshed look of my client’s RV kitchen made the effort worthwhile. As with any DIY project, patience and attention to detail are key to achieving a professional-looking finish.
In conclusion, it’s evident that while the Genesis Revive RV Backsplash offers a convenient solution for updating your RV kitchen, it may not suit every preference or requirement. Despite its lightweight construction and easy installation process, some RVers may find themselves longing for a more substantial and durable option akin to traditional tiled designs.
However, the Genesis Revive RV Backsplash presents a compelling choice for those seeking a quick refresh without the hassle of extensive renovations.
How Does the Genesis RV Backsplash Compare to the Competition?

When compared to traditional backsplash options, the Genesis Revive RV Backsplash shines with its lightweight design, easy installation process, and modern aesthetic appeal. In addition to this 18” x 48” peel-and-stick backsplash overlay, Genesis Products also offers an 18” x 24” overlay for smaller RV kitchens.
Head to Camping World to explore the Genesis Revive RV Backsplash and other renovation options!
Are you interested in renovating other areas of your RV? Here are a few additional resources:
What questions do you have about this Genesis RV Backsplash Overlay? Let us know in the comments below!