
Once again, the motivation behind the “Why are my photos blurry?” article originated from valuable feedback from my blog’s readers. In response to a request in my newsletter, subscribers openly shared their primary challenges and concerns related to photography.
It became apparent that a majority of my readers encountered a common obstacle – the quest for sharpness in their photographs, a recurring issue reflected in inquiries they often posed:
- “Why Are My Pictures Blurry”
- “How can I achieve sharper photos?”
- “What are the best sharpshooting techniques?”
Why Are My Pictures Blurry? – 3 Main Reasons
I strongly endorse the 20/80 rule, which posits that, in most processes, roughly 80% of the outcomes result from approximately 20% of the contributing factors. When embarking on the journey to master any new process, the objective is to identify that pivotal 20% that yields a substantial 80% of the desired results and address it as a priority.
In this discussion, my focus is on three fundamental issues (20%) responsible for 80% of problems that often hinder the achievement of sharp and clear photographs.

1. Blurry Photos Caused By Incorrect Shutter Speed
Truth. Slow shutter speed causes 90% of blurry or soft photographs taken handheld or without a tripod.
The shutter speed controls the duration that the time sensor inside the camera is exposed to light.
For example, a shutter speed of 1 sec means that the shutter stays open for 1 sec exposing the camera’s sensor to the light. A shutter speed of 1/100 sec means that the shutter only stays open for a fraction (one hundredth) of a second.
The problem occurs when the camera shakes as a result of our body movements (hands, shoulders, and legs) which results in camera movement when the shutter is open (exposure time).
With a basic knowledge of shutter speed, it’s not difficult to understand why it’s much easier to cause the camera to shake during a 1 sec exposure time in comparison to a 1/100 sec exposure time.
What is a safe shutter speed?
It would be great if I could say that 1/50 sec is the fastest and safest shutter speed, but that’s not the case. The value of a safe shutter speed depends on the focal length and the size of your camera sensor. A longer focal length magnifies the camera shake, which can result in more problems for photographers.
For example, it’s much easier to cause the camera to shake at a focal length of 70mm compared to 18mm. So how can you estimate the safest shutter speed to meet your needs? I use a simple guideline to estimate a safe shutter speed value.
When I use a camera with a cropped sensor (Sony A6000, Fujifilm XT2, Canon Rebel, Canon 700d, Fuji XT-1), I use the following formula:
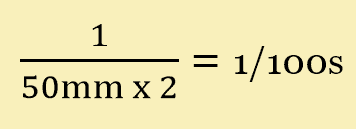
Minimum acceptable shutter speed = 1/focal length x 2
This means that when I shoot using a 50mm focal length, the minimum shutter speed equals 1/50mm x 2 = 1/100 sec
This doesn’t mean that I can’t shoot at a slower shutter speed (less than 1/100 sec) as this guideline is only to make me aware that if I shoot at a slower speed, I am entering a potentially dangerous area and I have to take extra precautions to avoid camera shaking or blurry photos.
2. Blurry Photos Caused By Incorrect Incorrect Aperture Settings
As you learned above, the shutter speed controls the duration of time the sensor is exposed to light. The aperture controls the size of the opening in the lens through which light travels to the sensor.
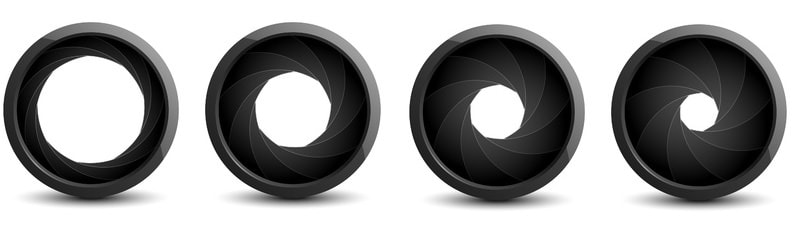
Aperture and Depth of Field (DoF)
The primary function of the aperture lies in its ability to control the extent of your scene that remains in focus, a characteristic known as Depth of Field (DOF).
For instance, when using a wide aperture of f/1.8 on a 50mm focal length, the area in focus within your shot becomes quite limited. Focusing on a subject two meters away, the Depth of Field narrows to a mere 11 cm, resulting in only a very small portion of the scene being sharp (shallow depth of field).

However, should you opt for a small aperture (f/13) and an 18mm focal length, the depth of field becomes significantly wider. In this scenario, focusing on an object two meters away ensures that everything from 0.7 meters in front of you to infinity will be in sharp focus.

The challenge arises when selecting the wrong aperture, a common mistake, especially in landscape photography. For instance, when capturing a wide-open landscape to encompass the beauty of the entire scene, it’s crucial to maintain sharpness throughout. Using a 50mm lens with the aperture set to f/1.8, as seen in the previous example, would result in a photo with some areas in focus and others appearing blurry.
How to Calculate the Depth of Field
Calculating depth of field can be approached through various methods, including reference charts and useful photography apps.
Throughout the years, I’ve relied on the DOFMaster website, where you can access the On-line Depth of Field Calculator. I highly recommend exploring this resource and experimenting with the calculator. By inputting your camera model, different focal lengths, and apertures, you can observe their impact on the Depth of Field.
Over time, as you gain experience and practice, you’ll become adept at assessing depth of field without relying on calculators or aids.
3. Blurry Photos Caused By Incorrect Focusing
The issue of focusing happens when you focus on the wrong object or part of the scene.
For example, if you want the main point of interest in the distance—let’s say a monument—to be in focus, instead of focusing on the main object, you accidentally set the focus on a tree a few meters away from where you’re standing. The result will be a perfectly sharp and in focus tree in the foreground with a blurry and out of focus monument in the background.
In this scenario, even your camera settings—aperture, shutter speed, etc.—were correct but the picture was ruined by bad focusing.
Related: Back Button Focus Technique
But don’t worry! I’ll give you two simple tips to help you avoid bad focusing issues. Since every camera manufacturer offers a similar kit lens setup with an 18-55mm focal length and a f/3.5-5.6 aperture range, most beginning photographers start with this kit, which makes it a perfect example.
Focusing Technique in Landscape Photography
Important. Select the widest focal length of 18mm and set the aperture between f/8-f/11 to maximize the depth of field value. Here’s the main tip: Focus one-third of the way into the scene to get the maximum depth of field. This way, you’ll get everything in focus starting from the foreground to infinity.

(If you shoot handheld without a tripod, make sure you follow the safe formula speed from the “What is a safe shutter speed?” section of this article).
The method of focusing one-third of the way into the scene is a life hack, while effective in 90% of cases, lacks precision and can sometimes fall short in more challenging situations. For greater accuracy, I employ a focusing technique based on the concept of Hyperfocal Distance.
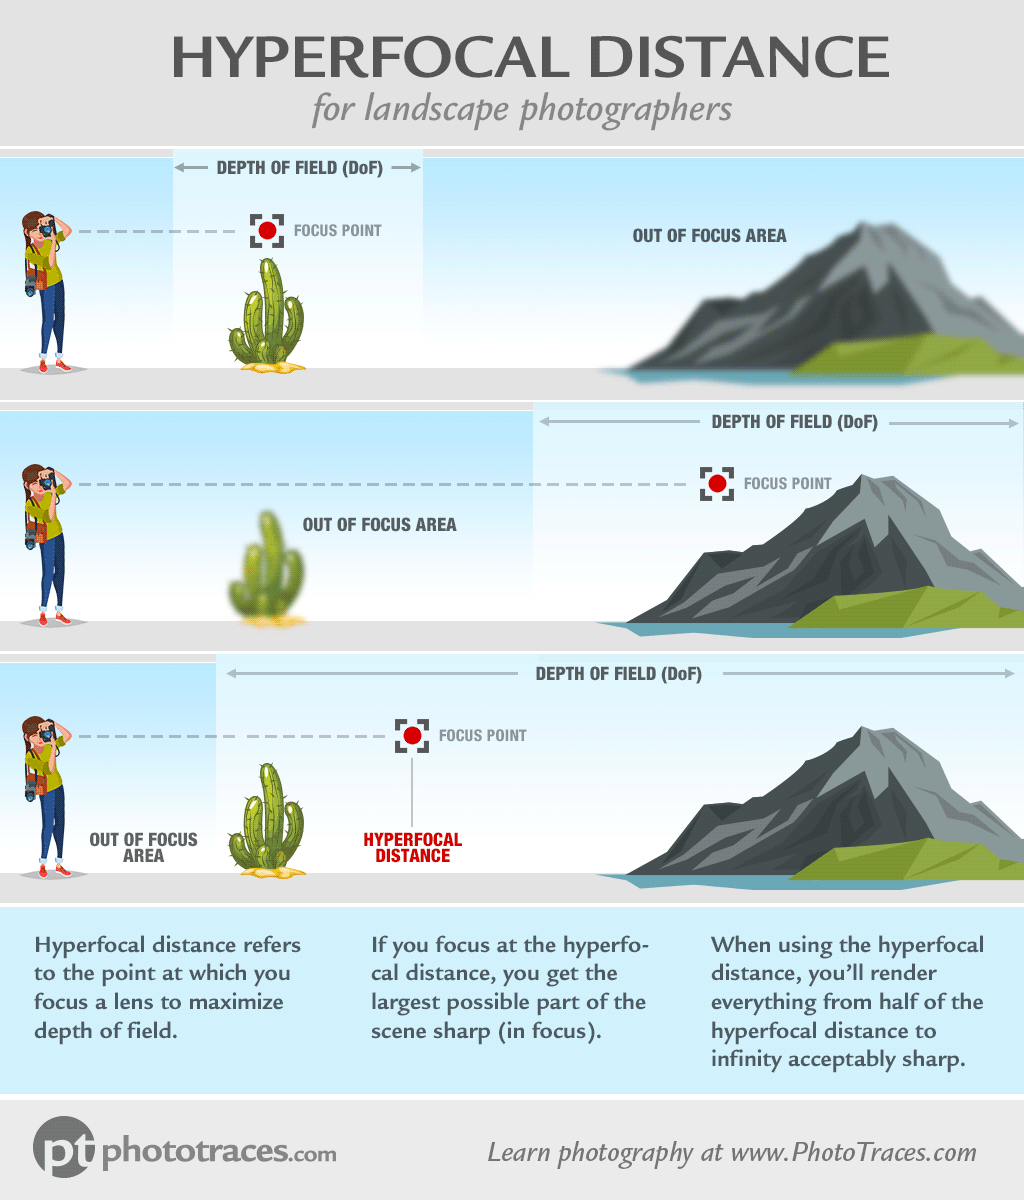
Hyperfocal Distance Technique
Hyperfocal distance is a critical concept based on determining the ideal focus point to maximize Depth of Field (DoF) in your photos. It represents the distance at which you should focus your lens to ensure that everything from half that distance to infinity remains acceptably sharp. Essentially, it’s the focal distance that enables you to maximize your camera’s depth of field, ensuring both foreground and background elements are in focus.
If you want to learn the Hyperfocal Distance technique in-depth, check out my dedicated tutorial.
By mastering the concept of hyperfocal distance and integrating it into your landscape photography workflow, you can capture impressive images characterized by excellent sharpness and depth. This technique enables you to fully showcase the beauty of expansive outdoor scenes.
Focusing in Portrait Photography
Select the longest focal length of 55mm and set the widest aperture of f/5.6. Focus on the person’s eyes. If you shoot from a two to three-meter distance, you will create visual separation with a perfectly in focus person and an out of focus background.

Once again, don’t forget about the safe shutter speed value we learned earlier.
Tips to Avoid Blurry Photos
Improve the Handheld Technique to Avoid Camera Shake
Minimizing camera shake is a fundamental skill for photographers seeking to capture sharp and clear images when using a handheld camera.
Here is the list of handheld camera techniques and tricks I use in my photography.
- I usually press my elbows against my body while holding the camera as steady as possible.
- I use the View Finder and press the camera against my head to create an extra point of stabilization.
- If possible, I even try to find something I can lean against like a wall, tree, or fence.
- Then, I inhale before taking the shot and hold my breath to prevent accidental shakes.
- I also take multiple shots so that I can choose the sharpest one later.
It’s also important to know how steady your hands are as even this varies from person to person and needs to be adjusted accordingly.
For example, after shooting for many years, I know that when I take the precautions listed above that I can shoot at a shutter speed of up to 1/15 sec at 50mm on a cropped sensor with a success rate averaging around 50%. This means out of 10 shots, five will be sharp.
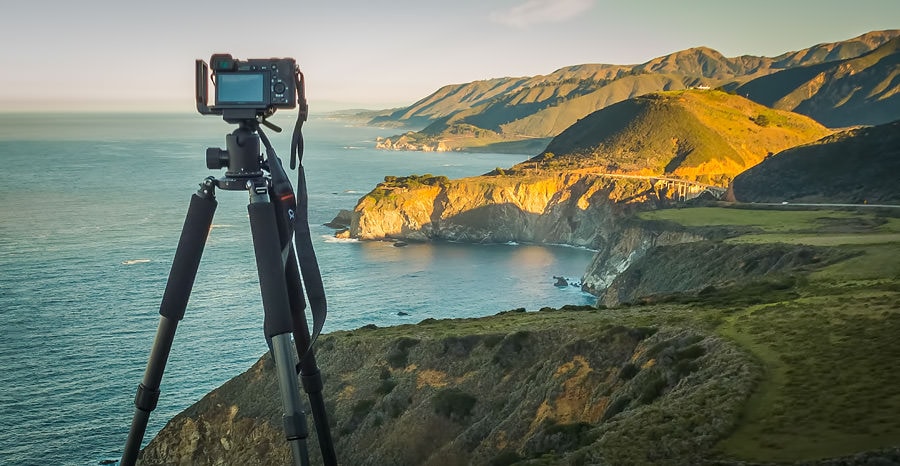
Use a Tripod for Added Stability
Using a tripod is the most effective way to maintain camera stability, allowing for the use of smaller apertures, lower ISO settings, and longer shutter speeds, resulting in better photos. However, it’s essential to place the tripod on a stable surface to avoid potential shaking from passing traffic or nearby pedestrians.
Investing in a quality tripod is crucial, as cheap ones may vibrate due to the camera’s weight.
Additionally, it’s important to turn off image stabilization when using a tripod, as it’s unnecessary in the absence of camera movement. Failure to disable image stabilization while using a tripod could be a contributing factor to blurry photos.
Use the Time Delay Function
When you’re using a tripod to capture photos, you might assume that camera shake is no longer a concern, but that’s not entirely accurate. Even the act of pressing the shutter button can introduce vibrations that affect the sharpness of your shots. This is where your camera’s time delay function comes into play.
Using the time delay function is a simple yet highly effective technique to ensure your images are sharp and free from the effects of camera shake. This method is particularly valuable in situations where you’re capturing long-exposure shots, close-up macro images, or whenever the utmost precision is required.

By integrating this feature into your photography workflow, you can enhance the overall quality of your tripod-mounted shots.
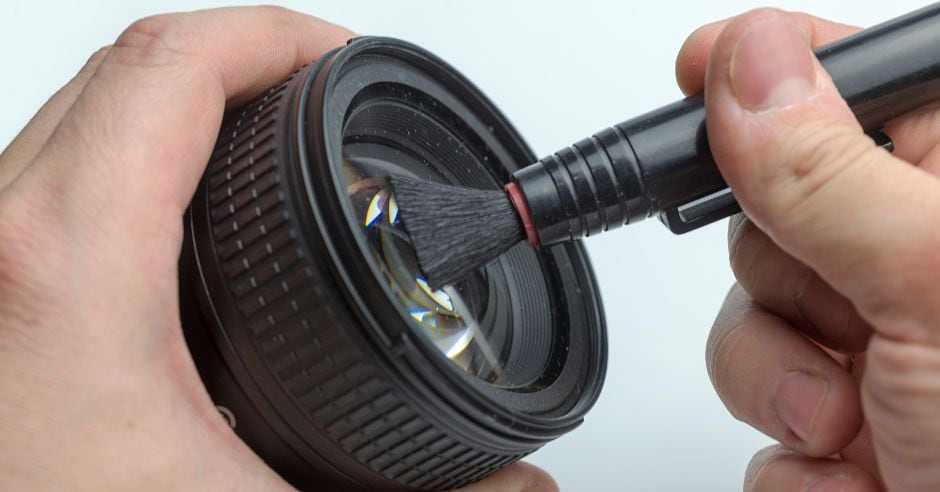
Bonus Tip – Keep Your Lens Clean
Make sure your lens is clean. While it sounds obvious (and I promise I’m not trying to insult your intelligence), you would be surprised by how many shots I ruined because I forgot to clean the lens. Over the years, I’ve developed the habit of glancing over the front of my lens every time I get ready to take a shot and clean front element of lens if necessary. To make it even more convenient, I keep cleaning tissues everywhere from my bag and pockets to my car.
How To Fix Blurry Photos
The most effective way to handle blurry images is to prevent them in the first place. However, if you find yourself with images that lack the desired level of sharpness, there are ways to rectify the situation in post production.
Historically, rectifying blurry images through post-processing has presented a considerable challenge. Just a few years ago, it was nearly impossible to fully restore lost sharpness. The introduction of AI-powered sharpening software has brought about some improvement in this realm. These AI tools can enhance image sharpness to a certain extent, although it’s essential to bear in mind that they cannot perform miracles.
One particularly effective sharpening software solution is Topaz Sharpen AI (Photoshop plugin). This tool is specifically designed to address issues with “soft” images and slightly “out-of-focus” photographs, making it a valuable resource for photographers seeking to salvage blurry shots.
While AI-based sharpening cannot substitute for the advantages of capturing sharp images in-camera, it can serve as a valuable tool for those instances when you end up with less-than-ideal results.
FAQ: Why Are My Photos Blurry?
Should I Use the Manual Focus Technique?
Manual focus can be a valuable technique when precision is crucial, especially in scenarios where autofocus may struggle, such as low-light conditions or scenes with low contrast.
However, my approach of using autofocus and then utilizing the autofocus lock (AFL) button provides a practical alternative. By employing this method, I benefit from the initial speed and convenience of autofocus, followed by the ability to lock the focus and take a photo.
Ultimately, the choice between manual focus and autofocus, or a combination of both as I’ve described, depends on your shooting style, the specific requirements of your subject, and the conditions in which you are photographing.
Does Faster Shutter Speed Cause Blurry Pictures?
No, faster shutter speed does not cause blurry pictures; in fact, it will help prevent blurriness and ensure the images will be sharp. When you use a faster shutter speed, the exposure time is shorter, minimizing the chances of capturing motion blur. This is particularly beneficial when photographing a moving subject or in situations where camera shake can lead to blurry images.
To avoid getting blurry pictures, especially when dealing with dynamic or fast-paced scenes, consider using a faster shutter speed.
What Shutter Speed Should I Use When Capturing Moving Subject?
When photographing moving subjects, selecting the appropriate shutter speed is crucial to ensure your images are sharp and free from unwanted motion blur. The ideal shutter speed depends on the speed of the subject and the effect you want to achieve.
For fast-moving subjects like sports or wildlife, a faster shutter speed (e.g., 1/500 seconds or higher) is recommended to freeze the action and avoid blurred photos. On the other hand, the use a slower shutter speed (e.g., 1/60 seconds) can be used to convey a sense of motion, creating a dynamic and intentional blur.
For a more in-depth understanding and to determine the best shutter speed for various scenarios, refer to the “Shutter Speed Chart” tutorial with a dedicated infographic.
Does Zoom Level Affect the Sharpness of the Photos?
Yes, changing the focal length on your zoom lens can indeed impact the sharpness of your photos. When you zoom in, increasing the focal length, there is a greater potential for camera shake, and the risk of capturing soft or blurry photos may increase. To compensate for this, it’s essential to use a faster shutter speed or employ stabilization methods, such as using a tripod.
For example, when using a 70-200mm lens it is almost impossible to avoid blurry photos at 200mm but 70mm is a relatively safe focal length for getting sharp images.
Therefore, being mindful of your shutter speed and stabilization techniques is crucial to avoid the common problem of a “photo is blurry.”
Should I Use the Mirror Lock Up to Maximize the Sharpness of My Photos?
When considering whether to use the Mirror Lock Up to maximize the sharpness of your photos, it’s important to recognize that most photographers today utilize mirrorless cameras, eliminating the need for a mirror. Mirrors are exclusive to DSLR cameras.
In the realm of DSLR photography, employing the mirror lock-up is generally unnecessary when capturing landscapes. If you’re using a tripod for stability and taking advantage of a “time delay function” to mitigate camera shake, these measures alone are often sufficient to achieve sharp photos.
However, there are specific scenarios, such as macro photography, where utilizing the mirror lock-up becomes more relevant. So, while it may not be universally required, there are situations where choosing to “lock up your mirror” can indeed contribute to maximizing the sharpness of your photos.
Why Are My Pictures Blurry? | Conclusion
If you understand and learn a few simple rules about how to assess a safe shutter speed, estimate the depth of field, and know where to focus, you’ll be producing sharp images time after time! With this knowledge, you won’t find yourself questioning, “Why are my photos blurry?” again.