
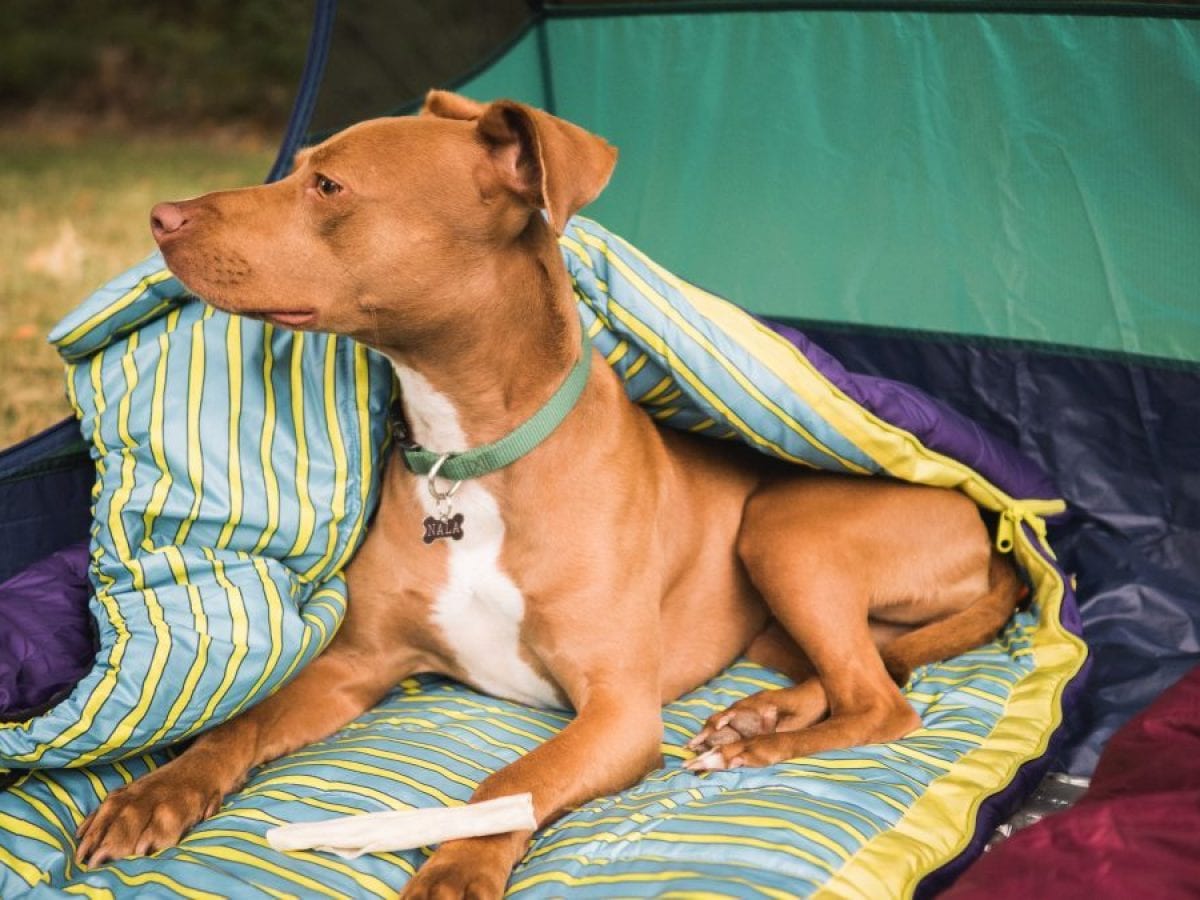
Dogs like to get cozy as much as their human companions (some even more so). This DIY uses an old foam pad and sleeping bag to make a lightweight dog bed so your pup is as comfy as you on your next backpacking adventure. If you don’t have old gear lying around, look for inexpensive used gear through REI Co-op Re/Supply or a secondhand store, or ask around for cheap or free used gear.
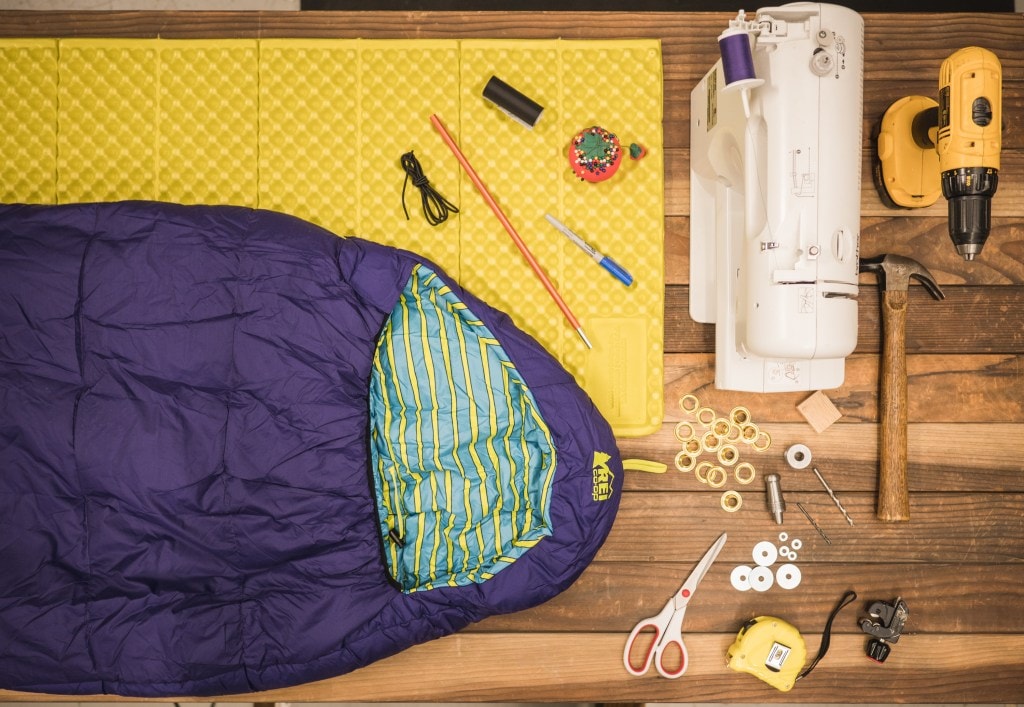
Materials:
- Old closed-cell foam pad, like a Therm-a-Rest Z-Rest or other closed-cell foam pad
- Old sleeping bag or quilt
- Heavy-duty thread or thread in a matching color to bag
- Four grommets with installation kit
- Four 6-inch pieces of shock cord, with ends melted if necessary to prevent fraying
- Four dowel pieces, around 1 1/4-inch long, to be used as toggle closures (they need to fit through grommets; we used tent pole pieces but small wood dowels would work as well)
- Four small washers
- Four large washers that won’t fit through grommets
Tools:
- Heavy-duty or fabric scissors
- Chalk
- Pins
- Sewing machine or sewing needle
- Hammer
- Lighter
Directions:
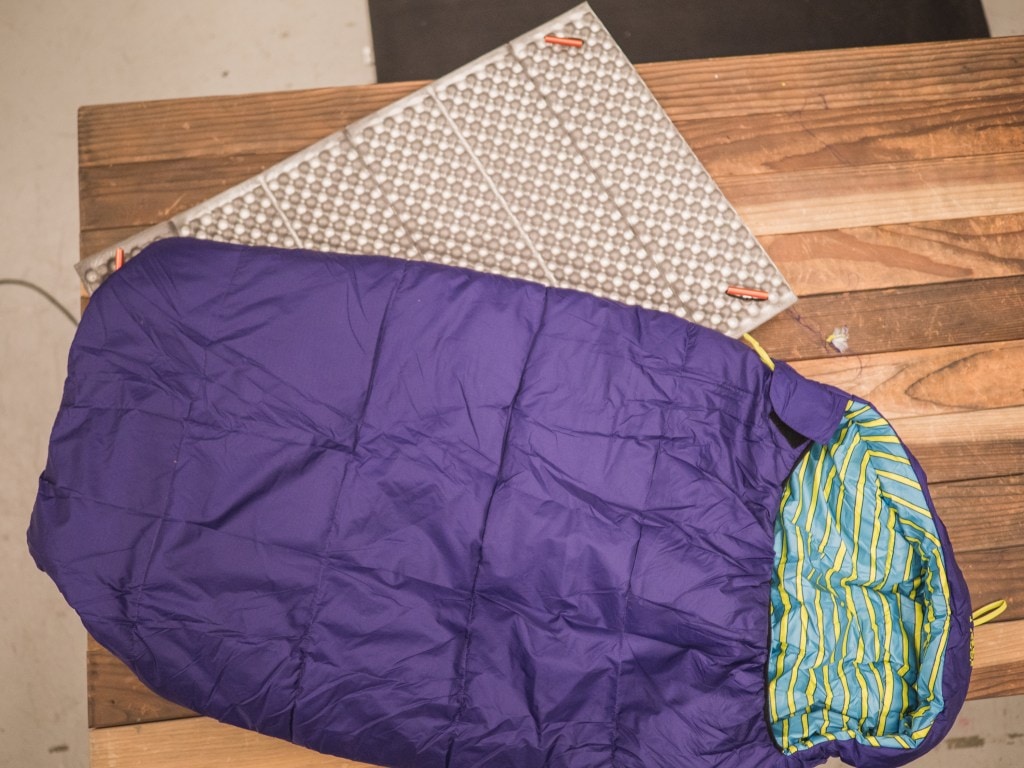
1. Cut foam pad to size
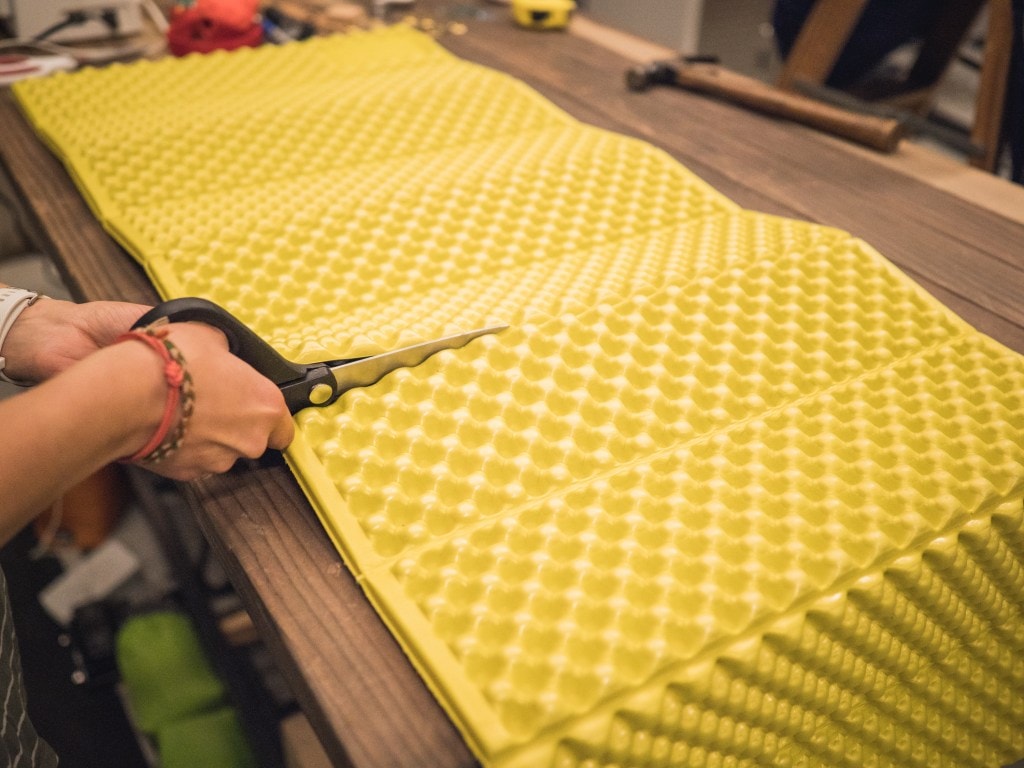
Use scissors to cut the foam pad to a good size for your pup to lie on. Use a Phillips screwdriver or a pointy pen to make a small hole in each corner of the pad about 1 inch from the edges.
2. Mark sleeping bag length
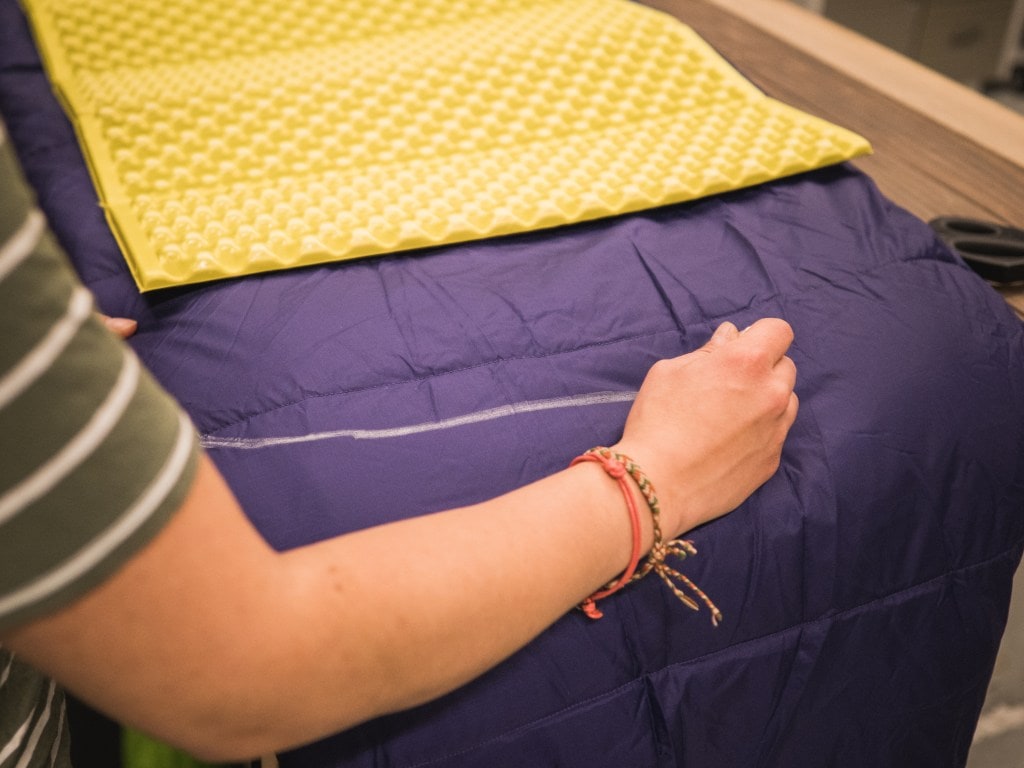
Make sure the sleeping bag is zipped closed. Place the foam pad on top of the bag with one edge aligned with the top front of the bag (where it reaches your neck), making sure all four corners are on the bag. Using chalk, make a slightly curved line on the bag about 4 inches below the edge of the pad, ideally just below a baffle. If you’re using a down bag this will help minimize the number of feathers lost.
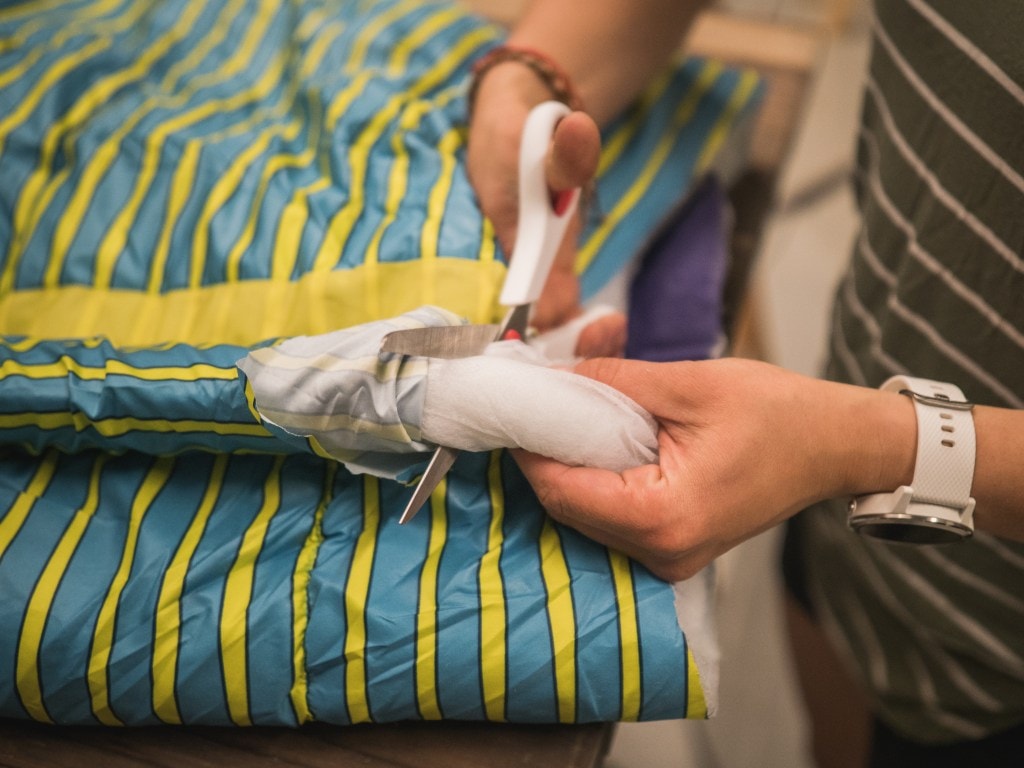
3. Cut sleeping bag to size

Starting from the non-zipper side, use scissors to slowly cut along the chalk line. It may be easier to cut one side of the bag first and then match the cut on the other side. When you reach the zipper, cut straight through.
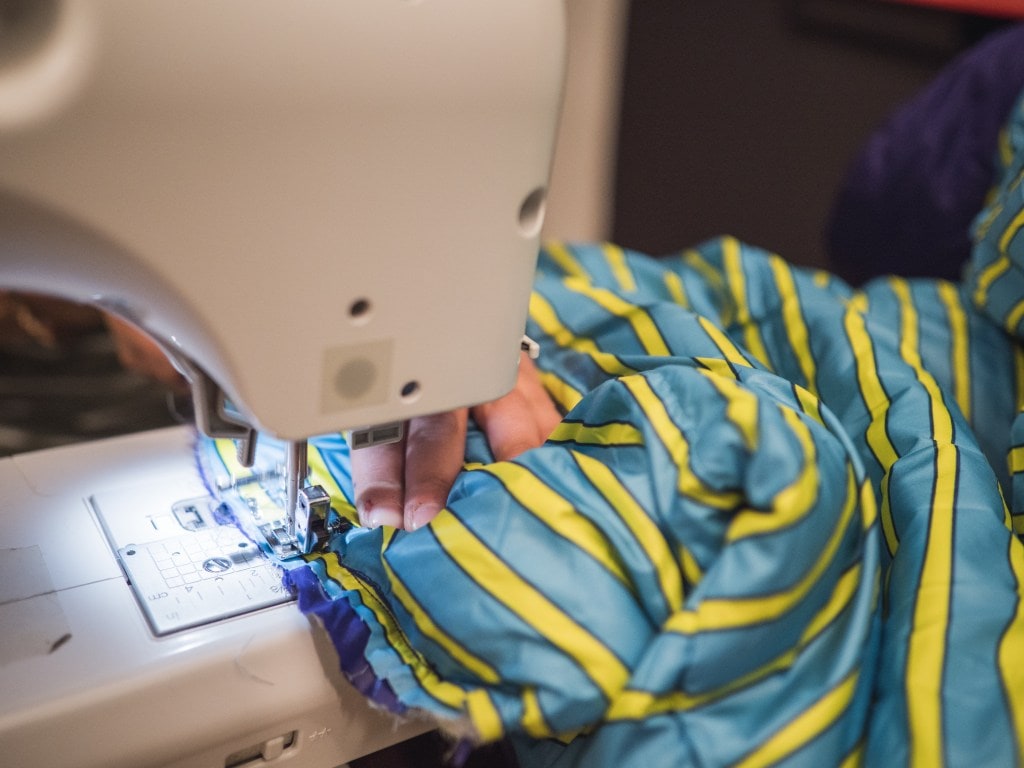
4. Sew raw edges together
Turn the sleeping bag inside out. If the bag has synthetic insulation like ours, trim the insulation back with scissors so you have room to sew the edges together and pin the fabric closed.
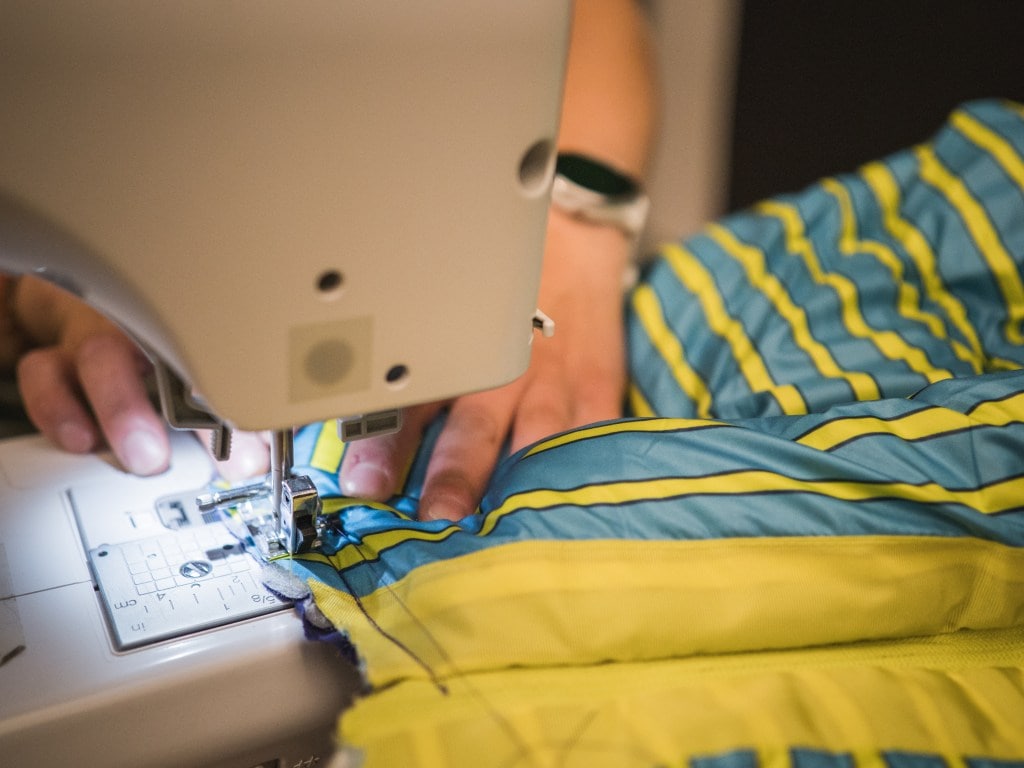
Using either a sewing machine with a strong needle or hand sewing using a backstitch, sew the raw edges together to hold in the insulation, leaving a 5/8-inch seam allowance. Make sure to sew over the end of the zipper. Trim extra thread.
5. Sew sides of sleeping bag together
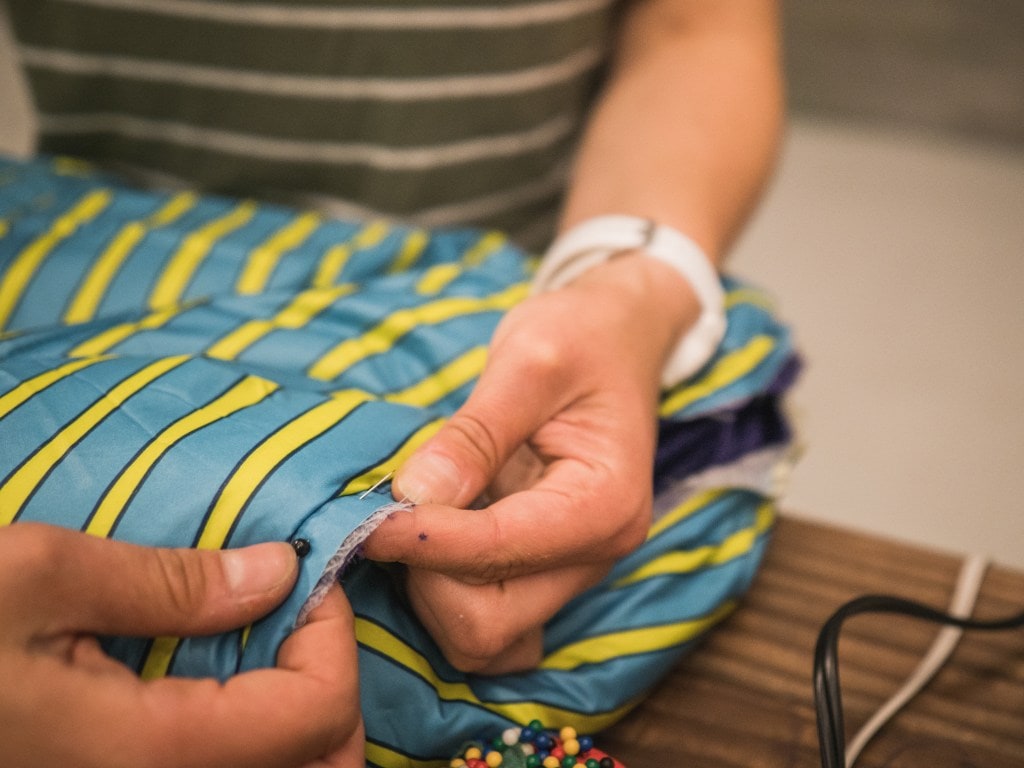
With the sleeping bag still inside out, pin the bottom edges of the sleeping bag together. Make sure the zipper is on the outer edge.
Using a sewing machine with a strong needle or hand sewing using a backstitch, sew the edges together, leaving a 5/8th-inch seam allowance. Make sure to sew over the end of the zipper. Backstitch at both ends to secure and trim extra thread.

Turn the bag right-side out. You now have a doggie sleeping bag!
6. Add grommets to sleeping bag
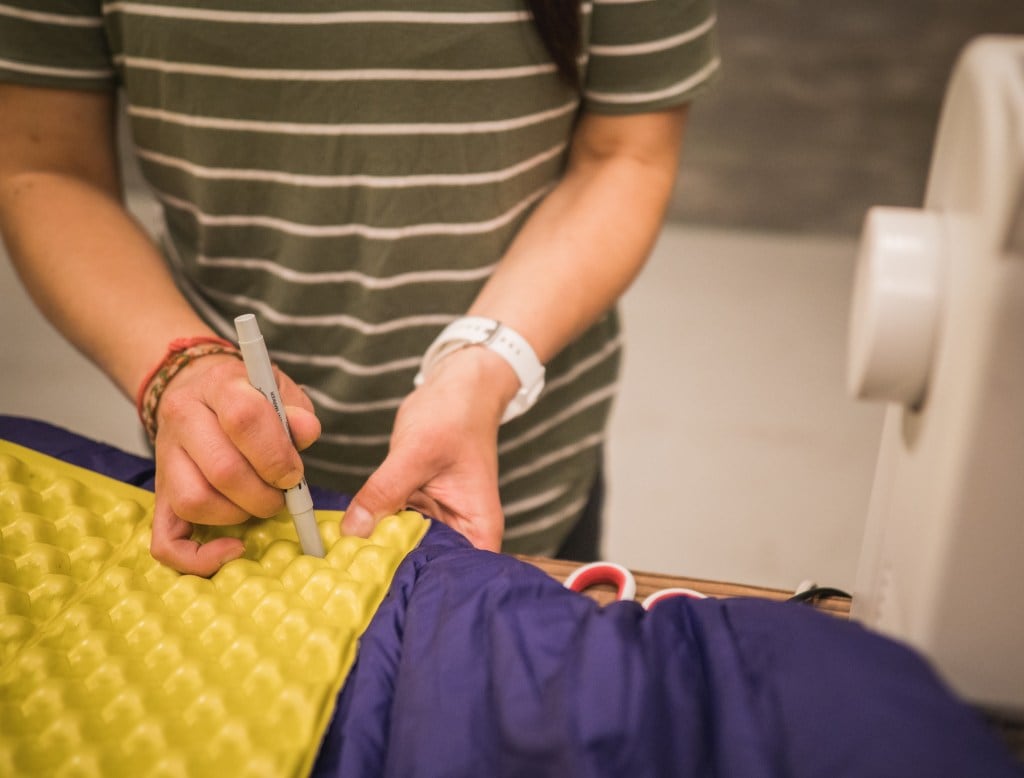
Turn the sleeping bag upside down again and lay the foam pad on top. Mark where the holes punched in the pad hit the sleeping bag.
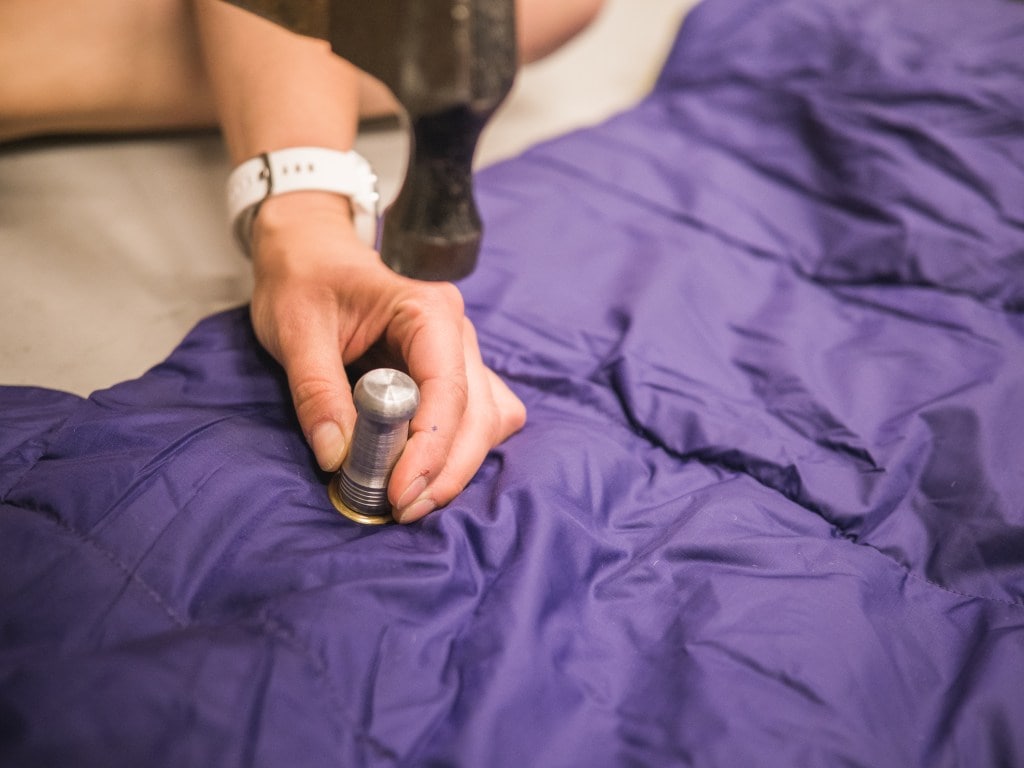
Set the pad aside and unzip the bag. Use the grommet tool to install a grommet at each mark in the bottom layer of the sleeping bag only. (Make sure you’re working on a hard surface that won’t dent when installing grommets.)
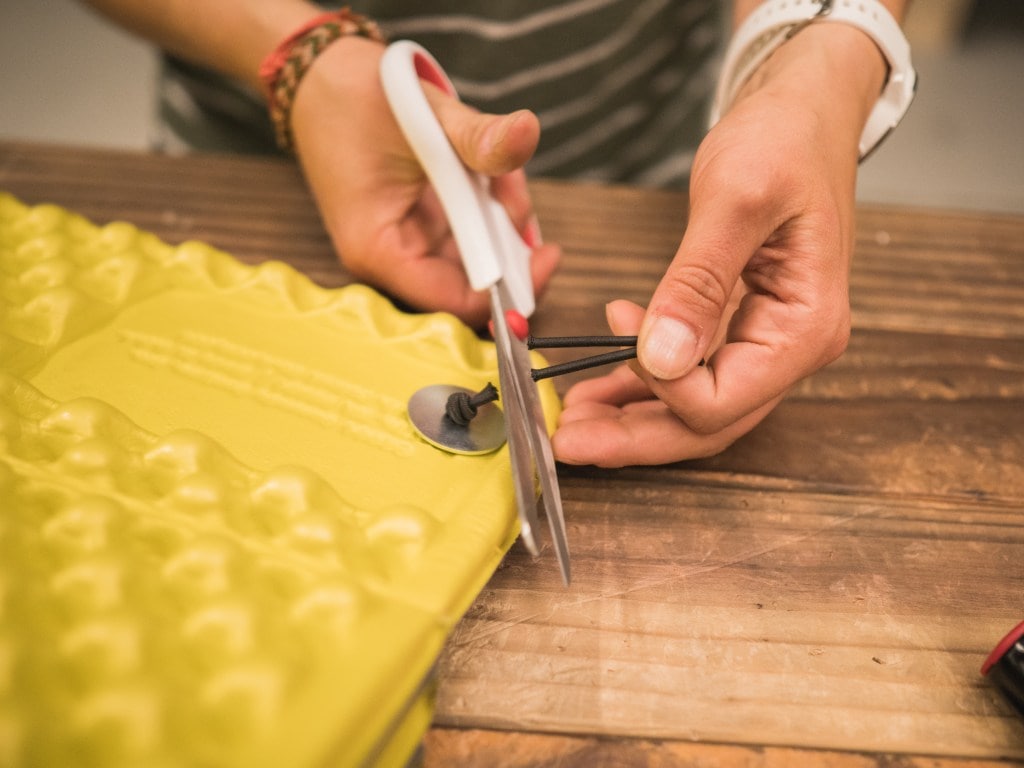
7. Add attachment toggles

Assemble your dowel pieces and shock cord. We used old tent pole pieces, cut to 1 1/4 inch and sanded, with the shock cord running through the center. You can also use plastic toggles or wooden dowels with a hole drilled in the middle to loop the cord through.
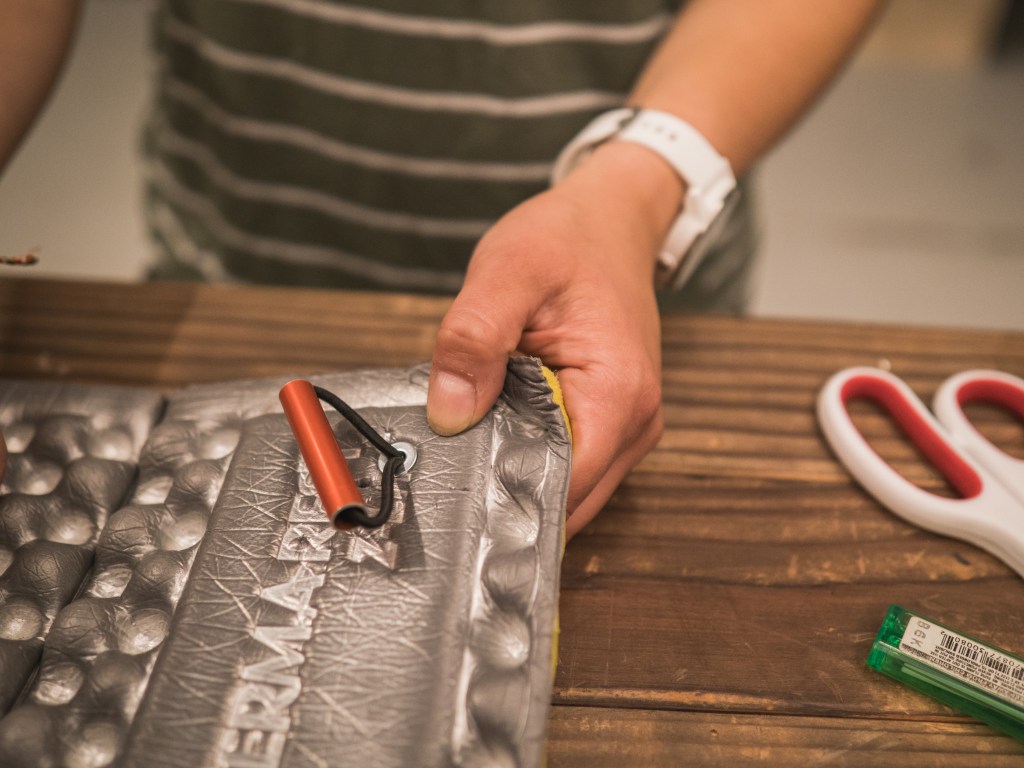
Slide a small washer onto the free ends of a piece of shock cord with a toggle, then thread them through a hole in the foam pad with the toggle on the top side of the pad.
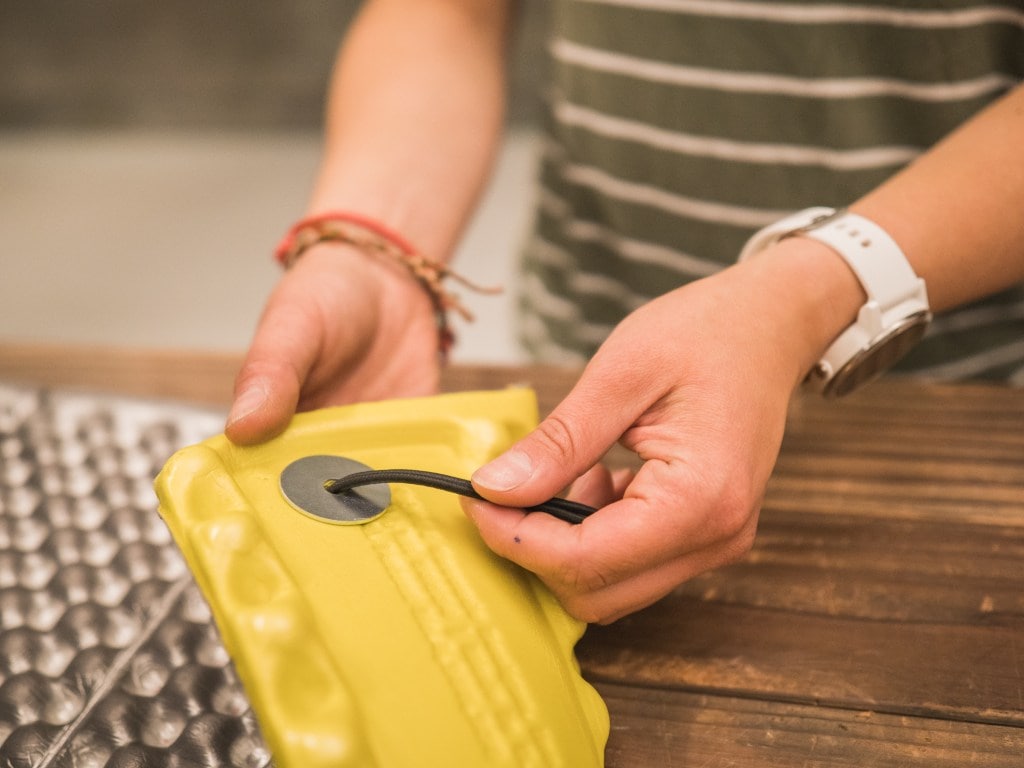
Slide a large washer that won’t fit through the grommet onto the cord.
8. Attach sleeping bag and foam pad together
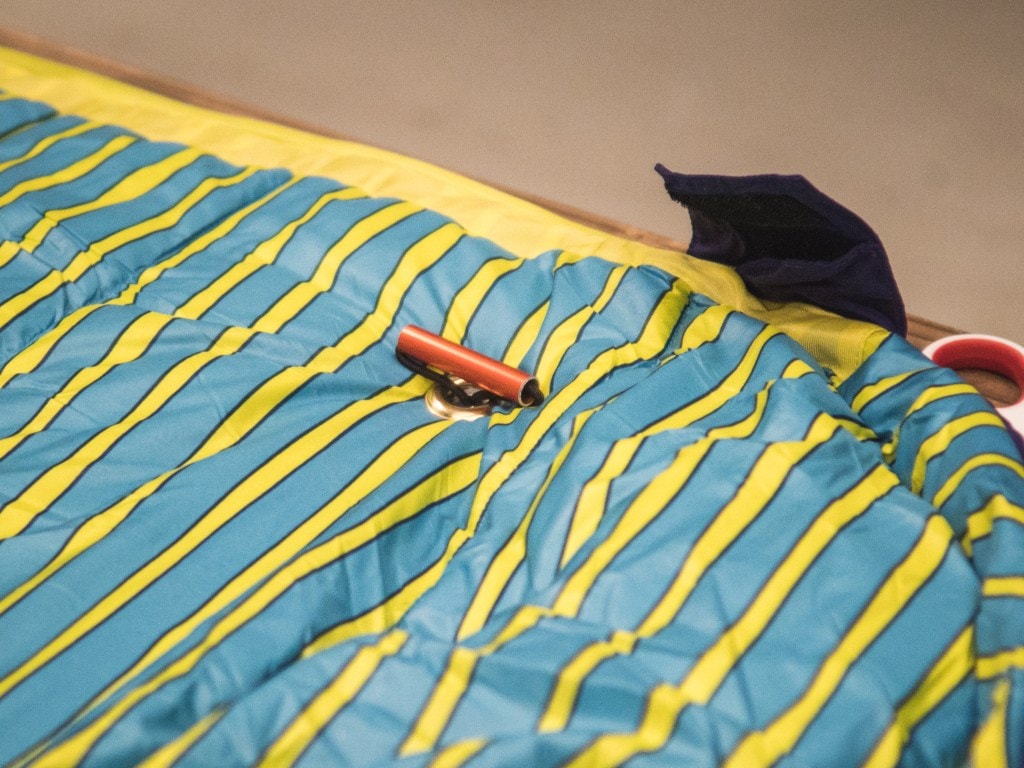
Place the sleeping bag on top of the pad and thread the toggles through the grommets, rotating them so they lie flat. Gently pull the shock cord down so the sleeping bag and foam pad are snug.

Without any stretch in the cord, tie an overhand knot in the free ends of the cord to secure.
Trim the excess cord and carefully use a lighter to melt the loose ends to prevent fraying.
9. Go camping!
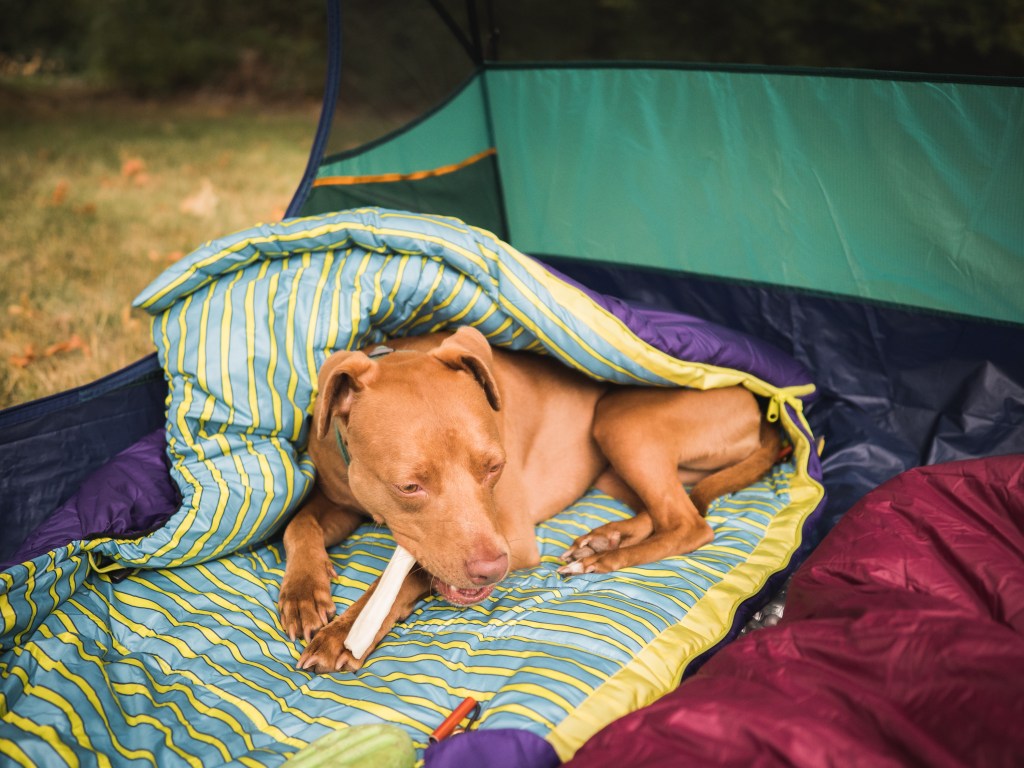
Hit your favorite dogs-permitted trail, set up camp and get cozy. The pad and bag can be packed separately to fit easily in a backpack, and you can use the foam as a sit pad for yourself during a hike. Check out our tips for backpacking with dogs for even more ways to make the most of your overnight trips.
Editor’s Note: This article was originally published on August 3, 2018.