
If you are looking for an exciting way to explore some of the most stunning national parks in the United States, then a Southwest National Parks road trip is a perfect adventure! This unforgettable journey will take you through iconic landscapes of deserts and canyons, revealing breathtaking views and fascinating wildlife.
What is the American Southwest?
The American Southwest is an expansive geographic region in the southwestern United States. It includes Arizona, New Mexico, California, Utah, and Nevada, as well as parts of Texas and Colorado. This region is known for its diverse climate and culture and is home to some of the most iconic landscapes in the United States.

Discovering the Southwest
For the last seven years or so, I have traveled to the southwest at least twice a year. I have no plans to stop because it still feels that I have only scratched the surface. In the beginning, I started like most tourists by visiting the most popular spots. But, with every visit, I went deeper and deeper into exploring the less visited and less crowded spots.
This year, my plan was to explore the backcountry of Utah and Arizona by driving the dirt roads and camping in remote places far from civilization. While that was the plan, we (my wife and I) did not manage to execute it properly. The most obvious reason for our failed plan was the weather. The rain made most of the dirt roads unpassable leaving us to scramble to adjust our plans.
Although half of my planning did not materialize, I consider the latest trip to be the most successful and exciting. Every day changes and corrections to our itinerary kept us on our toes and allowed us to discover some amazing and unintended locations.
Please follow my visual diary where I outline my 12-day driving trip through the southwest.

Southwest National Parks Road Trip: Day 1 – Sedona
For every trip to the southwest, the first day is strategically the most important. It defines the success of the entire trip. There is a lot going on day one.
Air Travel
First, it is an air travel day. The goal is to reach our destination as early as possible. After being delayed twice during connection stops on previous trips, I have learned to always book direct flights to minimize the chance of delays.
For us, Las Vegas is the most logical destination to fly into since it is located within driving distance from the Grand Canyon, Bryce, Zion, Death Valley, and Sierra. But, what makes Las Vegas prohibitive for driving trips is the price of rental cars.
If you rent a car in Las Vegas and return it to the same location, the prices are reasonable. But, if you want to return the car to another city, it is much more expensive. I do not mean like double in price; I mean four to five times higher. Since we planned to fly home from San Francisco, landing in Las Vegas and renting a car was out of the question.

Instead, we flew to Phoenix where, no matter where you return your rental car, the price does not change. It is also still within driving distance to Northern Arizona and Southern Utah.
Car Rental
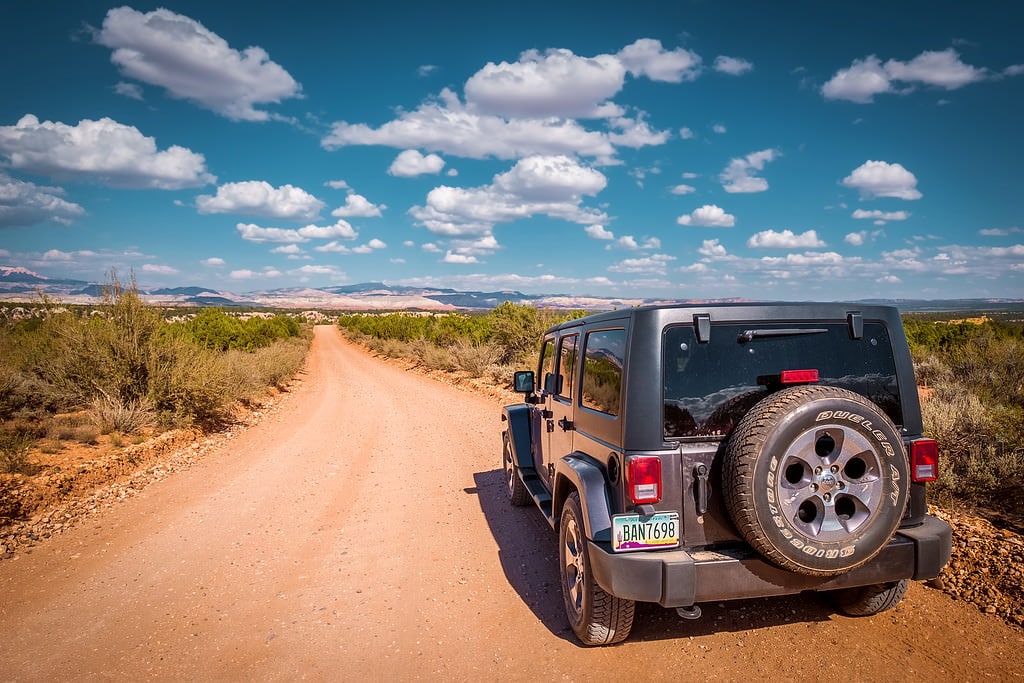
Next, the challenge is to rent the right car. Since we were planning to do lots of dirt road driving, I absolutely wanted a four-wheel or an all-wheel drive car.
When booking the car a month in advance, I selected the Toyota 4Runner class of car and specified we needed at least an AWD model in the comments. But, I guess no one reads customer comments because when we arrived at the car rental hub in Phoenix, there was no AWD model available. After long negotiations, they upgraded us two levels and gave us a new GM Traverse, which is a full-size SUV.
Although it was overkill for two people, it saved us a couple of times during those stormy nights since we could comfortably sleep in it.

Food
The final challenge on the first day was to load up on food.
The goal is to have enough provisions to stay off the grid for at least seven days. We approach this task strategically and know the precise list of items we need to buy.
The first stop is always Walmart where we purchase a cooler. Since it is impossible to bring a cooler or even camping chairs on the plane, we always buy these items on the first day of our trip and then leave them behind on the last day at the car rental when we return the car. Over the years, we have dumped at least a dozen coolers and over two-dozen camping chairs.
In recent years, Walmart made traveling much easier because of the Ship To Store service. Now, I can shop for supplies online from the comfort of my home and, if the particular store does not have it in stock, they will ship it to that location free of charge. All I have to do is stop at the store and pick it up at the counter.
I love it!
The second stop is at Costco where we load up on provisions. This is another advantage of traveling in the United States—your Costco membership goes a long way. We load up on produce, cheeses, and our favorite California wine.
Normally, we are ready to start our trip at this point but, this time, I made another short stop in Phoenix.
Specialty Food
I discovered that when you are on long camping trips where you have to cook on a daily basis, the most strategic food to have on hand is Russian-style canned meat. It has its origins in the Soviet military during the Cold War. The meat, which is mostly beef, was stored across the country in bunkers to feed the military in the event of war.
The biggest advantage of this particular type of meat is that it could be stored up to 10 years at room temperature.

This type of canned meat is still popular in Russia and is available at any Russian food store across North America. What makes this meat ideal for camping is that you can have a nutritious and tasty dinner in just minutes. Cook rice in boiling water for eight to nine minutes until it is ready. Dump the contents of the can into the rice. Since the meat already has plenty of spices in it, dinner is ready. It is fast and reminds me of my childhood.
We stopped at the Russian grocery store in Phoenix and bought six cans of Soviet-style canned meat. By then, it was late afternoon when we left Phoenix and headed toward Flagstaff.
Quick Stop in Sedona
It is a two-hour drive from Phoenix to Flagstaff, leaving us with only a couple of hours to spare for a short stop at Sedona. Instead of driving to Sedona using Arizona’s busy State Route 89A, we decided to test the off-road capability of our rental car and drove through the mountains taking the rough and rocky Schnebly Hill Road.

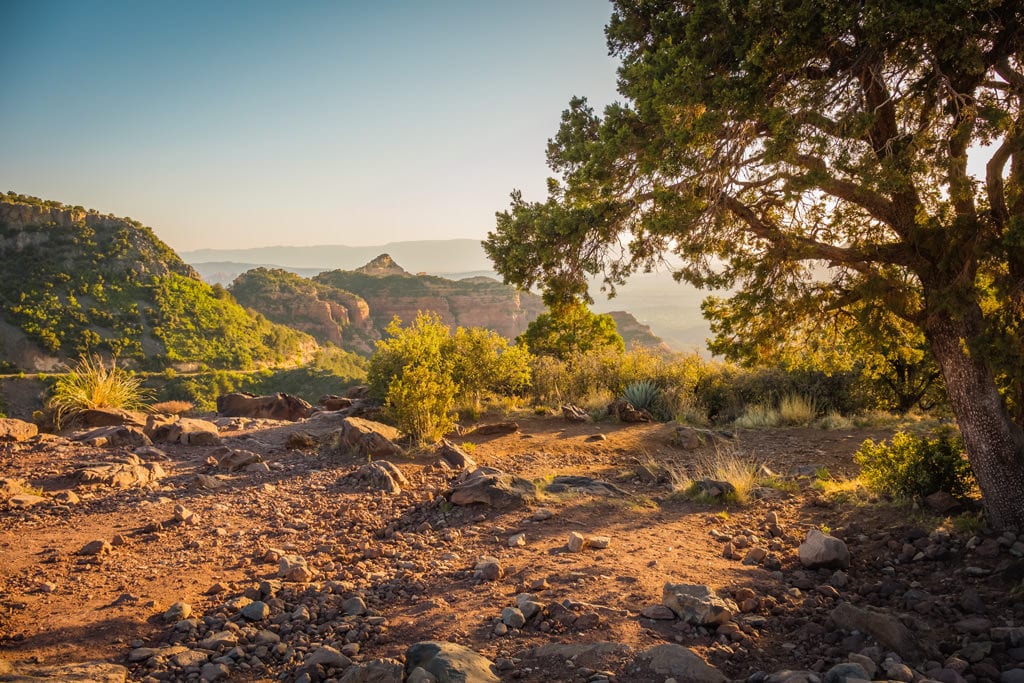
Because of poor road conditions, it took us a while to reach Schnebly Hill Vista Overlook where you have a nice view of Sedona Valley. Unfortunately, the weather was unfavorable for photography. The air was hazy with no clouds in the sky. The only way to capture the Sedona Valley view was to shoot directly into the harsh sun.
Schnebly Hill Vista Overlook
The good news is that we managed to test the off-road performance of our rental car, which performed admirably. We reached a small motel on the outskirts of Flagstaff after sunset and were ready to start a real adventure the following day.

Southwest National Parks Road Trip: Day 2 – Vermillion Cliffs
On the second day of our southwest trip, we faced our first challenge—we did not have a place to stay for the night.
Originally, our extended driving trip to the southwest was planned for mid-September but I realized in early April that we could squeeze the trip in during the second part of May.
This meant that I only had a short time to plan.
What I did not realize was that the third week of May, prior to Memorial Weekend, is the start of summer’s high tourist season. As a result, all the campgrounds, even huge ones like those in the Grand Canyon, were completely booked.
Luckily, this was not my first visit to the area and I had a few tricks up my sleeve.
A few years ago, I came across a unique campground while I explored the Vermillion Cliffs National Monument area. One half of the campground is located in Utah and the other half is in Arizona. For that reason, it is called the Stateline Campground. It is buried deep in the mountains and the only way to get there is by taking a 25km dirt road drive.
There is no staff at the campground and there are no reservations. It works on a first come, first serve basis. There are only nine spots available and it is completely free. I knew that not many people were aware of the place, so we had a good chance to score a spot there.
Our plan for the day was to drive to the Stateline Campground, claim our spot, and dedicate the rest of the day to hiking in the Vermillion Cliffs.
The Grand Canyon Detour
It is a 300km drive from Flagstaff to the Stateline Campground, but we did not want to arrive too early to ensure people who stayed the previous night had time to pack and leave.
We had plenty of time to swing by the Grand Canyon’s Desert View point. We had two reasons for the 100km detour.
First, I wanted to purchase the National Parks Annual Pass, which costs $80 and is good for all US National Parks and all areas managed by National Park Services. We learned a long time ago that the annual pass saves a lot of money for travelers like us.

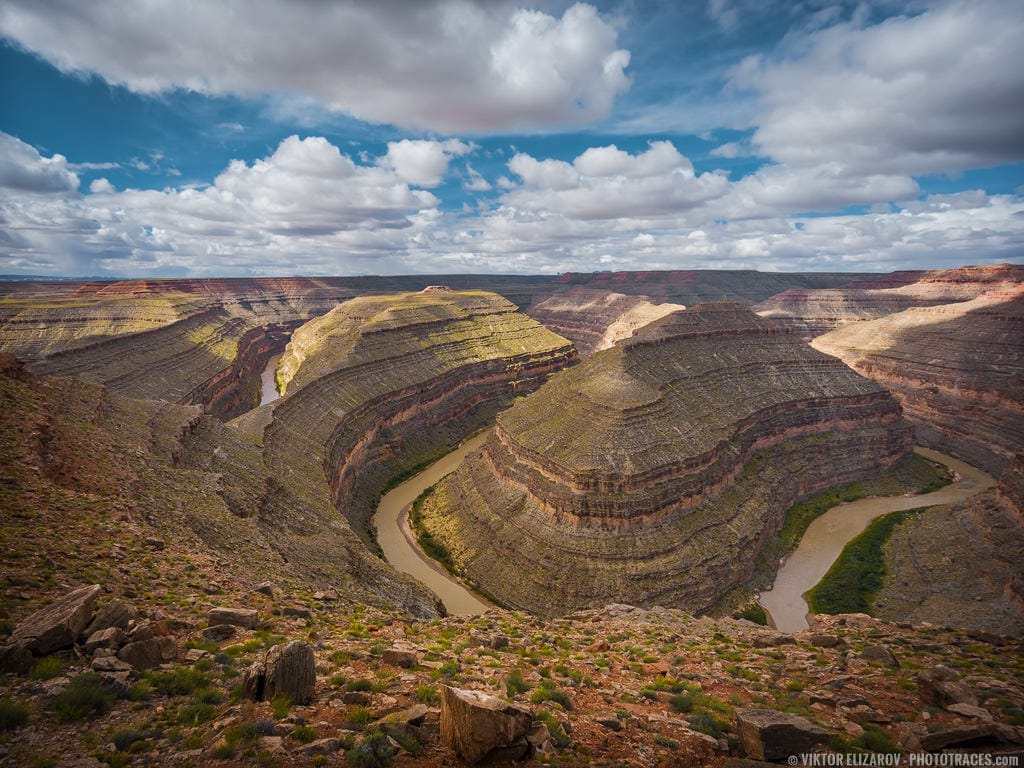
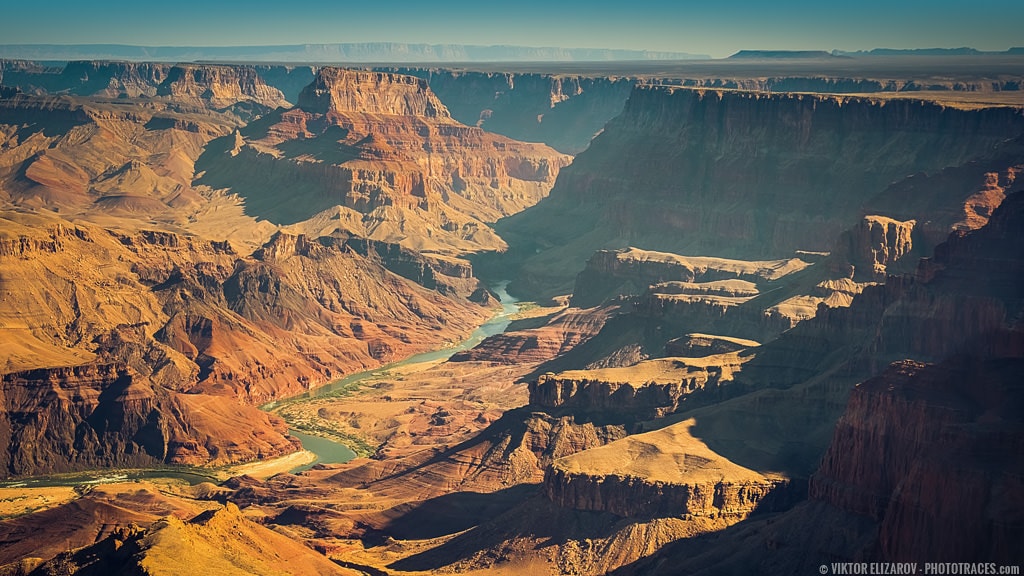
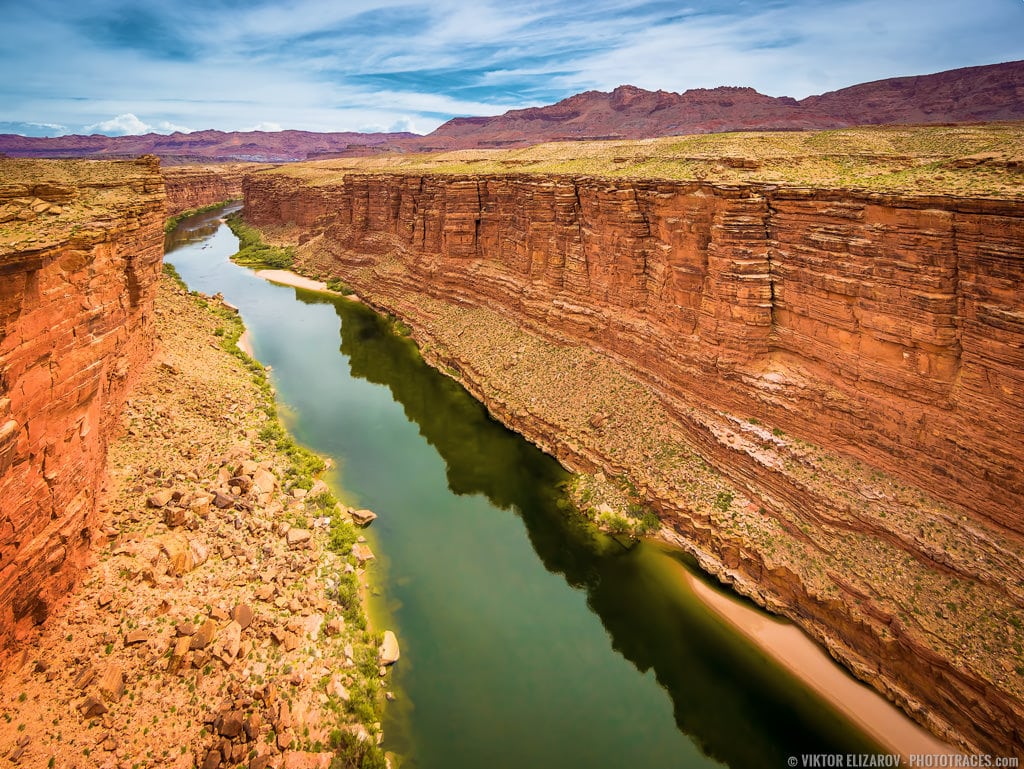
Second, the Desert View on the easternmost point of the Grand Canyon is one of my favorite places in the park. It has a wide, unobstructed view of the Colorado River below and the desert area adjacent to the canyon. Plus, you can hike down pretty far from the observation deck for even better views.
The best time to visit and photograph the Desert View is around sunset (duh), but I was happy to visit it early in the morning. Since we did not have plans to visit the Grand Canyon during our trip, this was our only chance to catch a glimpse of its greatness.
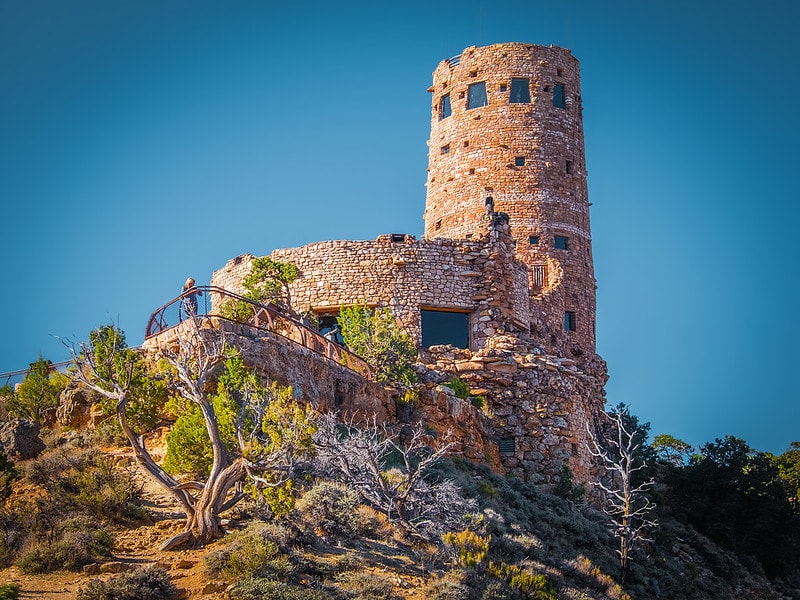
It was my first time to visit the Desert View earlier in the day and it was the first time the historic Watchtower was open. We climbed to the top of the tower and I even had a chance to take some HDR shots, shooting from the darkness of the interior toward the bright morning light.
Please remember, this was my first major trip where I brought my new Fujifilm setup. I used every opportunity to test my new Fujifilm XT2 camera.
Scenic Route 89A
When I planned my very first driving trip to Arizona and Utah, I realized that I had to drive an average of 450km per day to visit every place I wanted to see. This scared me a bit at first.
I later realized that driving or transitional days are sometimes more exciting and spectacular than the destinations themselves. When you drive through Northern Arizona and Southern Utah, the elevation constantly changes and, subsequently, the climate zones change as well creating an incredible variety of landscapes. Hours spent driving are fun and the time flies by fast.
This is how I felt driving from Flagstaff along Route 89 towards Utah.
When you reach the Bitter Springs, you must decide between taking Route 89 or Route 89A (alternative).
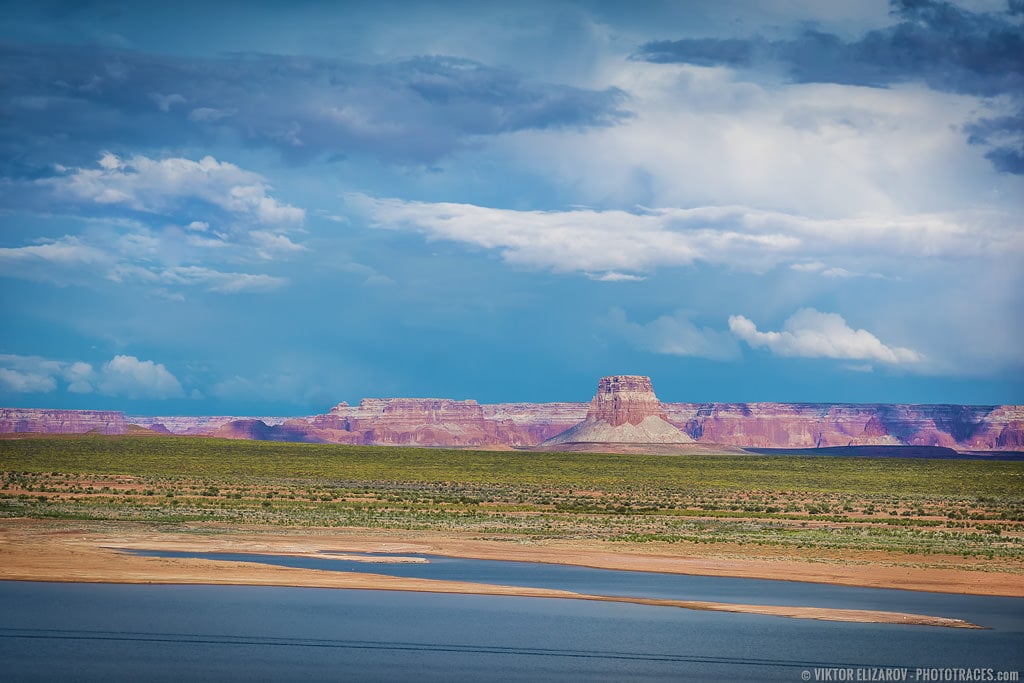
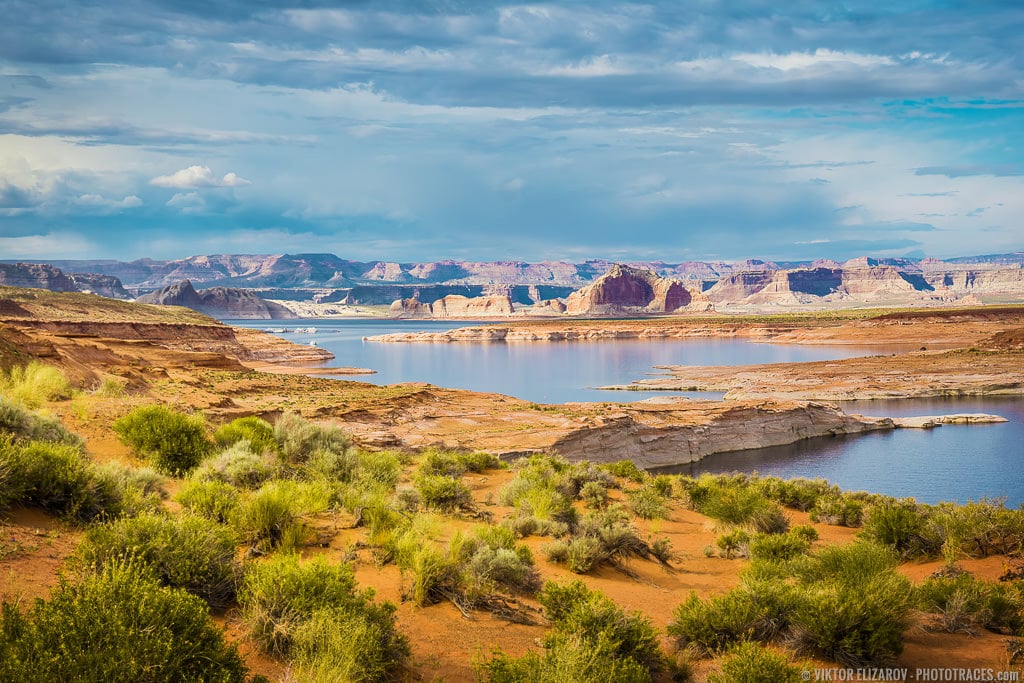
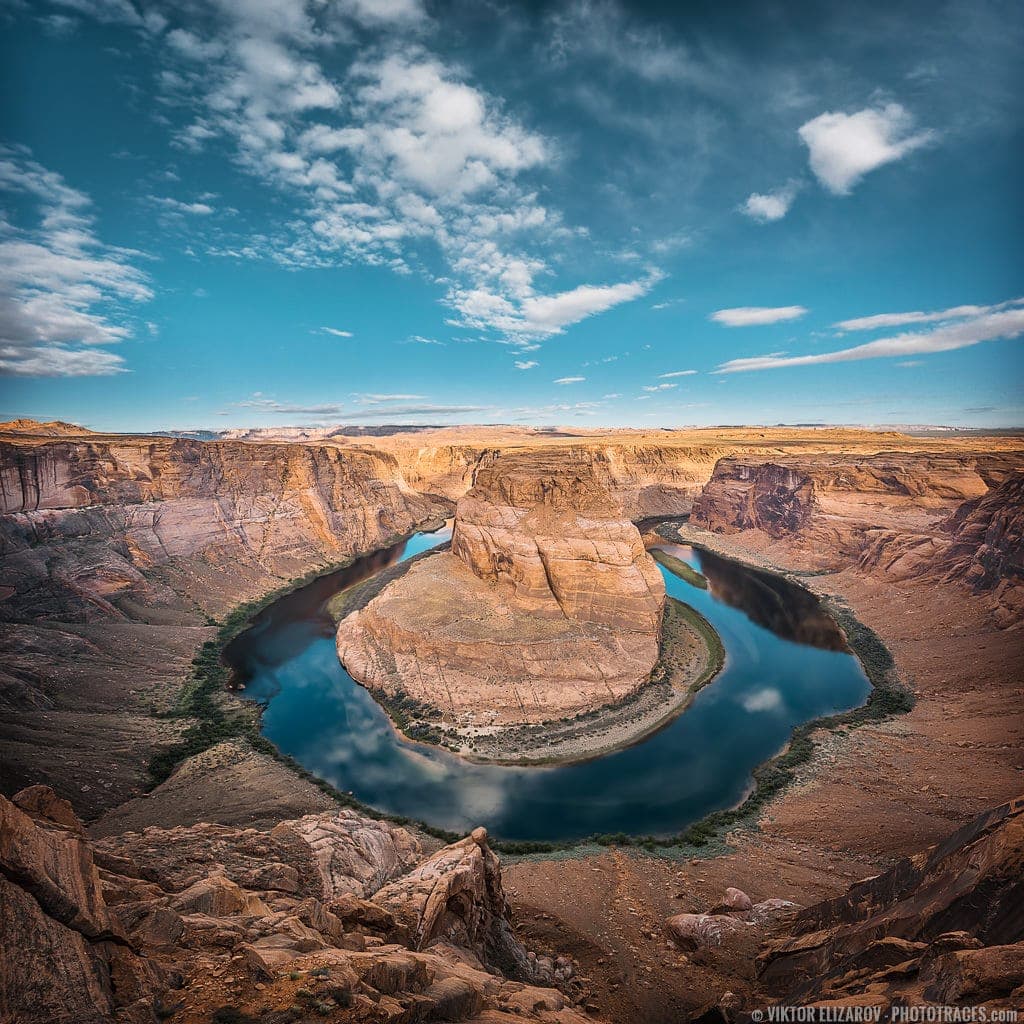
If you stay on Route 89, you have the opportunity to visit Horseshoe Bend, Glen Canyon Dam, and Lake Powell. It is absolutely worth visiting these places, but you have to be ready to face crowds of tourists everywhere.
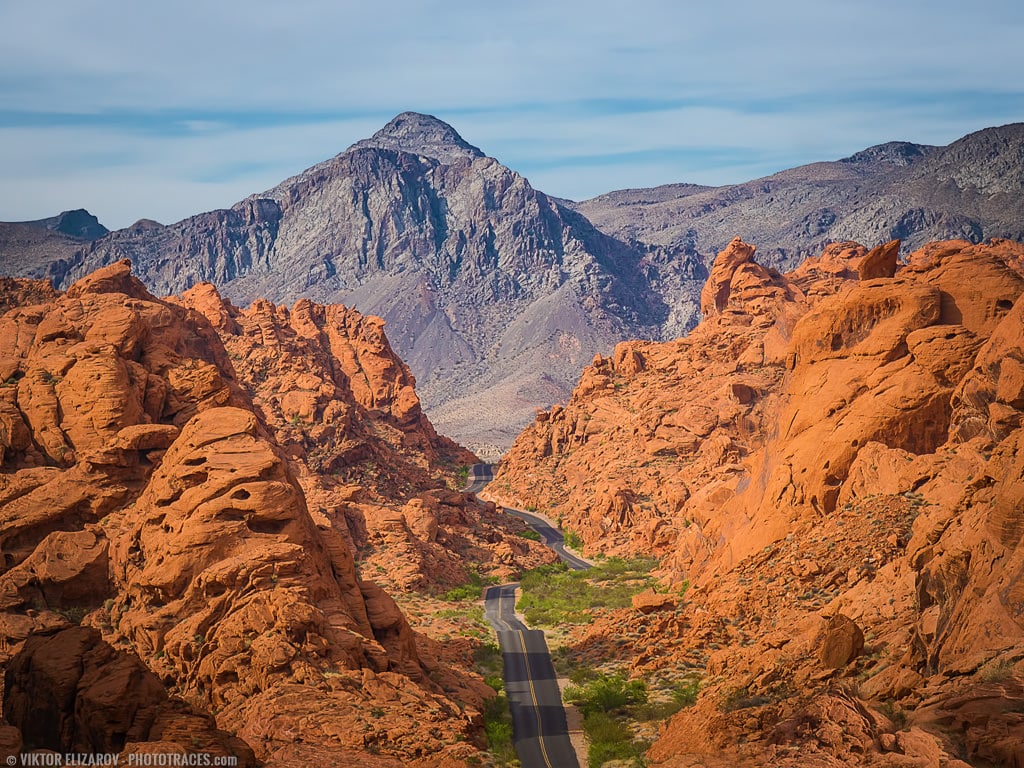
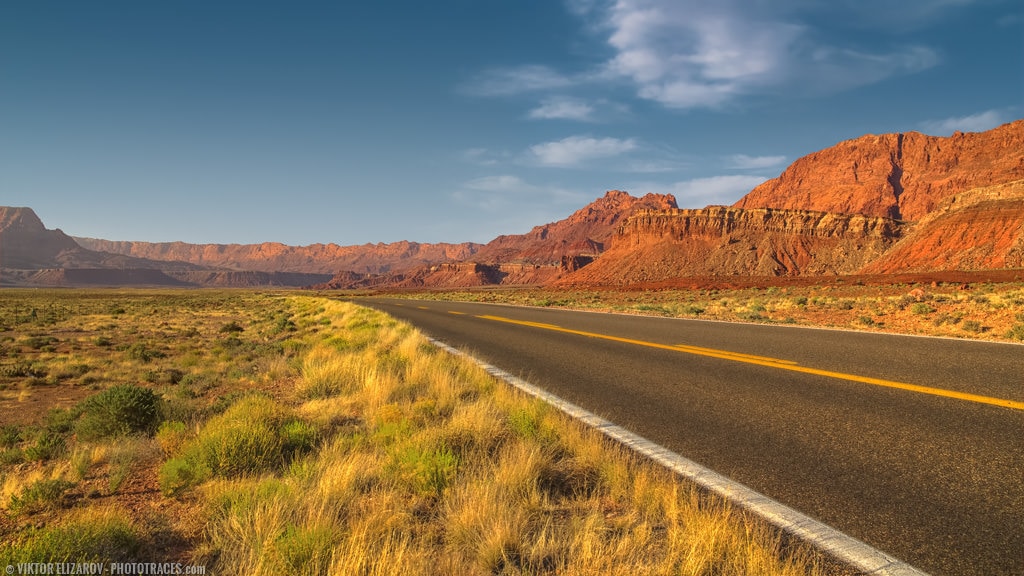
If you take Route 89A, you will experience one of the most beautiful drives along the Vermillion Cliffs and cross the Navajo Bridge with the Colorado River below. And, you won’t see many people around.
When I have a choice, I always pick Route 89A.
It was late morning when we turned on Route 89A. We had enough time to hit all our favorite spots along the way.
Echo Cliffs
For the first 20km or so, you drive in the valley with the Echo Cliffs along the right with the Vermillion Cliffs in the distance. In the middle, the Colorado River runs deep through the Marble Canyon.
Navajo Bridge
The next stop is the Navajo Bridge. The original bridge was built at the beginning of the 20th century as a one-lane bridge. When the new, modern bridge was constructed in 1980, the original bridge was preserved as a pedestrian crossing bridge.
Walking across the bridge provides us with the opportunity to take photos from unusual and unique vantage points. You can even set up a tripod.
I never miss an opportunity to walk across the bridge and enjoy the view even when the weather is not ideal for photography.
Glen Canyon
Glen Canyon is the recreation area run by National Park Services, which means we had a chance to use our new Annual Pass for the first time. It is a short drive through a deserted area with dramatic rock formations and almost no vegetation.

Lees Ferry
Lees Ferry is the only place in over 1000km where you can access the Colorado River by car. Before the Navajo Bridge, Lees Ferry was the only spot where travelers could cross the river between Arizona and Utah.

These days, it is the most popular spot for the departure of Colorado River and Grand Canyon multi-day rafting tours. The longest tour lasts almost two weeks!
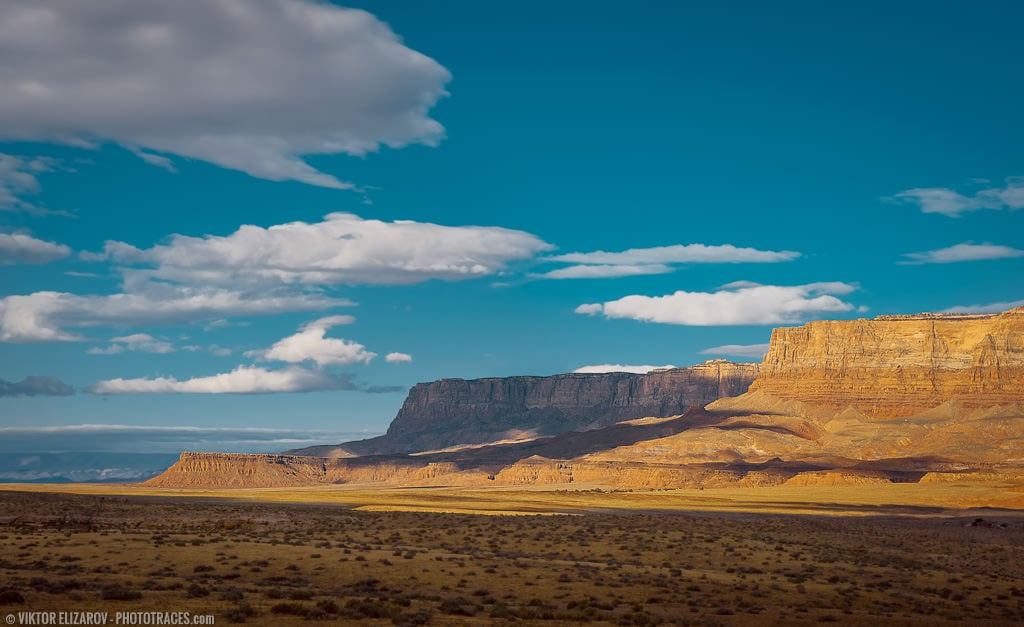
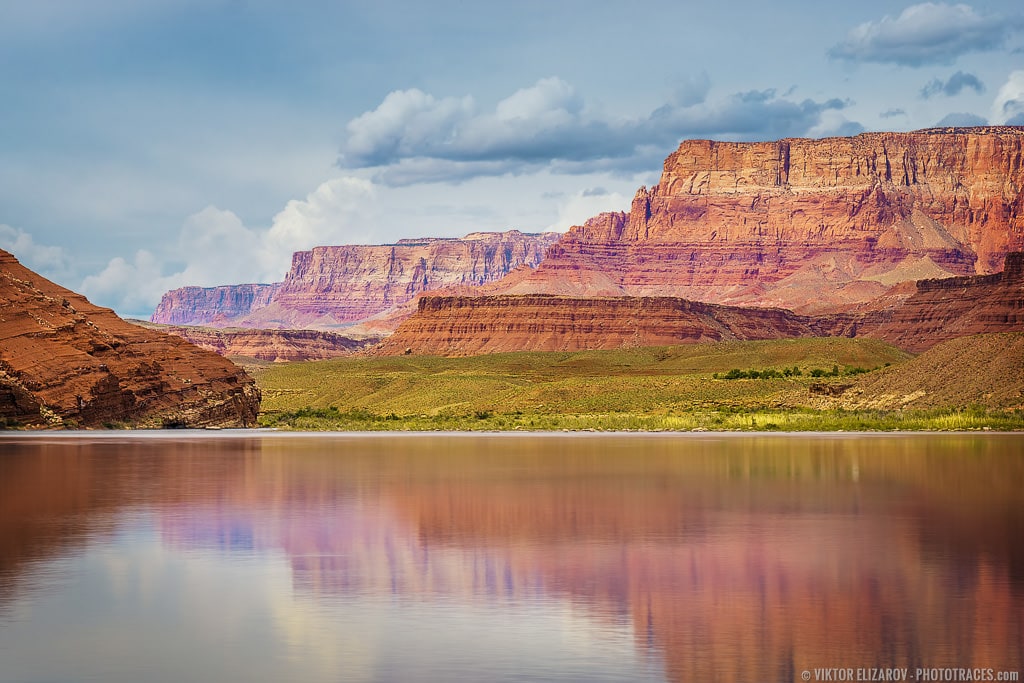
Vermilion Cliffs Valley
The final stretch of the Route 89A drive runs through a beautiful valley along the Vermilion Cliffs. It is a 45km drive with an empty road ahead, endless plains on the left, and the Vermilion Cliffs so close on the right that it feels like you can reach out and touch them.


House Rock Road
Just before you reach the end of the valley and the beginning of the mountainous road toward the Grand Canyon’s North Rim, we turn right and head to House Rock Road.
The Vermillion Cliffs is a vast, mountainous area with Route 89 running along the northern border of the national monument, Route 89A running along the southern border, and House Rock Road running through the mountains.
Related: Exploring Utah’s Backcountry – Cottonwood Road
House Rock Road is a dirt road and, in some places, is fairly rough but it provides access to some of the most spectacular locations in Northern Arizona and Southern Utah. The road is extremely popular among hikers and photographers.


Stateline Campground
We arrived at Stateline Campground early in the afternoon and found that eight of the nine campsites were empty. We picked the best spot, had a quick lunch, and drove north on House Rock Road.


Buckskin Gulch
Last year, the highlight of our trip was our visit to Wire Pass Slot Canyon in the same area of the Vermilion Cliffs.
This year we decided to explore the Buckskin Gulch trail.

Of course, our first choice was to visit the elusive the Wave Canyon, but since it has become such a popular spot among photographers, the Utah Bureau of Land Management has limited the number of visitors to 24 per day. You have to go through a lottery process to obtain a pass, which means Wave Canyon was out of reach for us.
Maybe next time.
We spent the second part of the day hiking along Buckskin Gulch trail, which is a long, flat hike that is not very demanding.


We walked through a series of small valleys accessing each of them through narrow passes between the cliffs. Each valley had a distinctive look with different rock formations and vegetation. Everywhere we turned, we were accompanied by wild rabbits.
Over a four-hour hike, we met only one other hiker—a German man who regularly visits Utah and Arizona. This made our complaints pointless that Eastern Canada is too far from the Southwest.


It was a very hot day with temperatures approaching 30C, but as soon as the sun disappeared behind the mountains, the temperature dropped immediately. We had to dig out warm clothes to enjoy our soviet style beef dinner by the fire.
By sunset, the campground was full with some hikers forced to sleep along the side of the road.
At night, temperatures were close to freezing but we did not feel it. We were exhausted and slept like babies.
Southwest National Parks Road Trip: Day 3 – Bryce Canyon
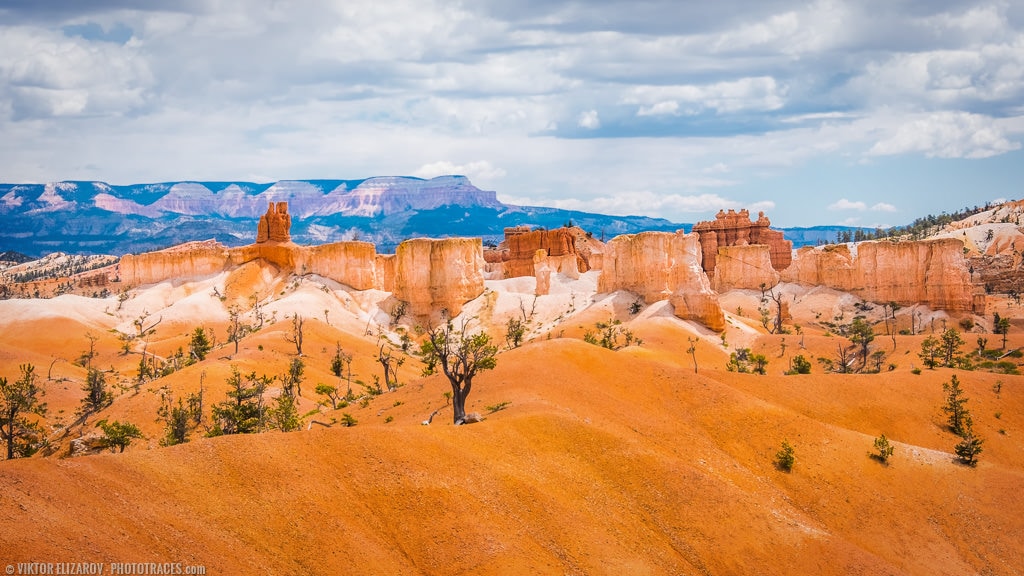
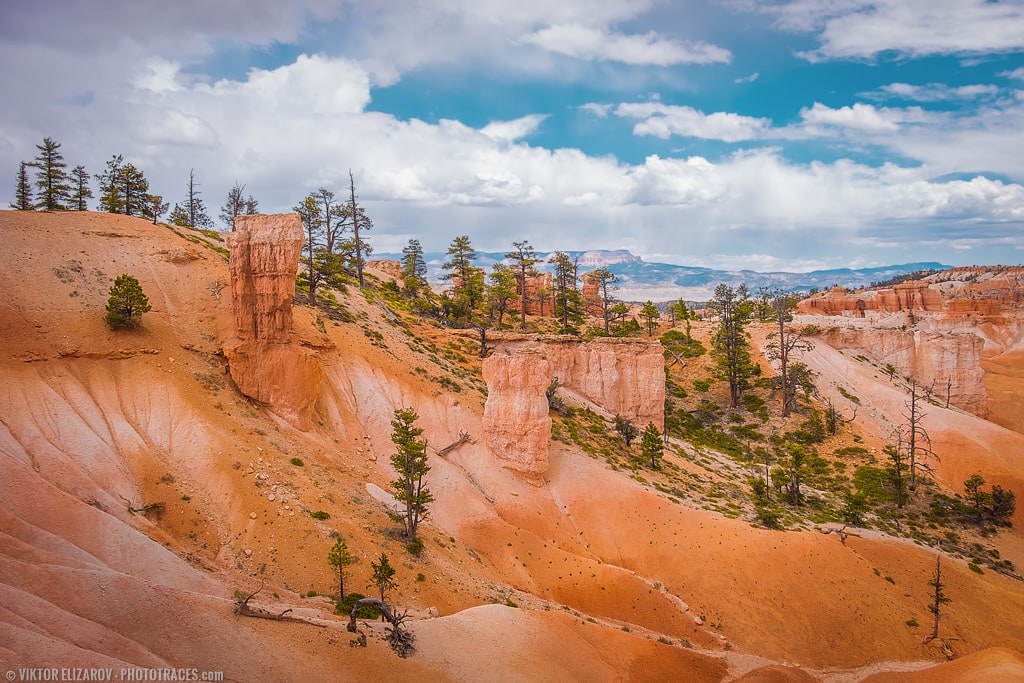
Day three of our driving trip was dedicated to Bryce Canyon National Park.
Bryce Canyon National Park has a special place in my travels and in my photography. I consider the park to be the most visually striking and among the most unconventional places I’ve ever visited. It has such an unusual combination of colors and shapes that it is hard to believe the canyon is a natural occurrence and not some modern artist’s funky exhibit inspired by a wide range of hallucinogenic drugs.
Even after visiting Bryce Canyon numerous times, it keeps drawing me back again and again.
But, visiting the canyon has its own challenges.
First, compared to other national parks in Utah like The Grand Canyon, Zion, or Capitol Reef, Bryce Canyon is relatively small. But, in recent years, it’s become a very popular destination and it is packed with tourists during its peak season from May to October.
The good news is that most tourists are lazy. 90% of Bryce Canyon visitors only explore the park by driving along its 17 miles of paved road, stopping at vista points along the way for pictures. If you start hiking down to the bottom of the canyon, you will find yourself in solitude only in 10 to 15 minutes.
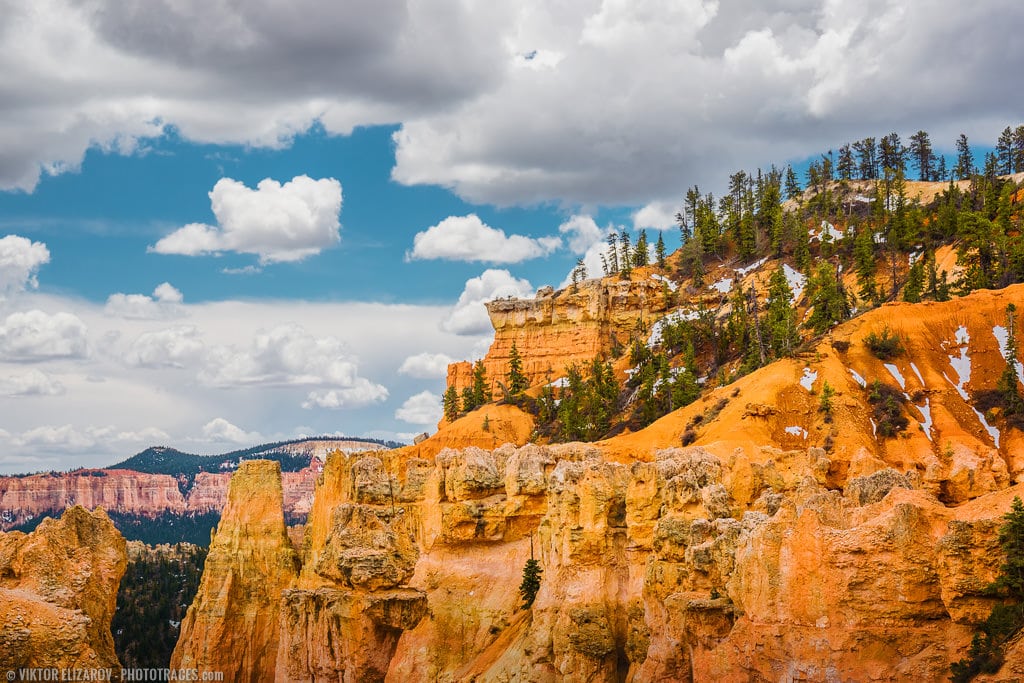
To fully experience Bryce Canyon, you must hike down to the canyon and explore it from the inside.
The second challenge in visiting Bryce Canyon is the weather.
During my very first trip to Bryce Canyon in the middle of May, I entered the park in the morning wearing a t-shirt with plans to enjoy the warm sunny day. You can imagine my surprise when I found myself in the middle of a heavy snow storm by early afternoon. I had to cut my visit short.

The following year, I was chased away by freezing rain and attributed my misadventures to bad luck. But, I later realized that Bryce Canyon is situated at an altitude between 2,000 and 2,700 meters, which means that even in summer you should expect anything. Chances are, if you start exploring Bryce Canyon when the weather is nice, make sure to pack a rain jacket and warm clothes in your backpack.
From the Vermillion Cliffs to Bryce Canyon
It is a 200km drive from the Stateline Campground to Bryce Canyon and our goal was to ensure we arrived at the park before 9:00 a.m. to beat the crowds.
We woke at sunrise and started our regular morning routine by making two batches of coffee using our trusted AeroPress. The AeroPress is a lightweight coffee press that allows you to manually make espresso in just minutes. Over the years, it has become an essential part of all my travels.
The drive to Bryce Canyon took us from the Vermillion Cliffs National Monument to the Escalante National Monument. It is a spectacular drive and the 200km passed by incredibly fast.
In the middle of the drive, I realized that I had once again miscalculated our arrival time.
Arizona and Utah belong to different time zones. When you cross the state line from Arizona into Utah, you change from the Pacific to the Mountain time zone. I learned this long ago, but I still fall into the same time zone trap again and again.
While traveling to the southwest, it is common to cross the Arizona-Utah state line multiple times throughout the day. The time zone change always complicates things for photographers attempting to calculate the sunrise and sunset.
This means that instead of arriving at Bryce Canyon at 9:00 a.m., we arrived around 10:00 a.m. and the park was already full. Our final destination was Sunset Point, which we had to circle for 20 minutes just to find an available parking spot.

The Way to Explore the Bryce Canyon
Since there are so many exciting places to visit in Bryce Canyon, it can be overwhelming when you visit the park for the first time. After visiting Bryce Canyon on numerous occasions, I would like to share with you a few tips on how you can get the most out of exploring the beautiful park.
- If you only have a couple of hours to spare while visiting Bryce Canyon, drive the 17-mile Road 63 that winds along the rim of the canyon and takes you from one observation point to another. You will see and photograph some of the most iconic spots in the park like the Amphitheater and the Natural Bridge.
- If you have an extra hour after completing the drive along the rim, visit Sunset Point. Take the short Navajo Trail, which takes you all the way down to the bottom of the canyon and back. You will experience the famous switchbacks of Wall Street.
- If you have an extra two to three hours, take a combination of the Navajo and Queen’s Garden trails. This is a 4km loop trail that takes you to the bottom from the Sunset Point. After hiking at the bottom of the canyon, you climb up at Sunrise Point. Then, you can complete the loop by walking from Sunrise Point to Sunset Point along the rim of the canyon. This is one of the most popular trails in the park, so it can be especially crowded in the middle of the day during peak tourist season.
- If you have an entire day to spare at Bryce Canyon, add the Peekaboo Loop Trail to your itinerary. It is a longer and more demanding hike, but you will get the full experience of Bryce Canyon.
- If you have dedicated multiple days to explore Bryce Canyon, you probably do not need my help. You will have plenty of time to combine multiple trails into your personal and customized itinerary. And, if you are adventurous enough, you can even camp at the bottom of the canyon. Just remember that you will need a permit to camp overnight.
Day Long Hike: Peekaboo Loop Trail
In our case, we hiked down from Sunset Point and spent the rest of the day exploring the less-visited corners of the canyon without following any specific trails.
Once again, the most challenging part of the hike was the weather. It was a humid and hot day, but a short cold rain started at least 10 times throughout the day. We had to go through the routine of constantly putting on and taking off our rain gear time and time again.
I started the hike with the Fujinon 10-24mm f/4 lens attached to my Fujifilm xT3. But, since my favorite wide-angle lens is not weather sealed, I had to hide it every time it started raining. After a few hours of this routine, I was fed up. I swapped the 10-24mm lens with the 18-135mm lens that is weather sealed and spent the rest of the day taking multiple shots for wide-angle panoramas.


Southwest National Parks Road Trip: Day 4 – Kodachrome Basin State Park
We had to make radical changes to our plans during Day Four of our driving trip to the southwest.
It was a day of both disappointment and excitement.
When we drove from the Vermillion Cliffs to the Grand Staircase Escalante National Monument, we had two goals. First, we wanted to dedicate one full day to explore Bryce Canyon, which we managed to complete on Day Three. Our second goal was to drive the Cottonwood dirt road from Bryce Canyon through the heart of Escalante back to the Vermillion Cliffs.
We wanted to spend a couple of days in the Coral Dunes State Park campground.
It was impossible to accomplish our second goal.
Due to rainy weather the previous few days, the Cottonwood road was closed. Since most of the dirt roads in southern Utah consist of clay, they become unpassable when they are wet regardless of the type of car you drive.

The scenic Cottonwood Road is 80km long with the first 15km paved. The rest is a twisty dirt road made of sand and clay. We decided to drive along the paved part to see if we could find something worth exploring and photographing. This was when we made the biggest discovery of our entire trip. We stumbled upon an area with a strange name – Kodachrome Basin State Park.
It is a relatively small region surrounded from the north, east, and west by spectacular cliffs in a stunning combination of red, white, and pink hues. Plus, over 60 sand pipes are randomly erected throughout the area. The signature sand pipe that defines the basin’s appearance is 50m tall and is visible from a great distance.
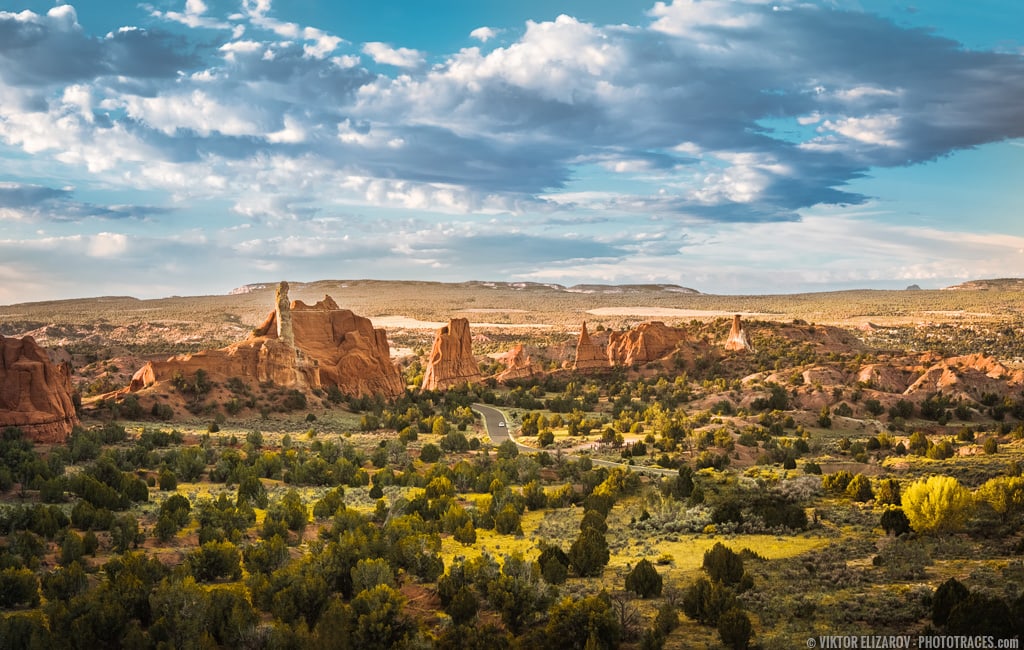
After spending a few hours hiking in the park, I realized that the Kodachrome Basin is a goldmine of opportunities for any photographer. I knew I absolutely needed more time there.
This was when we made the most significant change to our itinerary. We abandoned our plans to return to the Vermillion Cliffs area and, instead, we spent the next three days in the Kodachrome Basin.

We were lucky to score the only available spot in the park’s campground. We loved the Kodachrome experience so much that, for our next trip to Utah four months later, we made the park our headquarters for the entire trip. We reserved the camping spot in the park for 10 days and spent over a week driving the dirt roads and exploring southern Utah’s beautiful backcountry.
Name Origin of Kodachrome Park
The name of the area has its origin in 1947 when National Geographic photographers visited the area and featured it in the magazine the following year. They named it after a new brand of film made by Kodak that defined color film photography.
The Kodachrome brand was the first color film made commercially available to the general public.
The name, however, does not sit well with me. It bothers me. It does not make any sense to name a natural wonder after modern brand names. As a photographer, I understand the importance of Kodak in defining photography and the role Kodachrome played in the origin of color photography, but naming the basin after Kodachrome does not seem appropriate.
Only 70 years later, the name Kodak reveals a shortsighted significance and an unwillingness to embrace modern photography, which makes it irrelevant. It is like renaming Yosemite after Adobe Photoshop because of Photoshop’s role in revolutionizing photography in the last 20 years.

But, I guess an even worse scenario would be to name a natural wonder after Microsoft Windows.
What do you think about the name Kodachrome? Does it bother you? Leave your comments below.


Southwest National Parks Road Trip: Day 5 – Utah’s Scenic Byway 12
After three days of day-long hikes, we chose to take it easy and dedicated the entire day to a driving trip.
For a long time, I wanted to drive Utah’s Scenic Byway 12, which is arguably one of the most beautiful drives in the world. Because it offers some unique and distinctive scenery that cannot be found anywhere else, it is designated an All-American Road.
I have driven along some stretches of the Scenic Byway 12 over the years, but I never had a chance to complete the entire drive.
The Scenic Byway 12 is located in Southern Utah and connects Bryce Canyon National Park on the west and Capitol Reef National Park on the northeast. The 200 km road runs through the Dixie National Forest, the Grand Staircase–Escalante National Monument, the switchbacks of Hogback, and Boulder Mountain.
The elevation varies from 1,000 m to 3,000 m and, as a result, provides incredible variations of landscapes from the deserts of Capitol Reef and the alpine meadows of the Aquarius Plateau to the narrow canyons of Escalante and the mountainous forests.

We did not have any specific plans when we started the drive early in the morning. We just wanted to enjoy the experience of a day-long drive through the most rugged and remote areas of the southwest.

Driving Through Escalante Canyons
The stretch of road from Escalante to Boulder was built during the Great Recession when the United States government intentionally created jobs for young men without families. The road was known as the Million Dollar Road because it took five years of manual labor without any machinery and using tons of dynamite to build the road through the solid rocks of Escalante.

The Head of the Rocks Overlook provides wide and unobstructed views of the entire area with the Aquarius Plateau in the distance. The view from the overlook is so unconventional that only the switchbacks of the byway remind us that it is a terrestrial landscape and not some alien planet.


The Boulder Mountain Crossing
The Boulder Mountain Crossing is the highest point of the entire drive. It resides at an altitude of 3,000 m. When we started the ascent in the town of Boulder, the temperature was around 22C and, when we reached the Hollow Overlook at the top of the crossing 30 km later, the temperature was close to freezing.
Related: Camping in Valley of the Gods
The view from the Hollow Overlook is overwhelming, but it is not easy to photograph. The main attractions (Henry Mountains, Grand Staircase—Escalante, and Capitol Reef) are spread too far apart at such a great distance that even panoramas do not fully convey the beauty and scale of the scene.


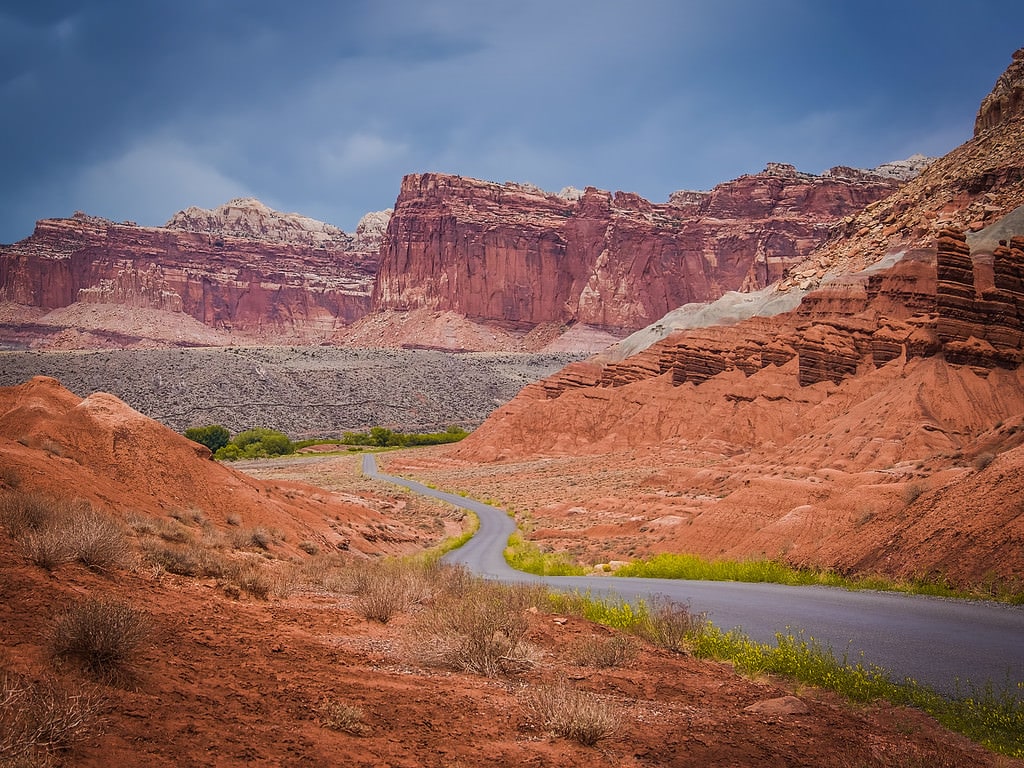
Capitol Reef National Park
We did not have much time to spend in Capitol Reef National Park, so we only drove the 15 km Scenic Drive that takes you deep inside Capitol Gorge. We loved the Capitol Reef experience so much that, four months later, we dedicated three days to drive the dirt roads of Capitol Reef National Park including the Cathedral Valley Drive.

Snowstorm in May
We had a little scare on the way back. We got ourselves into a heavy snowstorm while driving up Boulder Mountain. I am used to driving in snowy conditions during winters in Eastern Canada, but since we rented the car in Phoenix, it only had a set of summer tires that offered absolutely no traction in the snow. I knew about an alternative road that bypasses the Boulder Mountain crossing, but the Burr Trail dirt road was impassable after weeks of rain.
We were lucky because the snow was only falling on the northern side of the mountain. When we started to descend, the snowfall changed to rain and we safely completed our drive.
In total, we drove close to 500 km and returned to our campsite just before sunset. I had just enough time to take some interesting shots in Kodachrome.

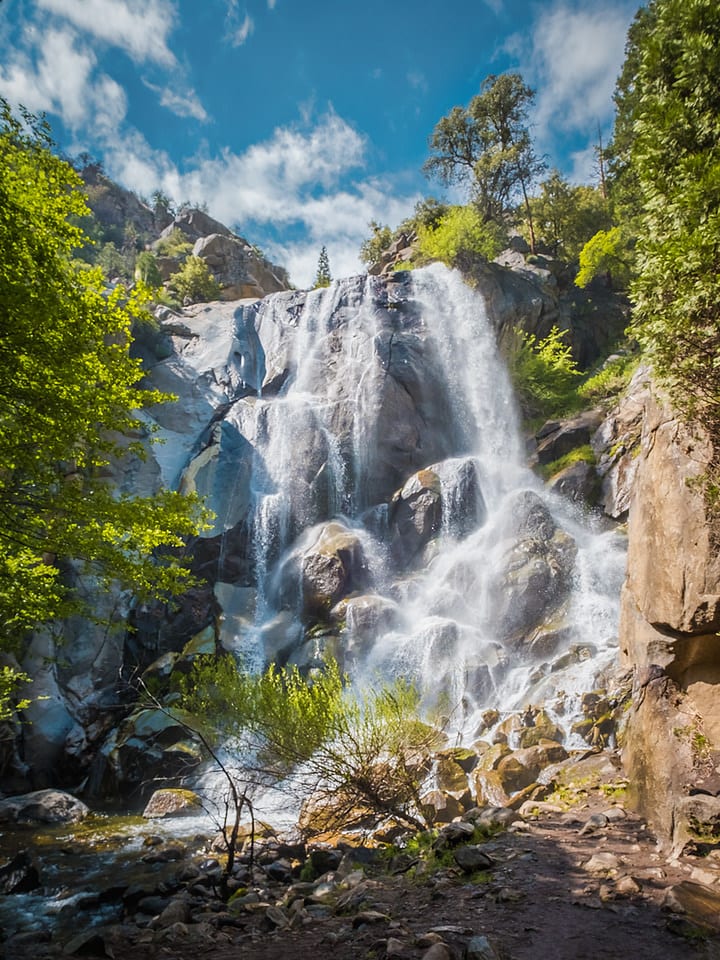
Southwest National Parks Road Trip: Day 6 – Lower Calf Creek Falls
It was our last day in southern Utah. Before transitioning to the California leg of the trip, we wanted to experience the canyons of the Grand Staircase-Escalante National Monument one more time.
After our driving adventure the day before, we were eager to engage in more physically demanding exploration. The choice for the day’s activity was to hike to the Lower Calf Creek Falls. It is arguably one of the most scenic hikes in the region and, as a result, is very popular among tourists.
As a rule, some of the most interesting trails in the Escalante area are located in remote areas. To reach many of the trails, you must drive for tenths of kilometers along dirt roads, some of which are incredibly rough. Next, you typically have to walk an hour or more through the heat of the desert before you reach the trail’s main attraction. Between the dirt roads and the hike, this limits the number of people who reach those areas, which is why you can walk for hours without seeing any other hikers.
The Lower Calf Creek Falls Trailhead is different, however. It is located just off Byway 12 and is extremely accessible, which is why it usually attracts large crowds.

I learned a long time ago that crowds and landscape photography do not work well for me.
Let me explain.
As a landscape photographer, I always wanted to capture the iconic Horseshoe Bend of the Colorado River in Arizona at sunset. One year, I organized my entire trip around achieving my dream. I made sure I stayed near Horseshoe Bend for three nights to increase my chances of taking the right shot.
You can imagine my surprise and disbelief when I found, I kid you not, about 500 people waiting to watch the sunset around the bend. Half of them had tripods and DSLRs. It was mind-boggling to find so many people in such a relatively remote area. It completely spoiled my experience and I left without taking any photos.
Since then, I do my research well in advance and only visit areas where I have a good chance of enjoying solitude and serenity.

To maximize our chances, we planned our hike on a weekday. We woke up at sunrise and, after a one-hour drive along the spectacular Byway 12, we arrived at trailhead parking before 8:00 a.m. We were rewarded for our research and planning with only two other cars in the parking lot.
The Lower Calk Creek Falls Trail is a 10-km out and back trail, so we knew that we could enjoy complete solitude for a couple of hours. The entire trail follows Calf Creek and is hidden inside the deep and narrow canyon. The trail itself looks like an oasis with plenty of vegetation along the creek surrounded by vast desert-like areas without any signs of life.
The final destination for the trail is a dead-end at the beautiful Lower Calf Creek Falls. After enjoying the Falls, you must turn around and walk back. Luckily, the trail is so beautiful and spectacular that it feels like an entirely new trail on the way back.
When we reached the Falls, we found only one other person there and, 10 minutes later, we were completely alone. I had the freedom to experiment with different compositions without worrying about anyone walking into the frame.

The hike is flat with almost no elevation but almost the entire trail is covered with sand, which makes it much more demanding than it looks.
After visiting southern Utah for years, we were not surprised that even on a hot day with temperatures around 30C, we experienced two bouts of freezing rain.
When we returned to our campsite that afternoon, we had plenty of time to unpack and get ready for the long 1,000k drive from the deserts of southern Utah to the Sierra Mountains of California.


Southwest National Park Road Trip: Day 7 – Death Valley National Park
The seventh day of our southwest adventure was a transitional day. The Utah leg of our trip was over, and we headed to our next destination—the Sequoia National Park. The 900km drive takes you through Utah, Arizona, and Nevada all the way to the Sierra Mountains of California.
Having driven the route before, I knew what to expect. It is always difficult to adjust to driving six to seven hours on a busy freeway after spending a week navigating small, empty roads where something new and exciting awaits you around every corner.
To make the boring drive through the deserts of Nevada more exciting, I plotted a detour through Death Valley National Park. Even though we only had three to four hours to spend there, it was better than nothing. We also needed to replenish our food supply, so we scheduled two stops in Las Vegas at Costco and Walmart.
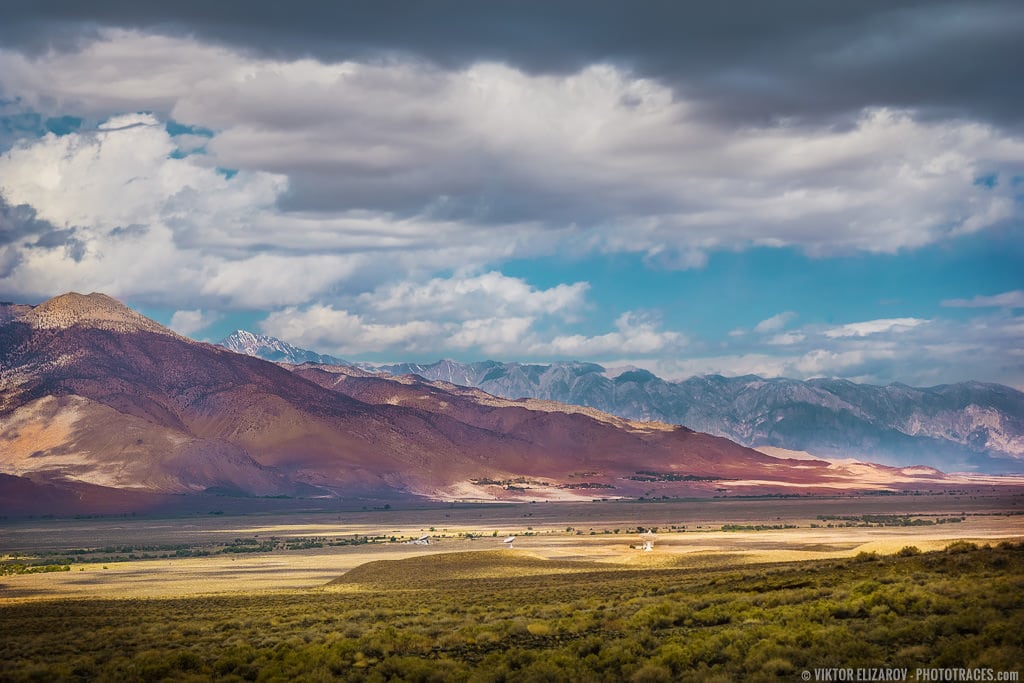
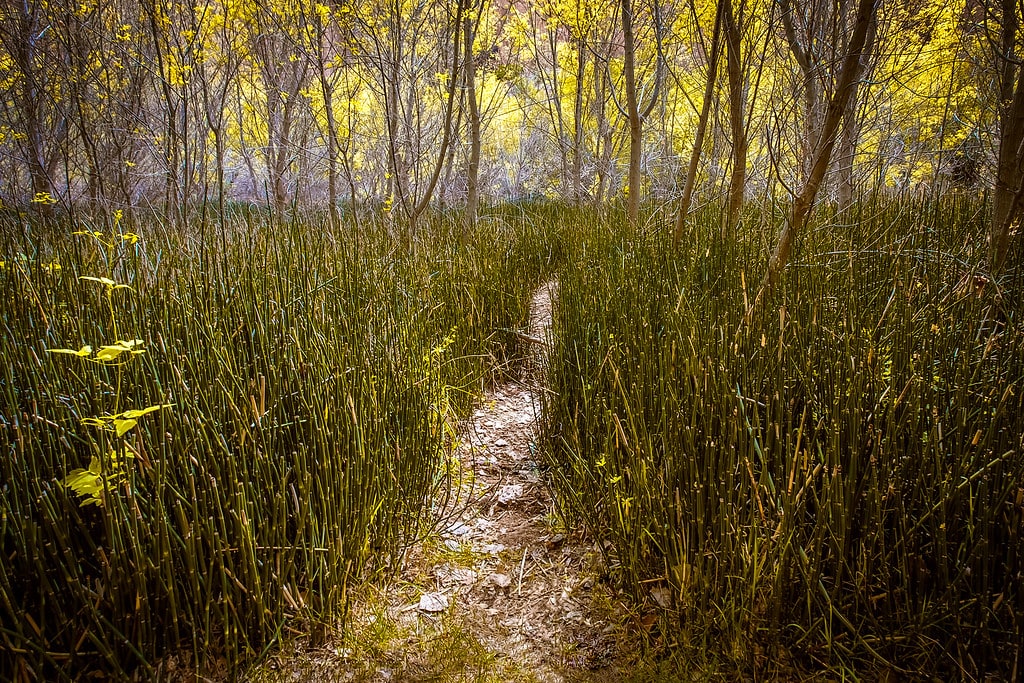
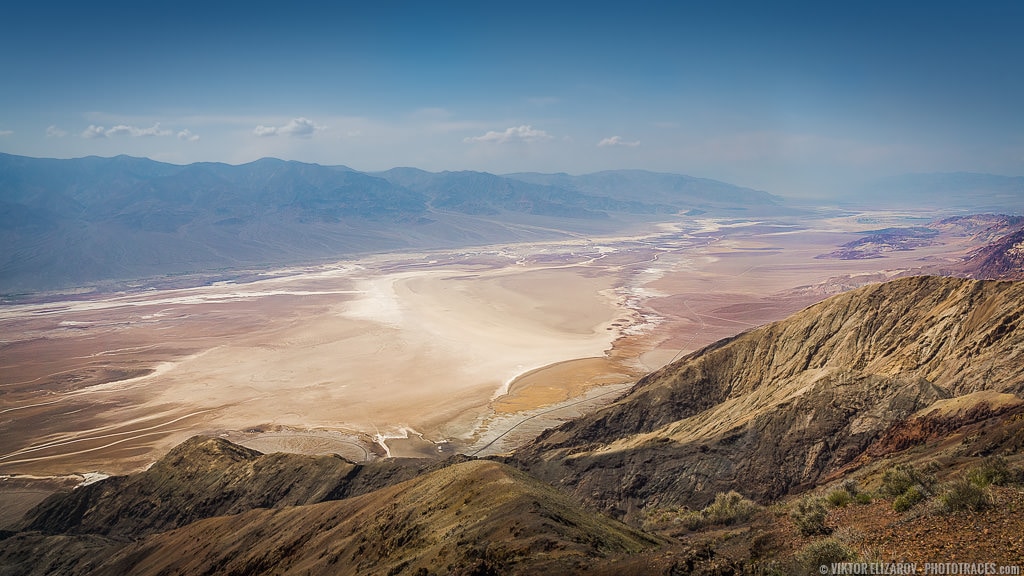
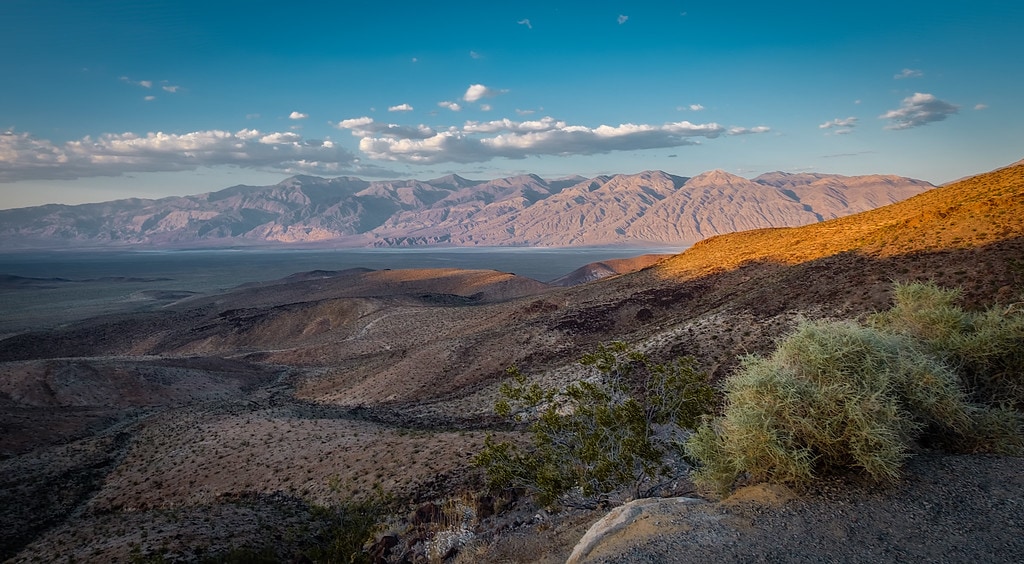
All in all, it was an uneventful day until we passed Las Vegas and took a less traveled road to Death Valley. I always get excited about the approach to Death Valley because the drive is visually striking as you transition back and forth between valleys below sea level to high mountains again and again.

Although the weather was not very exciting in terms of photography with hazy air and zero clouds, I still managed to take a few interesting shots. Plus, after two years of construction work, Dante’s Peak was open and we visited the new observation point at the top of the mountain.


We ended the day in a tiny motel nestled on the side of the road in the mountains of the Eastern Sierra.
I excitedly anticipated my first visit to the Sequoia National Park the following day.
Southwest National Park Road Trip: Day 8,9 – Sequoia National Park
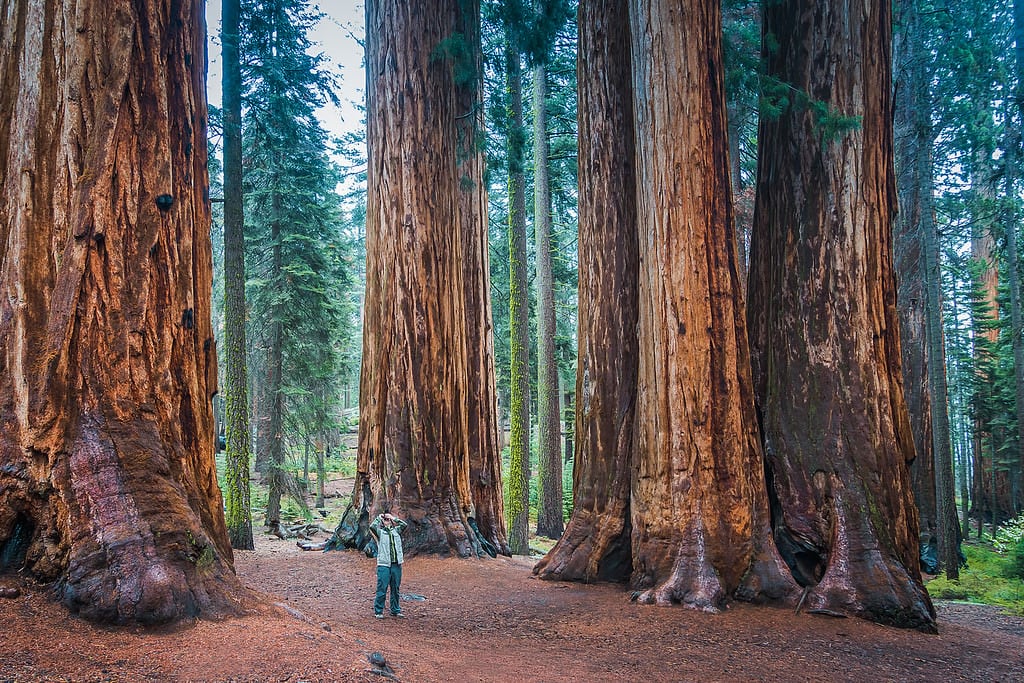
The California leg of our southwest driving trip kicked off with a visit to Sequoia National Park. Since I have never been to the park before, I was excited in anticipation of facing and photographing the forest’s iconic giants.
We woke up before sunrise in the eastern Sierra and were ready to take the 200km drive to the western slopes of the Sierra Mountains that is home to the Sequoia National Park.
We had two driving options. We could take the freeway and drive around the mountains through the desert or we could drive smaller roads through the mountains and face multiple high mountain passes. You can guess which option I chose. Of course, we took the rollercoaster drive instead of the boring desert road. But, since my wife is afraid of heights, I had to convince her with the promise of unforgettable views.
It was a beautiful sunny morning and nothing suggested trouble ahead.
During the first hour, we drove down the narrow, empty roads that took us through a series of small valleys where we saw California’s famous and picturesque farmlands.

We stopped for a quick coffee break on the shore of Lake Isabella. The weather was beautiful, exactly what you would expect in California at the end of May.

That all changed when we started climbing up the first mountain crossing and reached an altitude of 1200m. We realized that trouble was ahead of us since the top of the Sierra Mountains was covered with thick, dark, and rainy clouds.

When we reached the crossing at around 2000m altitude, we were already driving in a thick, milky substance with zero visibility. It was cold, wet, and slippery. I kept our speed at a maximum of 20km/h to ensure our safety.
It was the same pattern for the rest of the drive. When the road dipped below 1200m, we enjoyed warm and sunny weather with beautiful mountain landscapes surrounding us. But as soon as the road climbed to a higher altitude, we had a submarine-like experience where we could only see up to 10 meters ahead of us.
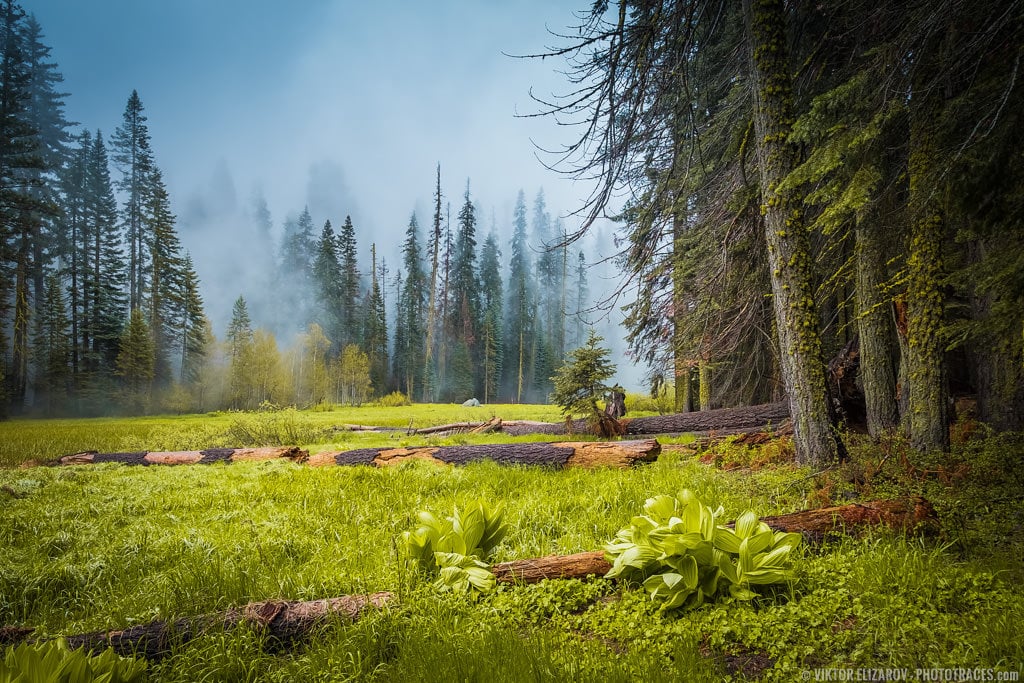
The solution was obvious—if we could spend the next two days at a lower altitude, we would enjoy great weather and avoid the cold and rain. But guess what? The sequoias grow at altitudes between 1500m and 2500m. To see them firsthand, we had no choice but to deal with the wet milky substance and cold weather.
Fortunately, we had a bit of luck on our side.
It was the week of Memorial Weekend and I could not find an opening at any of the campgrounds across the Sequoia National Park. I had to settle for a campsite further away from the park, which happened to be at a lower altitude. This meant that we spent our nights in warmer, dryer weather and drove up and into the mountains during the day.
Had I reserved a campsite in the park’s main territory, the experience would have been truly miserable.
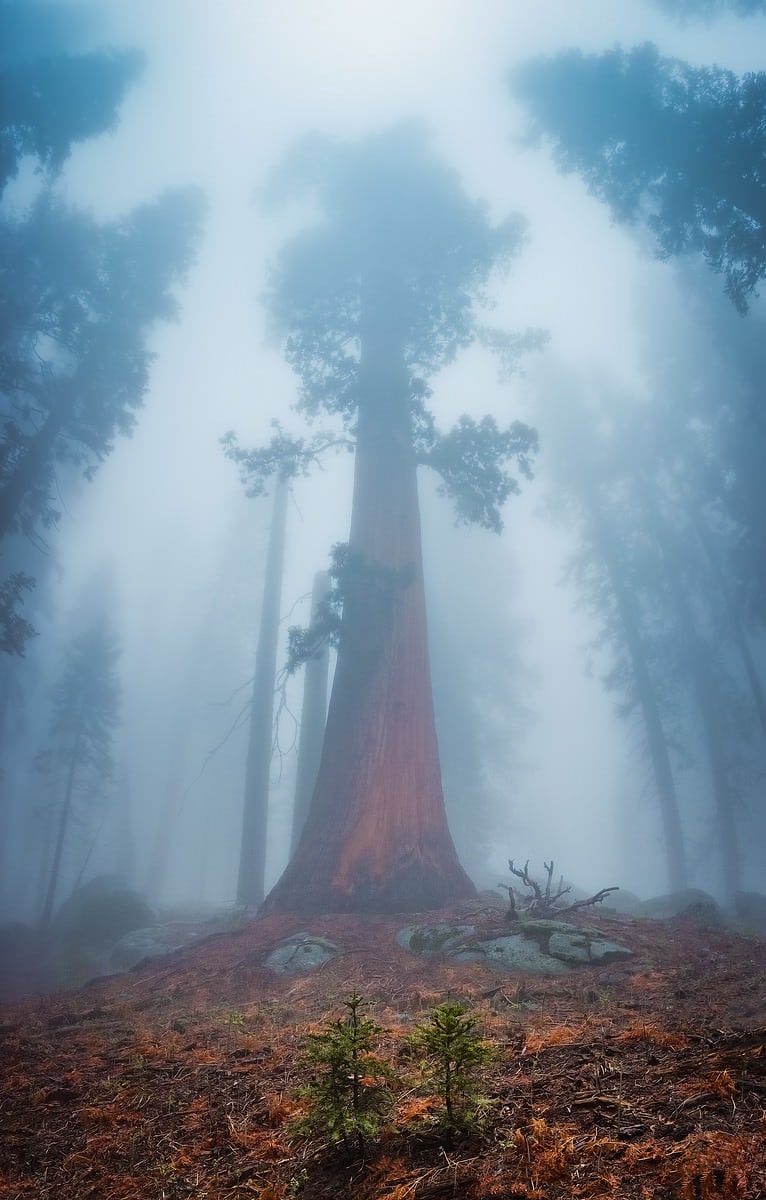
Even though my exposure to the Sequoia National Park was limited due to poor visibility and the opportunities for photos were minimal, it was still an unforgettable adventure. I thought I knew what to expect since I have read all about sequoia trees and seen countless photos of them since childhood. But their size and grandeur exceeded all my expectations.
I will definitely return to the park and hope to have better luck next time.


Unexpected Adventure in Sequoia National Park
While discovering the Sequoia National Park, we found ourselves on a remote and deserted area where we met two unlucky hikers. They spent four days backpacking in the mountains only to end their trip on a bad note when they reached their car and could not find their keys.
We offered them a lift to the closest phone where they could call for help. After we dropped them off at the visitor’s center, we drove straight to our next destination—the King’s Canyon. In the middle of our drive, we realized that one of the unlucky hikers left his backpack in the backseat of our car. We drove all the way back to the visitor’s center where the unlucky hiker was waiting patiently for our return.
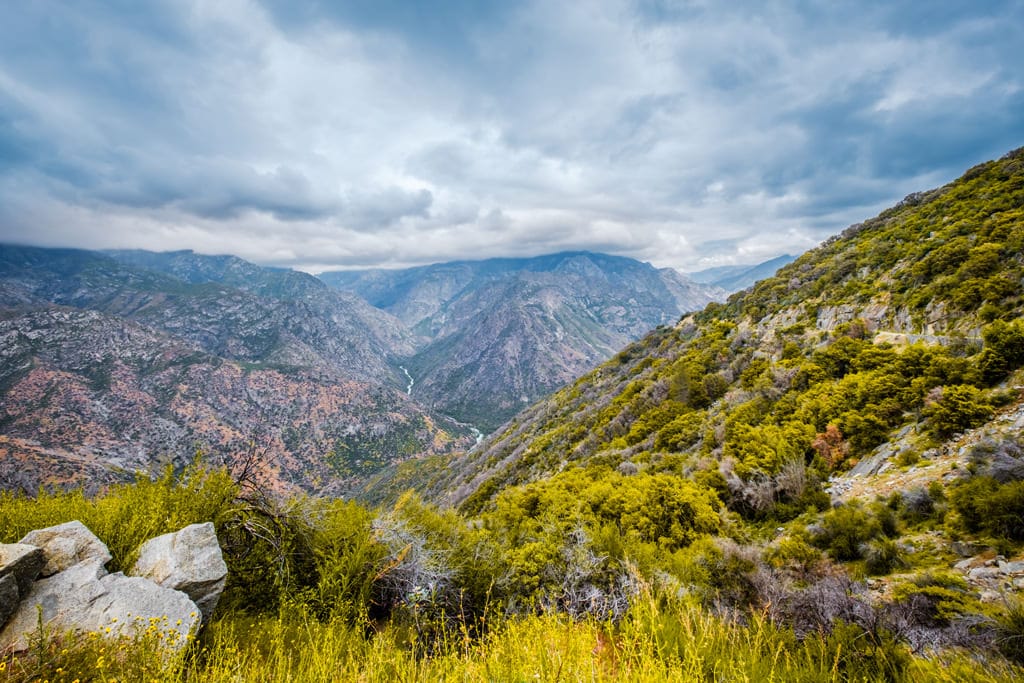
Southwest National Park Road Trip: Day 10 – Kings Canyon National Park
Despite the nasty weather, we enjoyed our first Sequoia experience, but we were eager to leave the higher altitude to enjoy dryer, warmer weather.
The Sequoia and Kings Canyon National Parks are located in close proximity to one another, which makes it a common practice to visit both parks during the same trip. That was exactly our plan.
The drive from Sequoia to Kings Canyon is less than 100 km, but it took us three hours to complete because of the thick fog and zero visibility that made driving the narrow, mountain roads extremely tricky and unpleasant.
Although the drive was treacherous, we were not worried about the weather because I knew that Kings Canyon is at a much lower altitude. We were certain it would be drier and much more pleasant there.
But we had one more pressing issue to solve. Once again, we did not have a place to camp overnight. The day we dedicated to exploring Kings Canyon was the first day of Memorial Weekend in the United States, which meant all the campgrounds had been booked months in advance. Even campsites higher in the mountains where rain and cold weather made it hardly usable and most likely unenjoyable were packed.
Plus, since you cannot camp in non-designated areas in any National Park, we had very limited options for wild camping between the two parks.
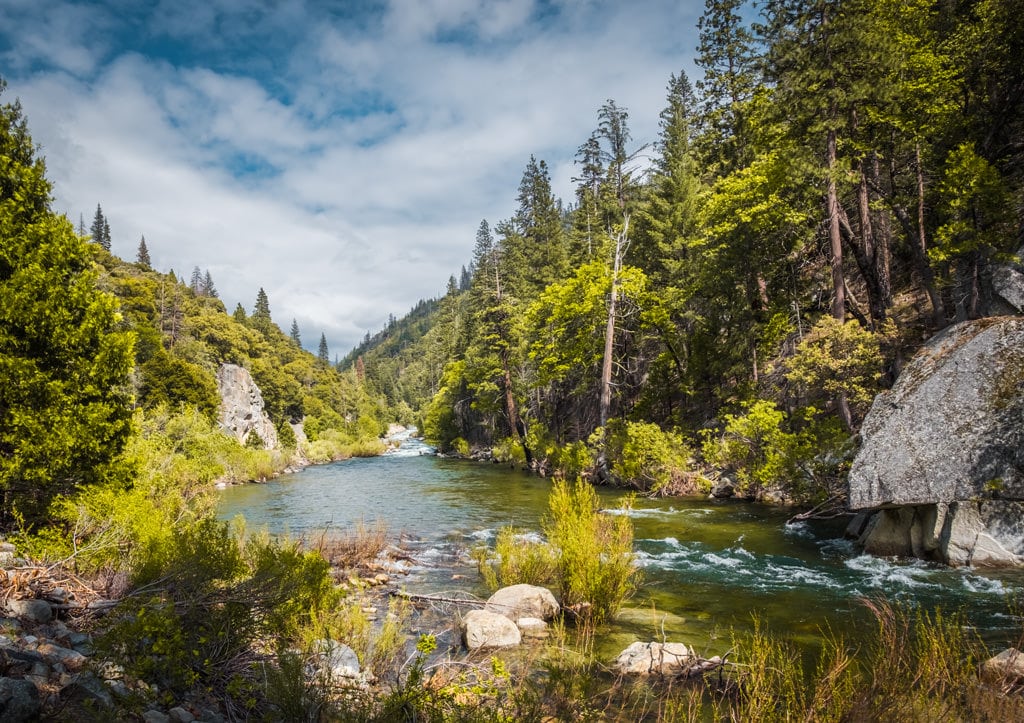
In the end, the internet community helped us find a spot for the night. Visiting freecampsites.net, I found references to a free campground located near the entrance of Kings Canyon National Park. It is located just off the side of the road on the beach of the Kings Canyon River. Since you cannot book the campground online, very few people know about it.
When we entered the campground around noon, we could not believe our eyes—all eight campsites were vacant, and the campground was completely empty. We grabbed the most secluded spot and drove through Kings Canyon and hiked in the park for the rest of the day.
Bear Scare
It was not our first visit to the Sierra Mountains, so we knew about the high chance of encountering bears in the mountains. Normally, bears do not pose a danger to people since the only reason they usually approach tourists is to steal food. All hikers and campers must be aware of the issue and know how to minimize the risk of a dangerous encounter by properly storing their food, especially at night.
Apparently, Kings Canyon has a high concentration of bears because we have never before seen such preventative measures. There are signs posted everywhere with instructions on how to deal with food while camping and hiking. The general rule is that you cannot leave any food unsupervised further than an arm’s length or it could be stolen by bears.
When you enter the park, park attendants give all visitors a short lecture on bears. Every campground is equipped with metal food boxes and a mandatory rule that campers store their food in the boxes every night. Nearly all the food boxes are deformed by deep scratches made by the bears foraging and trying to claw their way into the boxes for food.
You can also rent smell resistant food canisters that make it possible to hike in the canyon without attracting bears or other animals.

The problem was that our campground did not have any metal food boxes nor were there any park attendants to ask if the campsite was located in a dangerous area.
We stored our food in our cooler and drug it 50 meters away from the campsite. We also decided to sleep in the car.
Nothing happened that night and we found our food intact the next morning.
We only had one day to explore Kings Canyon, which was enough to fall in love with the park. Now, it is definitely on our to do list for our next trip. The plan is to spend three to four days hiking in the mountains. We certainly plan on bringing scent-proof backpacks for an even safer hike.

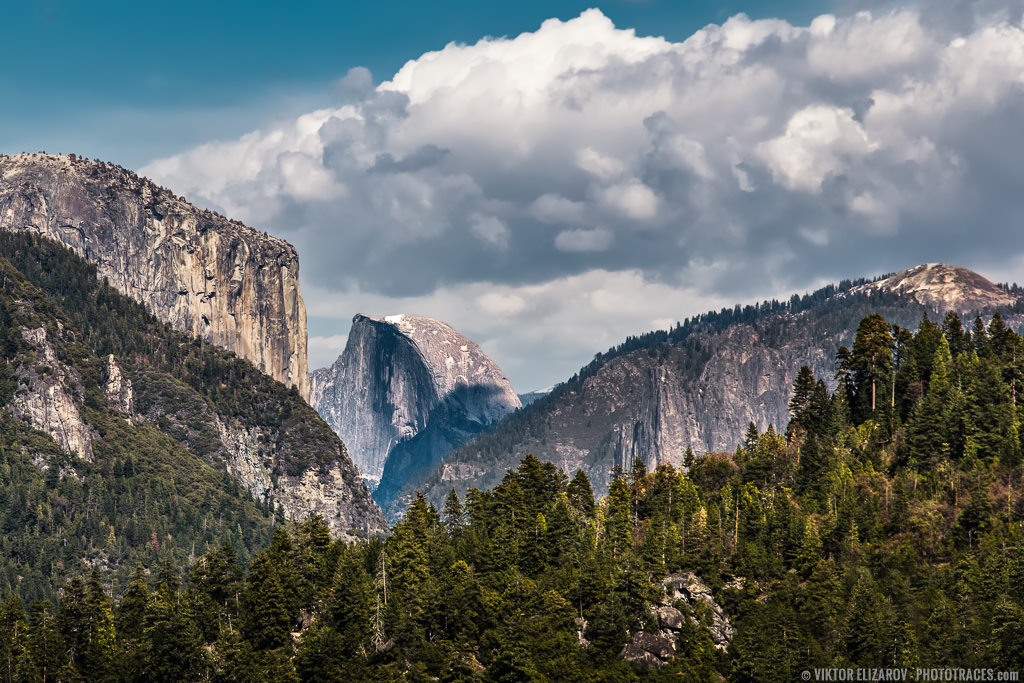
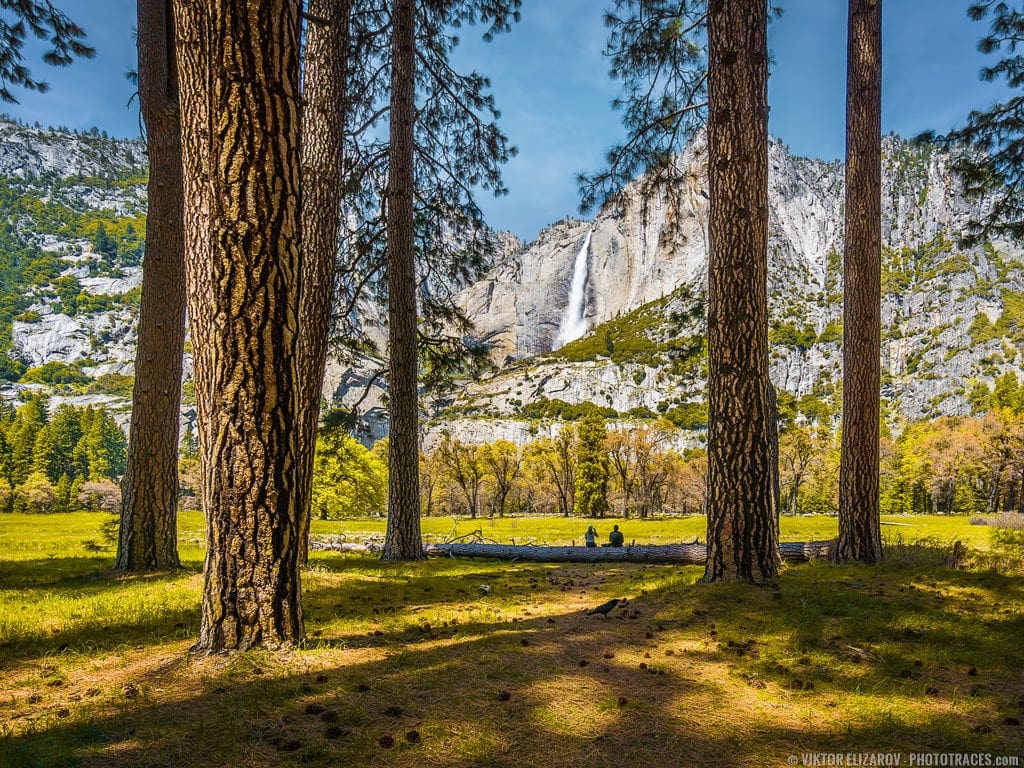
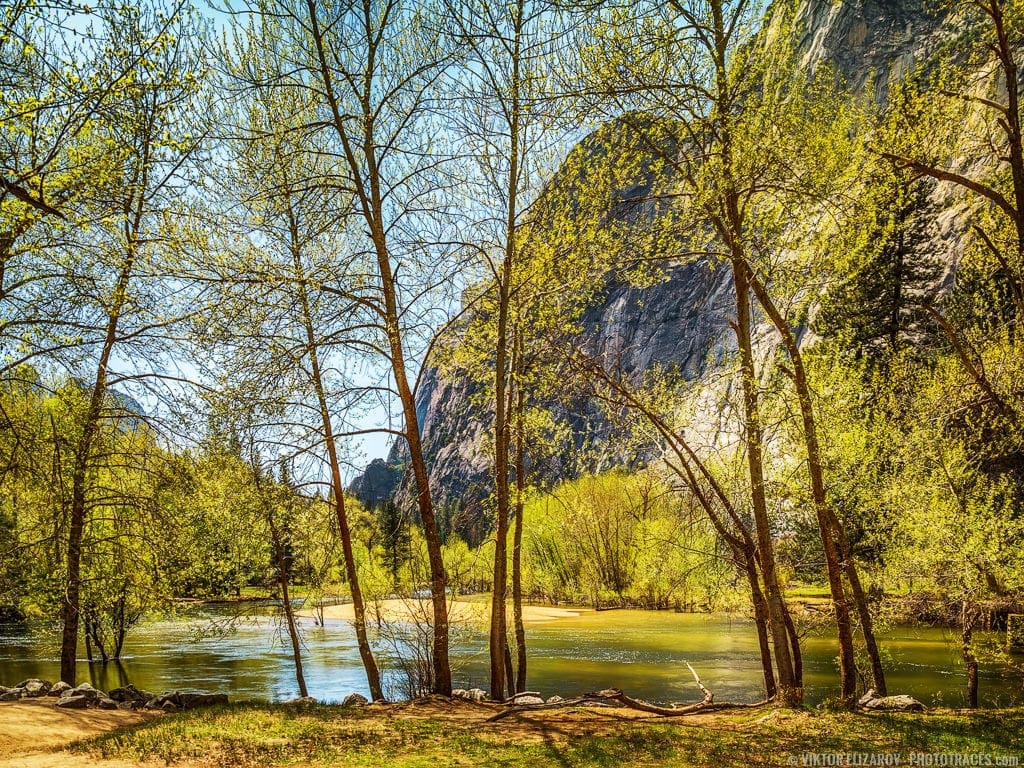
Southwest National Park Road Trip: Day 11 – Yosemite National Park
This was the most disastrous day of our entire trip. It was Saturday of Memorial Weekend, probably the busiest day in the United States when the entire urban population of California drives to the mountains and beaches. We knew what to expect and had a solid plan on how to avoid the crowds. The problem was that we did not execute our plan properly.
The plan was to wake up before sunrise, pack up, and drive directly to Glacier Point in Yosemite to spend the rest of the day hiking away from the crowds. But we woke up a bit later than expected and then packing up and driving took longer than we anticipated. Long story short—when we reached Yosemite, the road to Glacier Point was closed because the parking lot was full.
We were directed to the valley, which was already packed with people. We made a loop in the valley that took us nearly two hours because of the holiday traffic. After only two short stops, we headed straight to San Francisco—the final destination on our trip.

Southwest National Park Road Trip: Day 12-14 – San Francisco
The final destination of our trip was San Francisco. We had three days to spend in one of my favorite cities before we flew back home to Canada.
After spending two weeks in remote areas of the country, it is always a difficult transition back to busy city life. It definitely takes time to reacclimate and readjust to driving 12 lane freeways.
We did not have any specific plans for the final days of our trip beyond some family obligations.
The day before our departure, we drove our favorite road in the Bay Area—Skyline Boulevard. This narrow two-lane road runs almost 90 km along the ridge of the Santa Cruz Mountains and offers some incredible views of the Pacific Ocean to the west and the Bay Area to the east.
We hiked in the Windy Hill area, which offers wide open, unobstructed views of Silicon Valley with Stanford University below.
Next, we went to Half Moon Bay and drove toward San Francisco along the spectacular Route 1.
For an hour or so, we watched dozens of highly skilled surfers on Pacifica State Beach.
In San Francisco, we visited Baker Beach, the original location of the Burning Man.
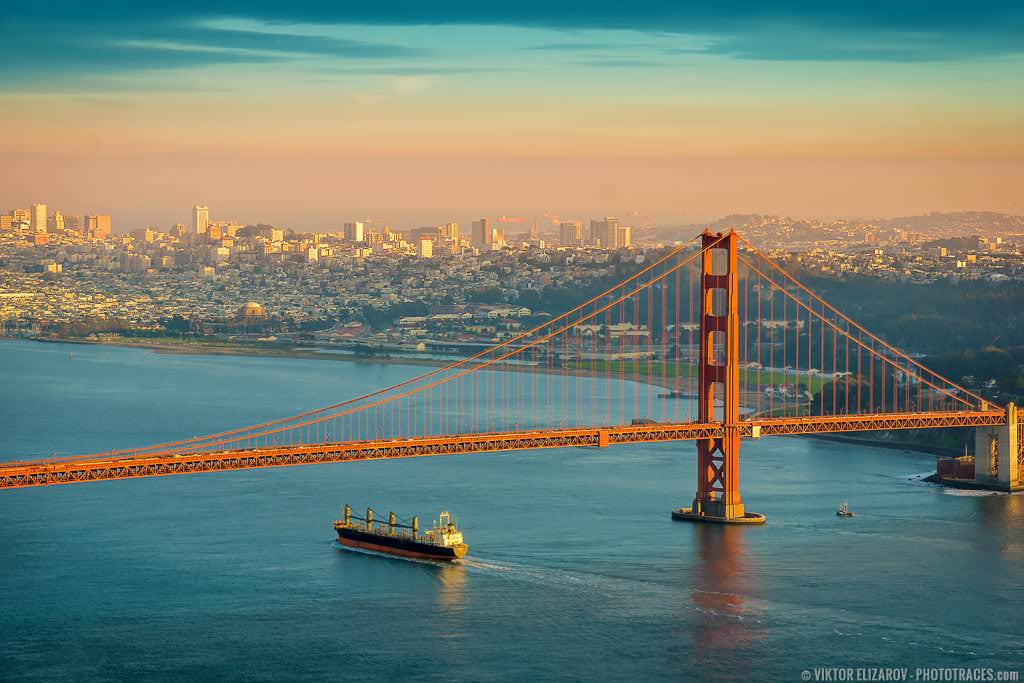
Later, we crossed the Golden Gate Bridge and enjoyed a quiet picnic at Marin Headlands with a spectacular view of San Francisco.
And that was it. Our southwest trip was over, and we were ready to fly back home.


Southwest National Park Road Trip | Final Thoughts
Southwest National Parks Road Trip is a fantastic adventure that offers some of the most breathtaking scenery in the United States. From the lush landscape of the Grand Canyon to the rugged mountains of Capitol Reef National Park, there are endless opportunities for exploration and discovery. Whether you’re looking for a quiet getaway or an action-packed journey, a road trip along the American Southwest will provide lasting memories and unforgettable experiences.