

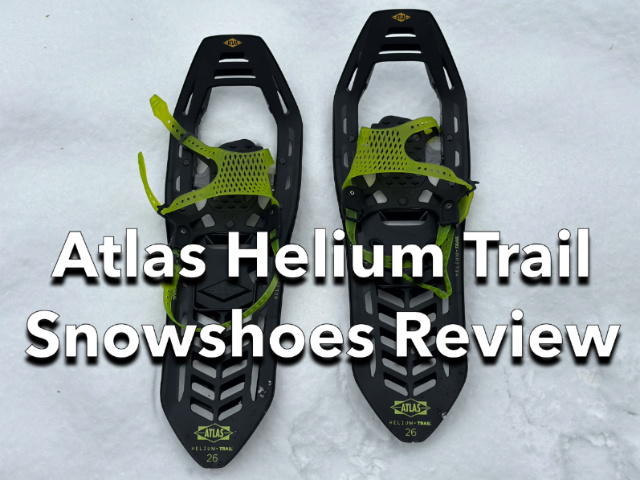
The Atlas Helium Trail ($150) is a lightweight and surprisingly inexpensive snowshoe designed for use on rolling hills and easy terrain. It has great traction and has a new Wrapp binding system, comparable to the Paragon Binding on MSR Lightning Ascent Snowshoes. The Helium Trail Snowshoes also come with heel lifts (televators) which make climbing hills easier and are not usually found on less expensive “trail” snowshoes.
Specs at a Glance
- Gender: Unisex
- Sizes: 23″ (3 lbs 2 oz), 26″ (3 lbs 7 oz)
- Traction: front crampon, side traction rails
- Crampon Material: Carbon Steel
- Heel Lifts: Yes
- Shape: Teardrop
- Deck Material: Plastic
- Max Recommended Load: 23″ (up to 160 lbs), 26″ (up to 220lbs)
Snowshoes are heavy, ranging from four to five pounds per pair, depending on sizing. But the thing that sets the Helium Trail Snowshoe apart from other makes and models is the fact that they only weigh 3 pounds and 2 ounces, which is an astonishingly low weight for a 23″ snowshoe. The 26″ snowshoe, which I’ve been using, weighs 3 lbs 7 oz per pair.

While the Helium Trails are exceptionally lightweight, the new net-like Wrapp binding is very simple to use and comfortable. It replaces the webbing style binding Atlas used last year when these snowshoes were first introduced, which had a defect where the binding could be cut by the side traction rails. That old binding is history and the problem has been completely fixed in this new model.
Atlas also offers the Helium snowshoe with two different binding systems. The Helium BC Snowshoe is nearly identical to the Helium Trail except that its binding uses a urethane ski strap instead of the Wrapp binding, while the Helium MTN Snowshoe has a Boa-based binding system. I like the Helium Trail and Helium BC the best of these three because they’re the easiest to strap to the outside of a backpack. Boa Bindings are very bulky and difficult to pack in comparison.

Teardrop Design
The Atlas Helium Trail is a teardrop-shaped composite snowshoes with a front crampon and side traction rails. The front crampon is made with carbon steel while the steel traction rails provide grip for side-hilling on sloped surfaces. The Helium has a chunky televator heel lift, which you can flip up to reduce calf strain when climbing hills. This must be done by hand since there’s no other way to grasp the televator wire, but a good whack with your trekking pole handles is enough to flip them back down when they’re no longer needed.
The plastic decking is surprisingly durable and has a lot of flex in it when you step on obstacles like rocks or small ledges. Louvers (angled slits) cut into the surface of the decking keep the deck flexible while shedding powdery snow. I consider the flotation good, but not extraordinary for a 26-inch snowshoe. But their light weight makes all the difference in this size!
The Helium Trail’s front crampon provides an excellent bite in ice, hard snow, and mixed rock and snow for hill climbing. The Helium MTN and Helium BC models have slightly more aggressive front crampons, but I doubt the difference is that material.

New Wrapp Binding
The Altas Helium Trail binding is a urethane “net” that wraps over the top of your boot. One side is permanently attached to the snowshoe while the other two corners have straps that you tighten over your boots. It’s very simple and stays shut if you tighten the straps snugly. The binding is “handed” so you must put your right foot into the right-hand snowshoe and your left foot into the left. A “RIGHT” and a “LEFT” are embossed in the bottom of the binding so you can’t mix them up.
As you walk, the binding pivots through a large front hole in the front of the snowshoe, so the front crampon digs into the snow in front of you while the rear of the snowshoe floats on top of the surface of the snow providing flotation. This is a standard snowshoe design.
In addition to the webbing, a rear urethane strap is used to lock your heel in place. If you don’t use the heel strap, your heel and boots won’t track straight or level, making it much harder to walk. When you’re ready to tighten the heel strap, you pull it tight. It’s held in place by a compression buckle and won’t slip.

Unless you change footwear, you can set the heel strap once and forget about it. When you put on the snowshoe, you can step into the front half of the Wrapp binding and simply secure the outside corners. It does help to use winter boots that have little ridge in the heel, like the Oboz Bridger 10″ that I’m wearing here, so the heel strap doesn’t slip down the back of your boot. Most insulated winter boots intended for hiking have this (see 10 Best Insulated Winter Hiking Boots).
Recommendation
The Atlas Helium Trail Snowshoe is surprisingly lightweight yet still fully featured (including a televator and side traction rails) for a snowshoe that’s only intended for gently rolling terrain. I’ve ignored that guidance and use it like I would use any backcountry snowshoe on mountain trails. While I did find fault with the previous model of Helium Trail and its former webbing-based binding, I think this new Wrapp binding is a home run. If you’re looking for a snowshoe that is very lightweight and easy to use, I’d grab a pair of these Atlas Helium Trail snowshoes. I know I’ll be carrying mine this winter.
Disclosure: The author owns this product.
SectionHiker is reader-supported. We independently research, test, and rate the best products. We only make money if you purchase a product through our affiliate links. Help us continue to test and write unsponsored and independent gear reviews, beginner FAQs, and free hiking guides.