
The Lightroom Smart Previews feature is one that changed the way millions of photographers organize digital images, edit photos when they travel. I consider it to be one of the most useful and innovative features in Lightroom.

What are Smart Previews in Lightroom?
What does it do exactly? Smart Previews allow you to travel with your entire photo library without bringing any actual photos. Does this sound illogical and improbable? Let me explain.
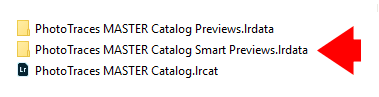
When the Smart Previews feature is enabled, Lightroom generates a smaller version of your photo called a Smart Preview. This is a DNG compressed file that is 2550 pixels on the longest edge. Lightroom stores these DNG images next to the active catalog inside the folder with the Smart Previews.lrdata name.
In practical terms, this means that if you disconnect the external hard drive with your entire RAW image library, you can still organize and edit your photos in Lightroom. But instead of editing the original images, Lightroom edits the Smart Previews. When you reconnect your external hard drive, the program synchronizes the changes you performed earlier with all your original RAW photos.
It’s smart, isn’t it?
Lightroom Smart Previews – Practical Applications
The most obvious practical application for Smart Previews is travel. You can bring your laptop with your entire catalog of photos on the road while keeping the original images stored safely at home.
My favorite way to use the Smart Previews feature when I travel is on long flights. I start organizing and culling my new photos without having to attach an external hard drive that stores the originals.
You can bring your entire photo library to a client meeting and still have access to all your photos thanks to Smart Previews.
Related: 15 Top Rated Adobe Lightroom Tips and Tricks
You can also have your laptop loaded with Smart Previews, which allows you to work remotely from a local coffee shop, for example.
File Size
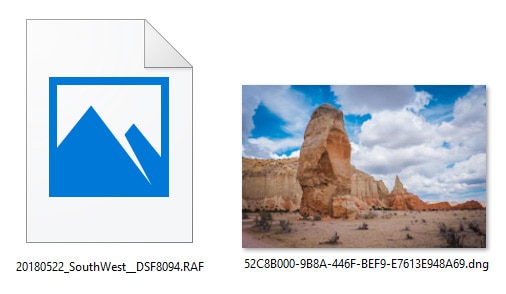
If you compare the file size of the Smart Previews with the original images, you will see that they are approximately 50 times smaller when you shoot uncompressed RAW or approximately 25 times smaller when you shoot compressed RAW. This means that if your entire photo library is around 4 TB in size, you can scale it down between 100-150 GB. It will fit perfectly on your laptop’s small SSD drive.
Quality
The quality of the DNG Smart Previews is exceptional. When you zoom in to 100%, you will not see any compression artifacts and the images are indistinguishable from the originals. Smart Previews also enables you to export JPEG version of the photos without actually having the originals. If you export a JPEG image that is no larger than 2550 pixels in size, you will have an image that is the same quality as the one created from the original RAW image.

The Smart Previews size of 2550 pixels on the longest edge will cover most cases such as posting to social media, websites, blogs, or other file sharing platforms. It is even large enough to create smaller prints.
Smart Previews and Mobile Editing
First, if you travel only with Smart Previews, Lightroom will not have an issue synchronizing the images across different devices over the Create Cloud.
Related: Lightroom Soft Proofing Workflow
But where Smart Previews play an important role in mobile editing is when you have original RAW images stored on the Creative Cloud that you want to edit on a mobile device(s). Instead of transferring the large RAW files, Lightroom Mobile will download the Smart Previews and then synchronize the editing changes inside the XMP files.
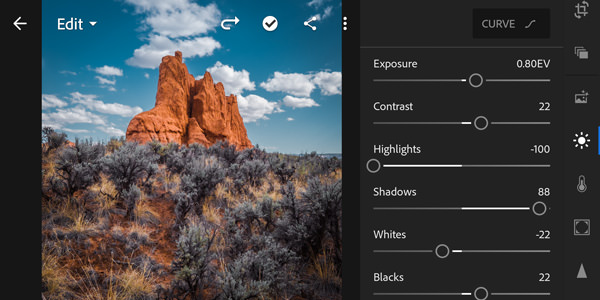
Smart Previews allow us to edit across devices when the internet connection is not ideal.
Smart Previews and Lightroom Performance
I’ve been using Adobe products for over 20 years. This is what happens when applications have a massive user base. Adobe comes up with a new tool or feature to perform a specific task or solve a particular problem in one of their applications. But over time, users find a completely different use for that feature—a use that Adobe never intended.
This is exactly what happened with Smart Previews.
Let me explain.
Lightroom is not a fast program and we all strive to improve its performance. When photographers started using Smart Previews, they noticed that the program ran much faster because it did not always have access to large RAW files. If your Catalog and preview files reside on a fast SSD drive and your RAW images reside on a slower spinning drive, any improvement in speed can be enormous.
Related: Controlling Vibrance and Saturation Separately
This is when photographers intentionally started disconnecting their external hard drives with their RAW images and worked the entire day using only Smart Previews. At the end of the day, they synchronized all the changes with their RAW library. Another variation of this workflow is, if you work on a desktop computer with your RAW library on a local hard drive, you can temporarily rename the root folder of the library to force Lightroom to use Smart Previews.
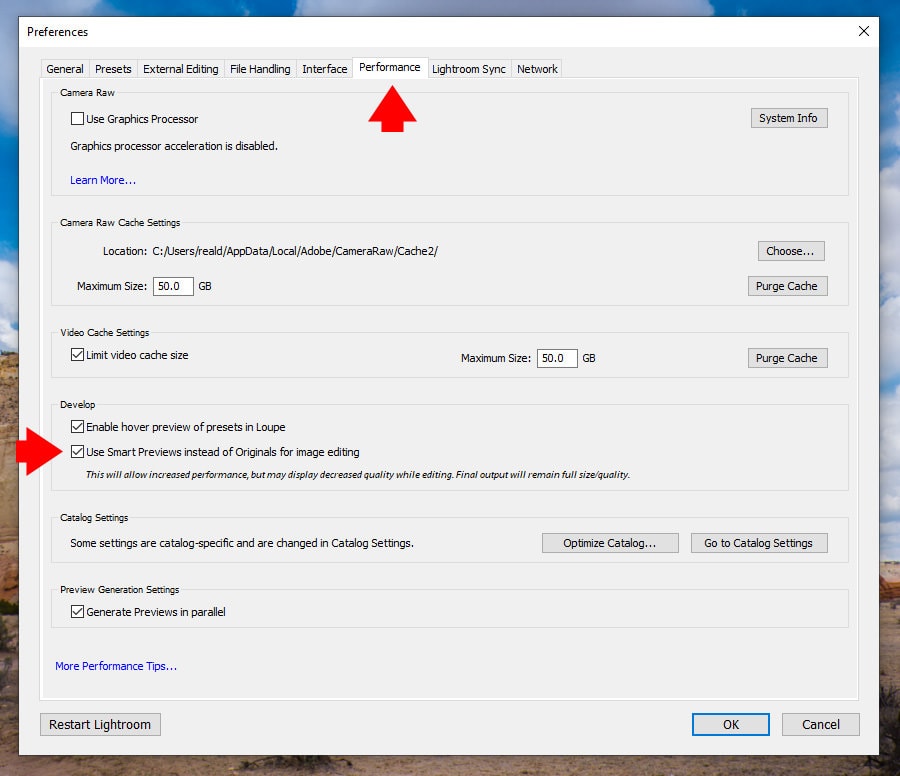
Adobe recognized the benefits of Smart Previews for speed improvement and implemented a new feature in the next version of Lightroom. Now, you can tell Lightroom to use Smart Previews instead of the originals and only switch back to the originals when zooming beyond the 2550-pixel size.
How to Build Smart Previews in lightroom
There are a few ways to force Lightroom into generating Smart Previews.
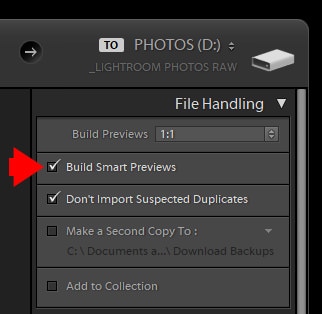
The most popular and the most obvious way to generate Smart Previews is when you import new photos into Lightroom. In the File Handling Panel, you can enable the Build Smart Preview option.
If you want to generate Smart Previews for previously imported photos, you can do this in the Library Module. In the Grid View, select an individual image (or multiple images). From the main top menu, select Library > Previews > Build Smart Previews. Similarly, you can generate Smart Previews for an entire folder by selecting the folder from the Folders Panel.
Related: How to Add Vignetting in Lightroom and Photoshop
In the Develop Module, you can create a Smart Preview for any selected photo from inside the Histogram Panel by clicking on the Original Photo option.
Identifying Images with Smart Previews
The most confusing part of using Smart Previews is identifying if a particular image has a Smart Preview or not. Where to find this information is not obvious.
In the Develop and Library Modules, the best place to look for Smart Preview information is in the Histogram Panel.
The Histogram Panel has four different indicators.
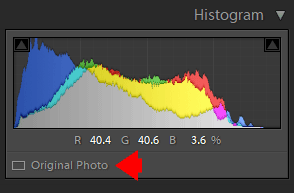
If the selected image has the Original Photo indicator, it means that Lightroom has access to the original image, but a Smart Preview does not exist.
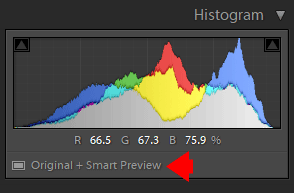
If you see the Original + Preview icon, you know that Lightroom has access to the original image and that a Smart Preview exists.
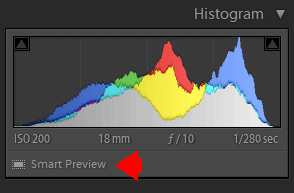
If you see the Smart Preview indicator, this tells you that Lightroom does not have access to the original file and is using a Smart Preview instead.
Finally, when you see the Photo Missing icon, you know that Lightroom does not have access to the original image and that there is no Smart Preview available.

If you need to see the Smart Preview information for multiple images, you can only do this in the Library Module. In the Grid View, select multiple images and check the Histogram Panel.
See also: How to Batch Edit in Lightroom
You will see four icons with numbers next to them. These numbers indicate how many images have:
- only Оriginal images
- both Оriginal images and Smart Previews
- Smart Previews but no original images
- neither originals nor Smart Previews
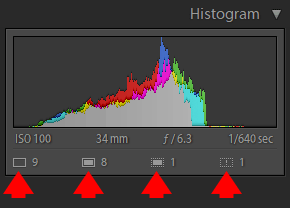
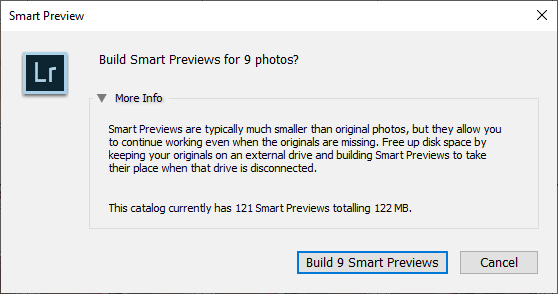
The least known feature here is that each icon is an interactive element. By clicking on the icon, you can trigger different options.
By clicking on the Original icon, you can generate Smart Previews for all the selected photos.
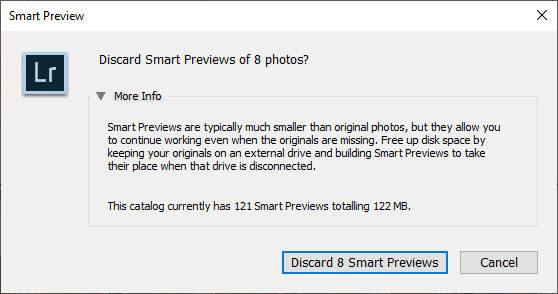
By clicking on the Original + Smart Previews icon, you have the option to discard the Smart Previews for all the selected photos.
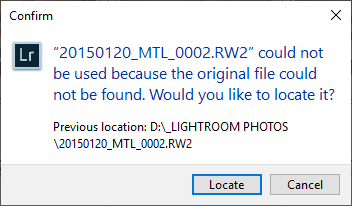
By clicking on the Missing icon, you have the option to locate the missing images.
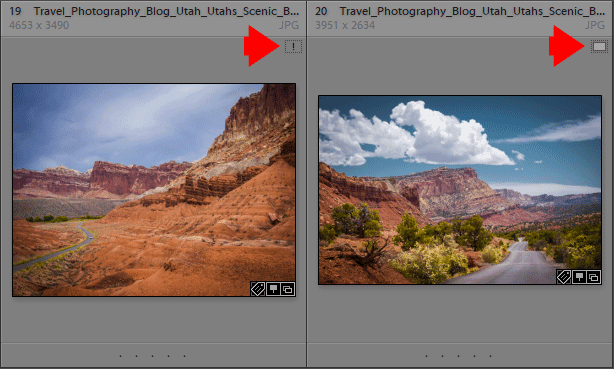
Finally, in the top corner of every thumbnail in Grid View, Lightroom will display the corresponding icon if:
- both the original and Smart Previews are missing
- the program only has access to the Smart Preview and the original file is missing
Final Thoughts
Managing a large volume of RAW files is probably the most challenging part of any digital photography workflow. The Smart Previews functionality helps this issue by allowing us to separate the Catalog from the RAW library to make digital asset management (DAM) more flexible and streamlined.
Plus, Smart Previews also play an important role in the mobile workflow by making it easier to manage and edit our photos across multiple devices.