
If you want to know how I use Lightroom Before and After functionality in my photography and how it helps me visualize my edits, you need to read this tutorial.

If you ask me about the Lightroom tool or function that I use most often, you would be surprised by my answer. It is not Split Toning or Panorama Merging nor is it a preset functionality. The obscure Before and After feature is my answer.
I am not saying it is the most useful or the most exciting tool, but it is the tool I use most often during editing.
When you shoot in RAW format, the images straight from the camera are not very exciting or appealing. By design, RAW images are low in contrast and saturation; the collected raw data must be processed first.
The transformation from the original RAW capture to the final, ready-for-publishing image can be drastic. I find it is easy for me to get carried away and overprocess an image when working in Lightroom.
See also: How to Duplicate Image in Lightroom
That’s where the Before and After feature comes into play. The function serves as a reality check and helps ensure that I am on the right editing track. When I am in the process of editing, especially when editing a photo that has the potential of becoming a portfolio piece, I use the Before and After function every few minutes.
There are many different ways of using Before and After in Lightroom, but I only regularly use the function in two specific ways.
In today’s article, I will show you how I use Before and After in Lightroom as well as the various other ways you can use the function in your editing workflow.
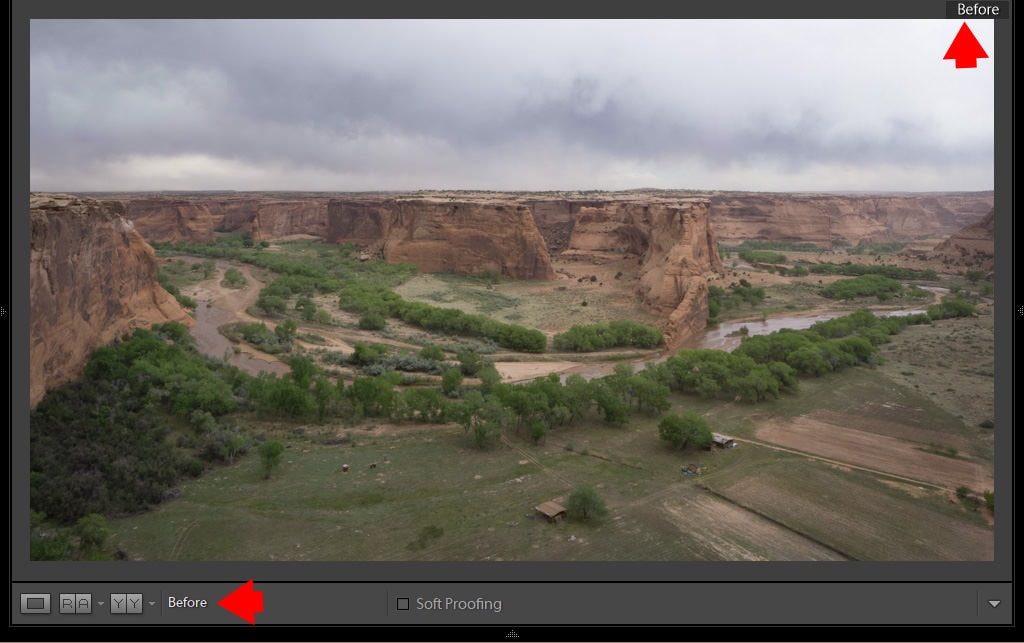
1. Before Only
This is the simplest way of displaying the original, unedited state of the selected photo.
Hit the “\” key on your keyboard and the selected image is replaced with an unedited version of the same photo.
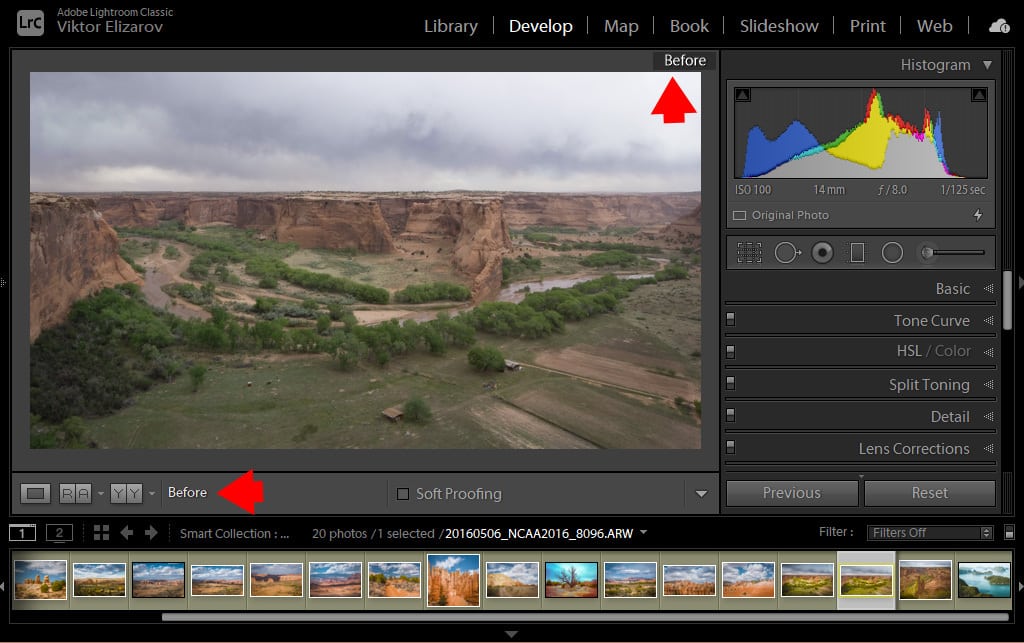
This does not change the Crop Overlay adjustments; the image in the “Before” state has the same dimensions.
By hitting the “\” key once more, the image is replaced with the currently edited version.
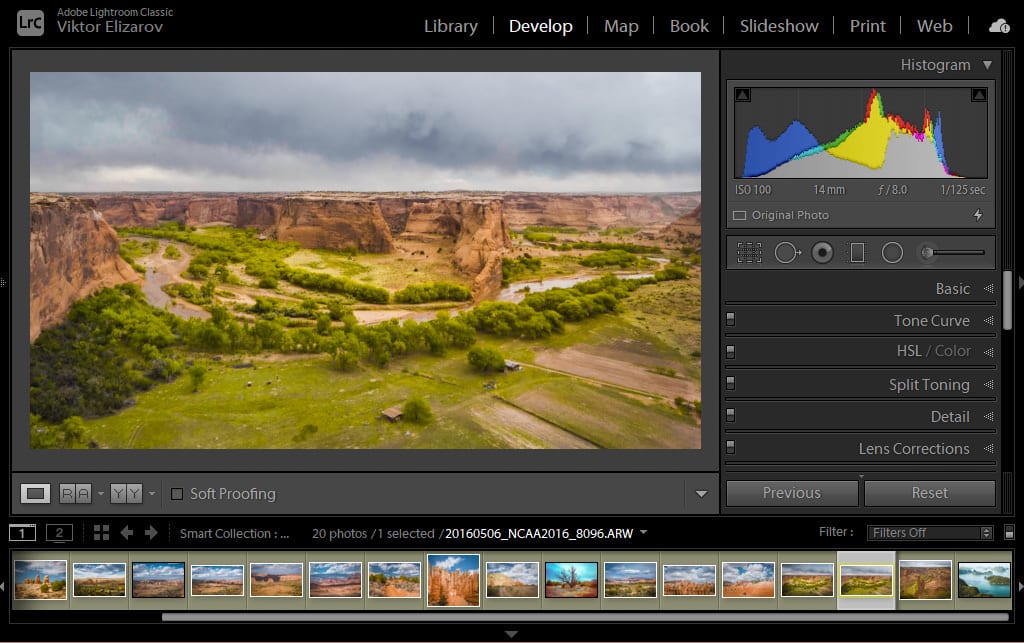
I typically hit the keyboard shortcut 4 to 5 times before I make a decision regarding my editing–if I need to dial it down or push my editing even further.
Here is a variation of the same method that I often use.
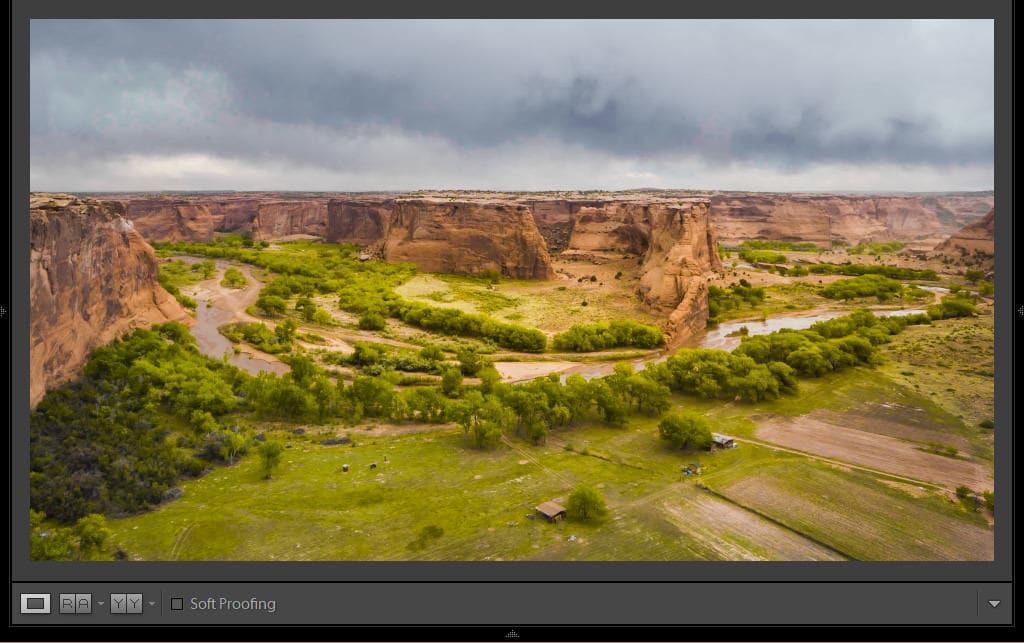
I find that one of the most useful shortcuts in Lightroom is the “Full Screen” shortcut. By pressing the “F” key, the selected image goes into full screen mode and covers the entire monitor. I often use this tool to evaluate the edited image in a view unobstructed by the Lightroom user interface (UI).
Unfortunately, the “Before Only” feature does not work in the full screen mode. When you use the “\” key in full screen mode, it immediately goes back to the standard Lightroom interface.
Here is how I work around this limitation:
First, I use the “Shift + Tab” shortcut to tell Lightroom to hide all its panels (top, bottom, left, and right). This maximizes the UI real estate for the selected image.
Next, I use the “\” key to display the unedited version of the selected photo.
2. Before and After with Snapshot Panel
I find that the Snapshot Panel is an underappreciated and underutilized feature in Lightroom. I know many professional photographers who never use it.
I love the Snapshot tool and use it with nearly every image I edit in Lightroom.
Snapshot allows you to save any editing instance from the History Panel as a snapshot.
Let me show you how my Snapshot Panel looks for one of my processed photos.
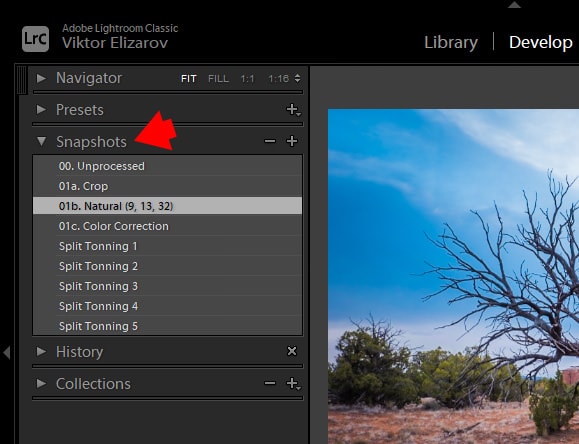
00. Unprocessed – I created the Snapshot or instance of an unprocessed RAW image at the beginning of my editing.
Before and After – I used the Crop Overlay tool to improve the composition by making it a bit tighter. Then, I created another Snapshot.
01b. Natural – The Snapshot tells me that I used the Natural preset and three adjustments from the TOOLKIT.
01c. Color Correction – I created the next Snapshot after I used the Lightroom editing sliders for manual color correction. I desaturated the sky area and emphasized the vegetation areas.
Finally, I created five more Snapshots for five editing versions that I made using the Split Toning Panel in Lightroom.
The Snapshot setup allows me to jump not only to the original, unedited version of the image but also to the various intermediate states during the editing process.
Another benefit of the Snapshot tool is that when I open the same image later, even months or years into the future, it will help me better understand the train of thought present during the editing process.
Like I mentioned before, the Snapshot Panel is an essential part of my Lightroom editing workflow.
Next, I will show you a few other ways to use the Before and After function in Lightroom. Although I do not use these methods often, they can be useful in some instances.
Lightroom has an entire Before and After function that you can access through the UI, keyboard shortcuts, or the main menu.
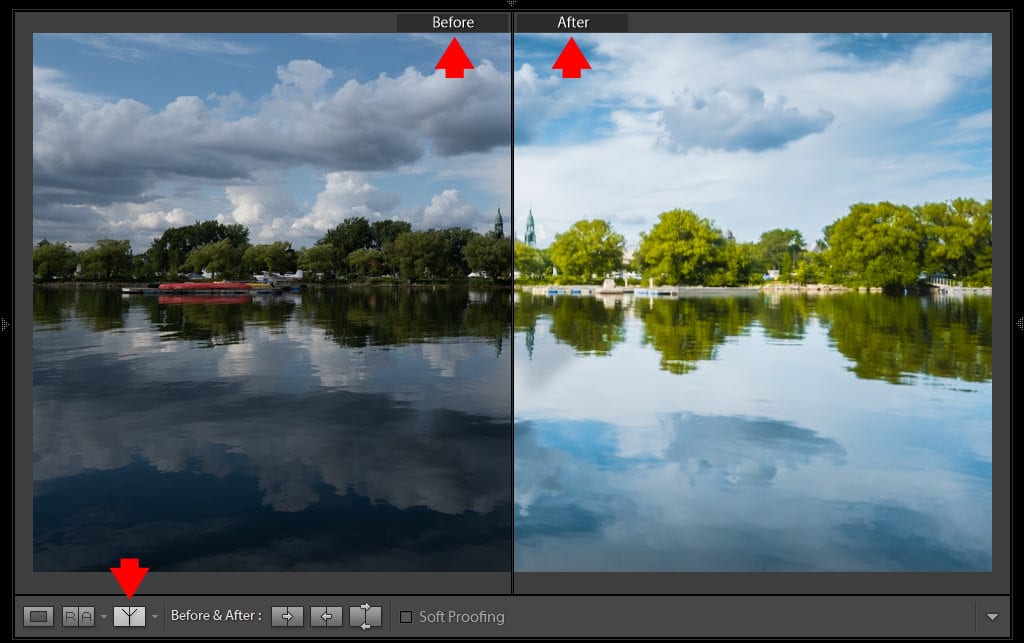
3. Before and After Left/Right
If you want to display the current editing state of the image next to the unedited version in a side-by-side comparison, here are your options:
a. Use the “Y” shortcut.
b. Click the YY icon below the image.
c. Use the top menu View > Before/After > Left Right.
I find this particular view to be the most useful. But when you edit photos in the landscape orientation, the side-by-side view can be too small for proper evaluation.
In these instances, use the trick I outlined above.
- Use the “Shift + Tab” shortcut to hide all the panels in Lightroom and maximize the UI.
- Next, use the “Y” shortcut to access the Before and After side-by-side view.

4. Before and After Left/Right Split
The split view is a variation of the Left/Right option but, instead of two images displayed side-by-side, one image is split in half with the unedited half of the image on the left and the current, edited half of the image on the right.
a. Use the “Shift + Y” shortcut.
b. Select the “Before/After Left/Right Split” option under the YY icon.
c. Use the top menu View > Before/After > Split.
I never found this split view to be very useful, but this option is available if you need it.
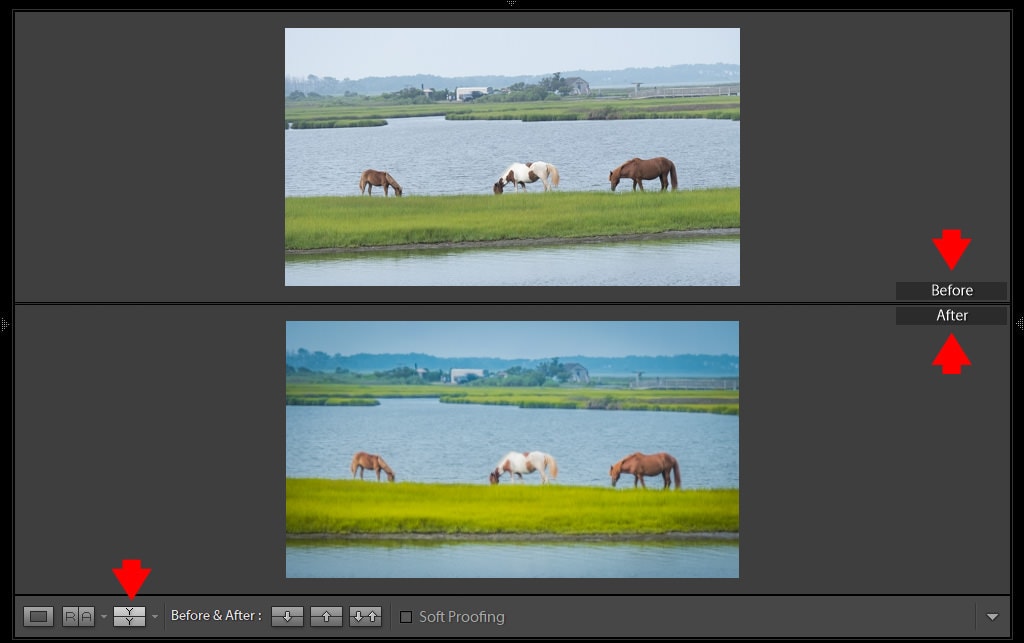
5. Before and After Top/Bottom
Here is another variation of the side-by-side option but with the images displayed in a vertical orientation from top to bottom.
a. Use the “Alt + Y” shortcut.
b. Select the “Before/After Top/Bottom” option under the YY icon.
C. Use the top menu View > Before/After > Top/Bottom.
6. Before and After Top/Bottom Split
This is the same idea as the Left/Right Split but the split is positioned horizontally.
See also: Luminocity Masking in Lightroom
a. Use the “Alt + Y” shortcut to access the top/bottom view. Then, use the “Shift + Y” shortcut to switch to split.
b. Select the “Before/After Top/Bottom Split” option under the YY icon.
C. Use the top menu View > Before/After > Split.

Additional Options
By default, the “Before” state is displayed on the left when using the side-by-side layout (or at the top in the top-to-bottom layout). You can swap the Before and After default display options using:
a. The Swap View icon under the image.
B. “Ctrl + Alt + Shift + Arrow Up” (“Cmd + Option + Shift + Arrow Up” on Mac).

When you use any of the Before and After options, the default view displays the original, unprocessed image with the current edited version. But you are not limited to only the default views.
See also: How to Use Histogram in Lightroom
When you open the History Panel and drag any of the editing steps from the History Panel to the Before image, the default unprocessed view changes to the selected editing step.
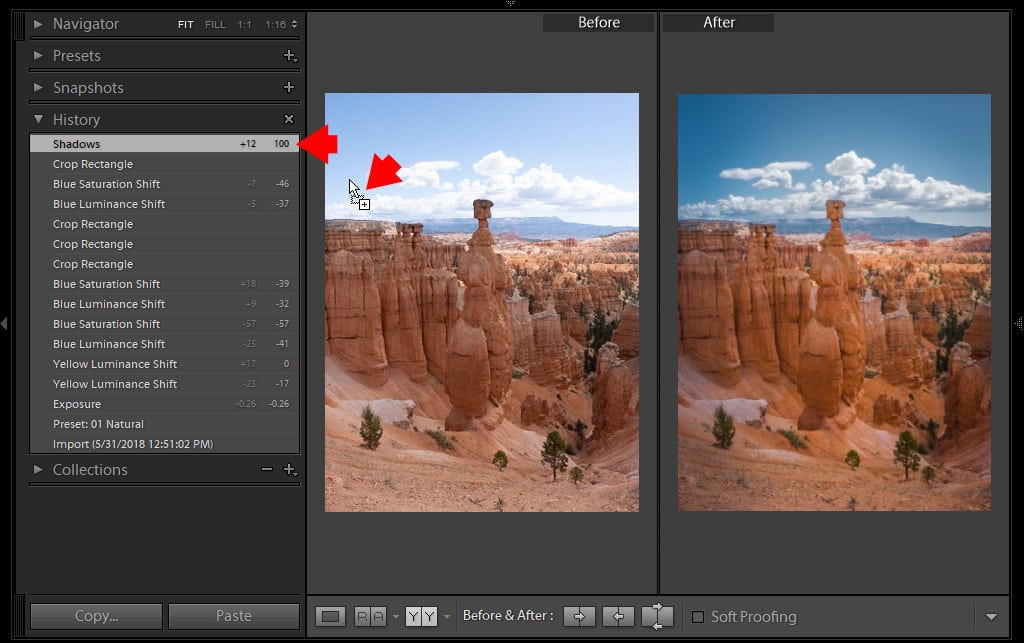
Once again, I am not sure how useful this feature is, but you have the option in case you ever need it.
7. Using Virtual Copy to Display Before and After
The Virtual Copy function in Lightroom allows you to create instances of the edited photos without duplicating the original image. You can apply different editing options to each Virtual Copy to separate the various editing versions.
Ctrl + ‘ (apostrophe)(Cmd + ‘) – to create a Virtual Copy of the selected photo.
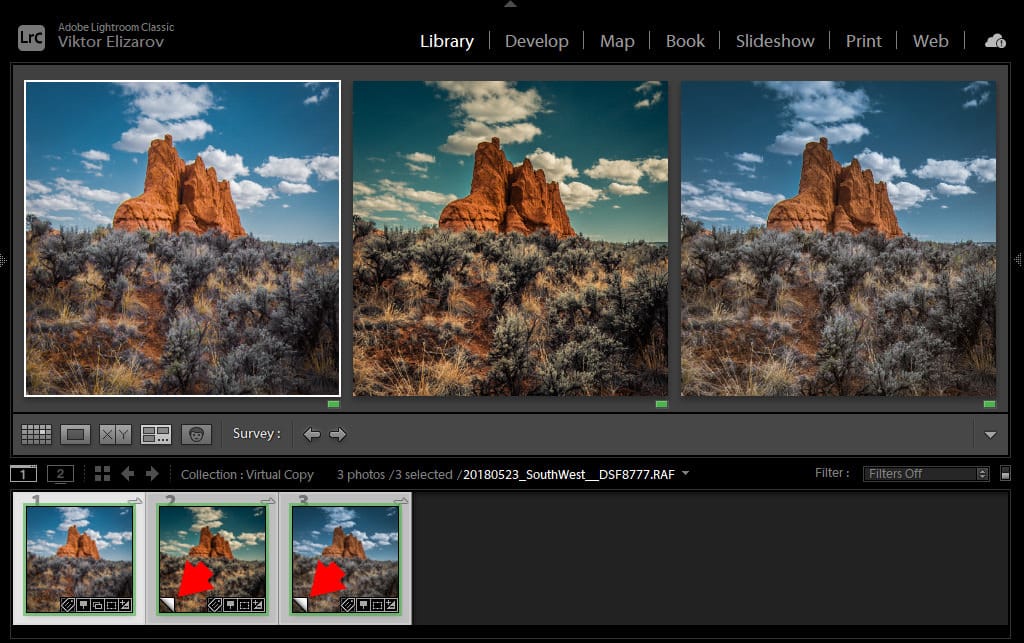
Using the Before and After option with Virtual Copies is similar to how I use Snapshots. Instead of using Snapshots, you simply use Virtual Copies to track your editing steps.
Lightroom Before and After Shortcuts
“\” – replaces the current editing state to the original unedited version.
Shift + Tag, “\” – a combination of shortcuts hides all the pane’s first.
“Y” – displays Before & After Side by Side.
“Shift” + “Y” – displays Before & After Left/Right Split.
“Alt”+”Y” – displays Before & After Top/Bottom
“Alt”+”Y” and “Shift + Y” – displays Before & After Top/Bottom Split
“Ctrl” + “Alt” + “Shift” + “Arrow Up” – Before & Afte Swap View