
Are you struggling to do stunning long exposure photography?
While long exposure techniques can get you ultra-powerful results, capturing beautiful long exposure images can seem difficult, if not downright impossible.
Fortunately, creating long exposure photos isn’t as hard as you think.
In fact, in this guide, I’m going to tell you everything you need to know about long exposure photography–so that, by the time you finish, you’ll be able to capture long exposure shots like a pro!
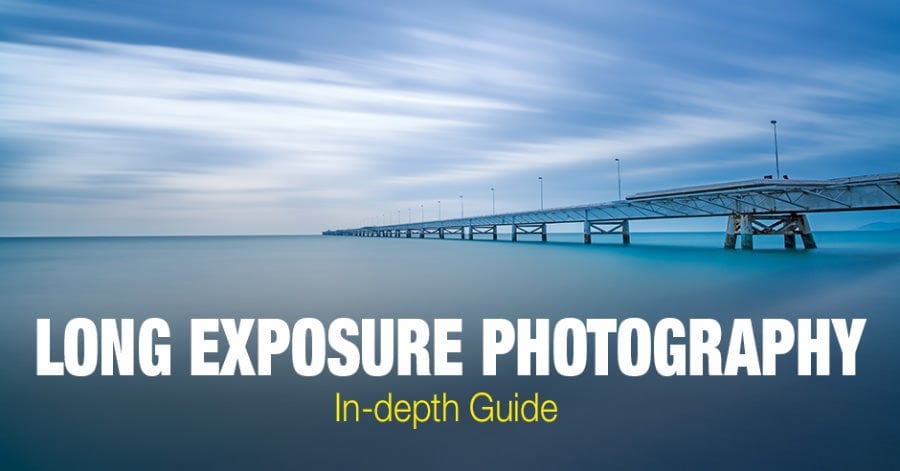
What Is Long Exposure Photography?
Long exposure photography is a technique that allows you to capture several minutes (or hours) of a scene with one image.
In other words:
Instead of capturing a photo of a moment, you capture a photo over time. You press your camera’s shutter button, and your camera continues to take a photo.
This allows you to create beautiful motion blur effects, because elements in your scene (such as clouds or waves) move during the course of the exposure.
Now, there is no easy way of separating long exposure photography from “short” exposure photography. But long exposure photos generally have a shutter speed of less than 1/30s or so, and often go on for far longer; some landscape photographers capture long exposure images that last several hours or more.
Shutter Speed and Long Exposure Photography
Your camera’s shutter speed is a fundamental part of long exposure photography. The shutter speed defines the length of your exposure–and so, if you want to capture long exposure images, you must use a long shutter speed.
But what will shutter speed actually do for your photos?
Well, with a long shutter speed, you can achieve two things:
Illusion of Motion
First, you can create images that include the illusion of motion. This is because a longer shutter speed can introduce blur into a photo, especially if you have a fast-moving subject.
So if you use a long shutter speed to photograph a person running across a lawn, the person will appear blurred in the final image.
Note that blur will be introduced at different shutter speeds, depending on how fast the person is moving (the faster the person, the faster the shutter speed can be while still producing blur).
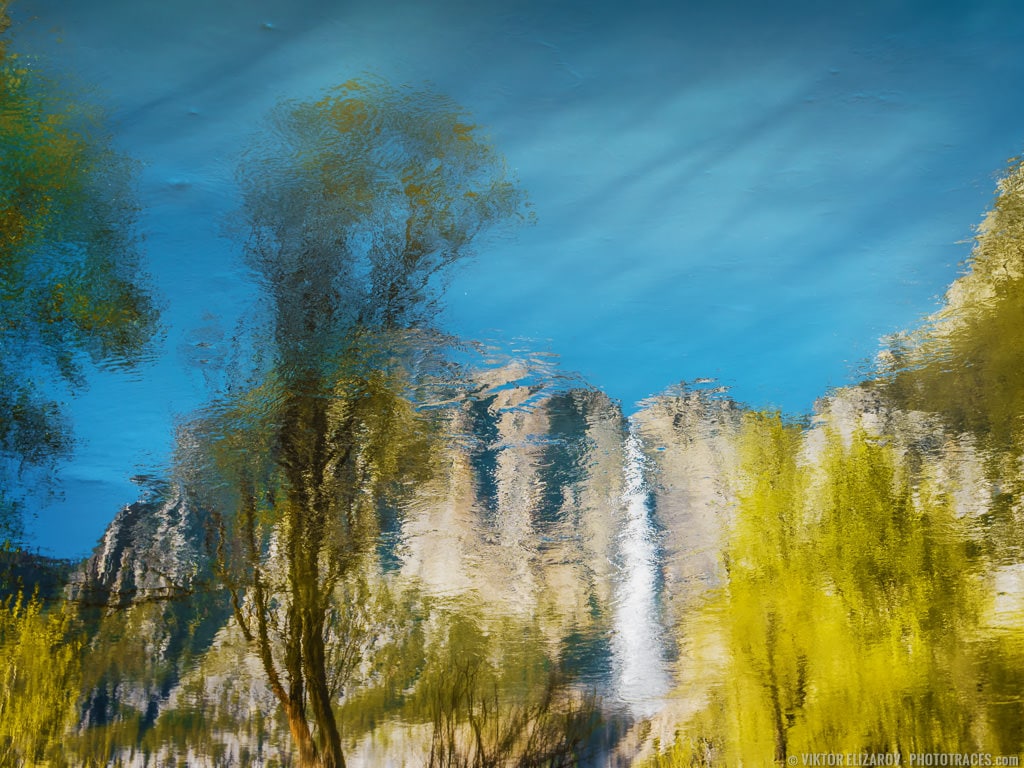
Surreal Interpretation
Second, you can create images that offer a level of surrealist interpretation. These photos don’t capture “nature” so much as an artistic version of nature.
How to Take Long Exposure Shots
There are two types of long exposure images that you need to be familiar with:
- Long exposures at night.
- And long exposures in the day.
Let’s take a look at each one in turn:
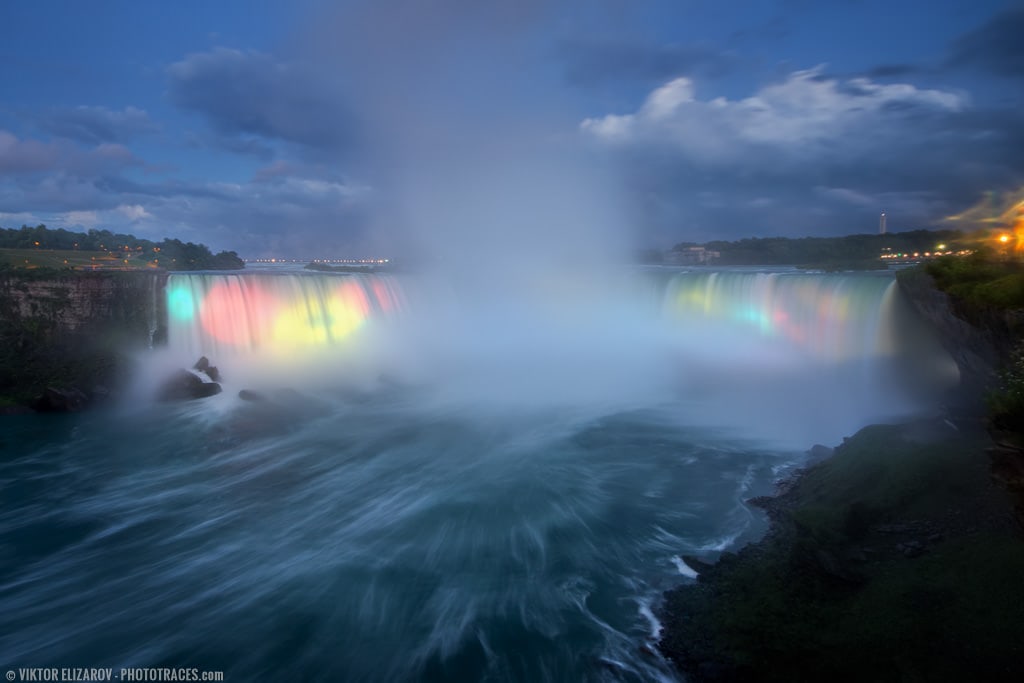
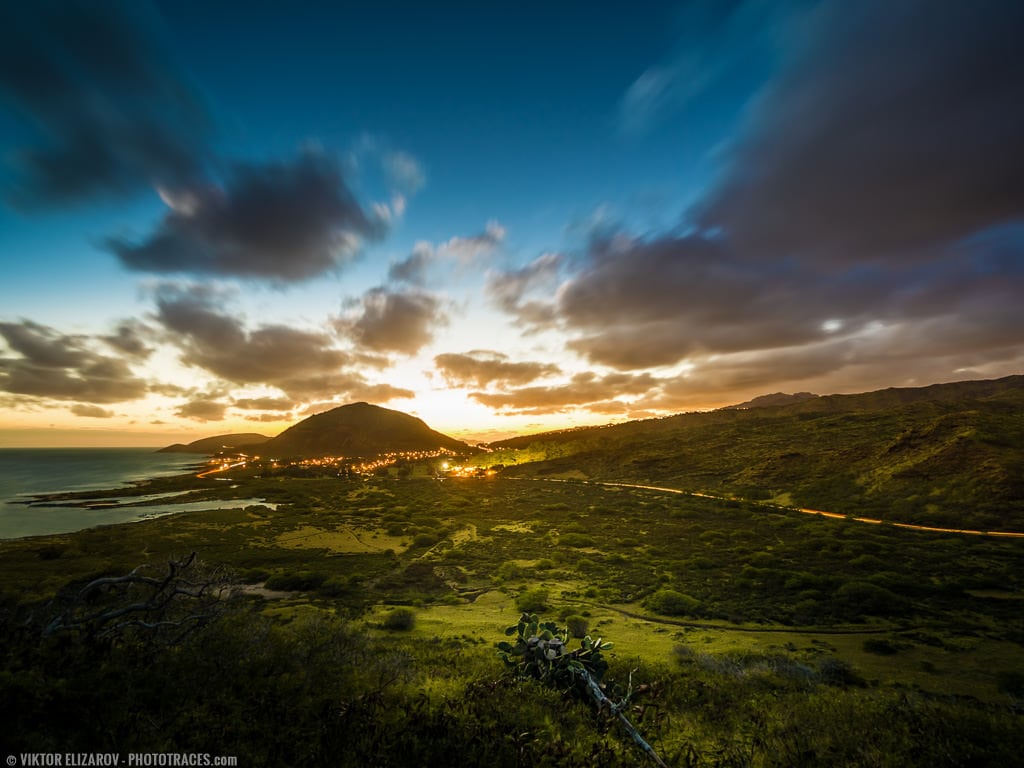
Long Exposure Photography at Night
First of all, it’s important to note that long exposure photography at night is not the same as astrophotography.
So if you’re looking to capture beautiful astrophotography images at night, check out this tutorial: Night Photography Settings – Set and Forget Method
That said, how do you capture long exposure images at night? What’s the technique?
Well, nighttime long exposure photographers are hampered by one key problem:
They can’t see.
At night, you’re often faced with pitch darkness, or near pitch darkness, which means that you won’t be able to compose carefully for a good shot.
So what do you do?
You scout the location in advance.
Step 1: Scout the Location in Advance
And while you’re scouting, mentally note (or write down!) the elements of the scene that can benefit from a long exposure technique.
Any moving elements work well, including waterfalls, breezy water, moving clouds, and much more.
You’ll also want to note the direction and speed of the wind and running water. It will help you to estimate the shutter speed you need to get your desired level of blur.
For example, fast-moving clouds will let you achieve a long exposure blur effect at much faster shutter speed.
I often combine traditional sunset photography with the night photography session.
I arrive at the location just before the Magic Hours. I photograph sunset during Golden Hour. And I have plenty of time during Blue Hour for scouting before it gets completely dark, and I am ready for night long exposure photography.
Step 2: Set up Your Equipment
If you did location scouting well, you know exactly where to set your camera and tripod.
And make sure your tripod is sturdy because it’s impossible to do long exposure photography without a good tripod. When you keep the shutter open for tens and, sometimes, hundreds of seconds, even small movements of the poorly stabilize camera will ruin your shot.
Step 3: Compose Your Shot
By the time you are ready to shoot, it will be completely dark, and the only way to nail interesting composition is to set up your shot based on composition you defined during scouting.
Again, make sure to bring a sturdy tripod; otherwise, you’ll introduce lots of blur into your image, and not the kind that long exposure photographers are generally after!
Step 4: Focus
Next, set your focus. If it is not completely dark yet, your camera may allow you to use autofocus, so feel free to try it.
If you succeed with autofocus, make sure you lock the focus once focus is acquired, to prevent your camera from refocusing.
But if the autofocus doesn’t work out, then manual focusing is always a strong option. These days I do not even bother with autofocus; I always use manual focus for predictable results.
Step 4: Set Exposure
Once you’ve nailed focus, then switch your camera to either Manual mode or Bulb mode. Note that Manual mode will often only allow you to shoot at exposures of up to 30 seconds, so Bulb mode will be necessary if you plan to go beyond this.
(On Fujifilm cameras, you’ll want to use the T, or time, mode.)
Next, press the Auto Exposure Lock button to lock exposure.
Step 5: Fine-Tuning Exposure with Exposure Compensation
At this point, you should activate the camera’s histogram if you’re working with a mirrorless camera, and you have this option. Then fine-tune your exposure based on the histogram using exposure compensation to boost or lower the brightness slightly.
If you don’t use a mirrorless camera that allows you to see the histogram before pressing the shutter button, you should take a test shot, then make any exposure changes based on your test shot’s histogram.
Step 6: Take the Shot
And then, finally, capture your nighttime long exposure image!
To prevent accidental camera shake, make sure you use shutter release (wireless or wired) or 2-second delay camera functionality to trigger the shutter. The camera will shoot the photo 2 seconds after you have pressed the shutter.
Step 7: Verify Captured Image
Make sure to check the final image for accurate focusing the proper exposure.
Step 8: Start Again from Step 3
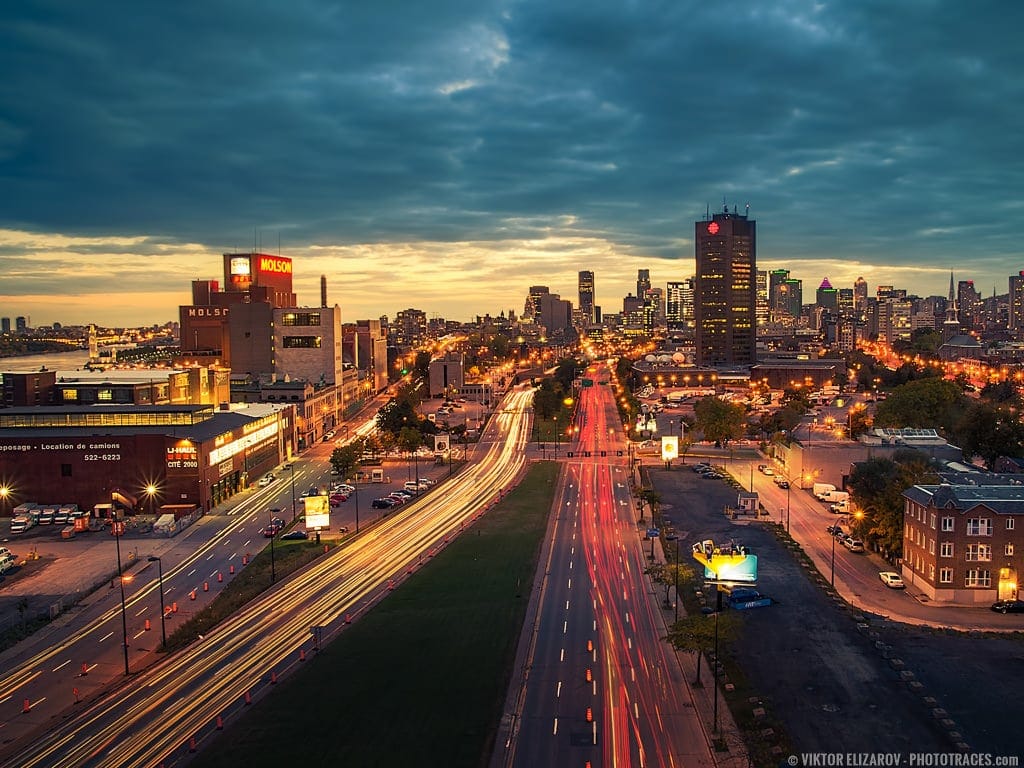
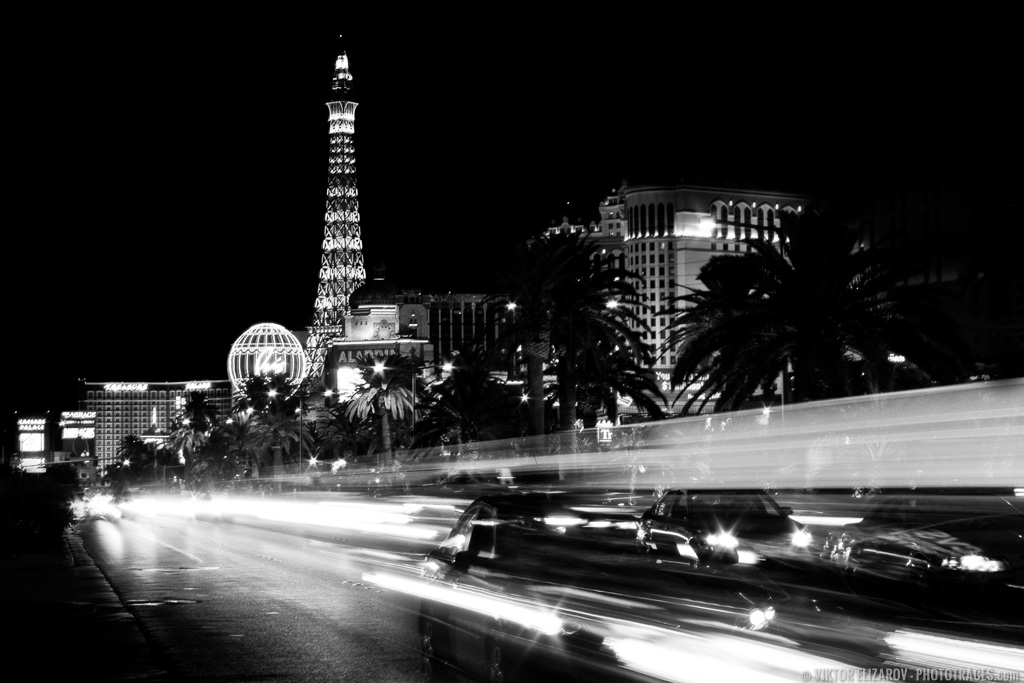
Long Exposure Photography in Daylight
Long exposure photography in daylight is similar to long exposure photography at night–except that you generally have too much light to work with, which makes it impossible to create long exposure images with a standard camera/lens combination.
That’s why daylight long exposure photographers carry neutral density filters, which darken the scene and allow you to use a long shutter speed without overexposing the image.
So if you’re shooting a long exposure in broad daylight, use the same instructions that I’ve given above. But after you fine-tune the exposure, mount the neutral density filter and compensate for the necessary exposure changes.
(Why don’t you mount the neutral density filter prior to this point? Because neutral density filters are dark, which means they can make it so you can’t see through your camera’s viewfinder.)
If you’re not sure how to change your exposure based on the neutral density filter, I recommend looking up an ND filter calculator or app, which will quickly and easily generate your adjusted camera settings.

Long Exposure Photography Without Tripod and ND Filters
I want to share with you a technique I use quite often. The technique allows me to achieve a long exposure effect without a tripod and without ND filters.
I take a series of shots, most often 10 or 12, of the same subject with approximately 1-second intervals between each shot. And later I merge a series of shots into one image in Photoshop.
If you want to learn more about the technique, check my 2 case studies below:
Camera Settings for Long Exposure Photography
Long exposure photos require a slow shutter speed. But they also require a number of other settings.
1. Shoot RAW
First, you’ll want to shoot in RAW; this will give you maximum flexibility when it comes to recovering the highlights and shadows in your image.
2. Use Manual or Aperture Priority Shooting Modes
Second, you’ll want to expose using your camera’s Manual mode or Aperture Priority mode. Either one of these options will give you the control you need to capture a stunning photo, but note that Manual mode allows you to work without exposure compensation, whereas exposure compensation is key when using Aperture Priority mode.

3. Use Matrix, Evaluative or Multi Metering
Third, carefully choose your camera’s metering mode. I recommend Matrix metering, as this will evaluate the entire scene and come up with a generally accurate exposure (though on Canon cameras you’ll want to choose Evaluative metering, and on Fujifilm cameras you’ll want to choose Multi metering).
4. Use Exposure Compensation
Fourth, if you use Aperture Priority, make sure you dial in exposure compensation based on the feedback you get from the histogram. If you use Manual mode, you’ll need to adjust the exposure manually by raising/lowering the shutter speed, the aperture, or the ISO.
5. Use Focus Lock to Prevent Refocusing
Fifth, focus using autofocus or manual focus (as if you’re shooting a normal landscape scene). Manual focus prevents accidental refocusing, but if you do decide to use autofocus, then make sure you engage the focus lock to prevent refocusing. Oh, and make sure you focus at the hyperfocal distance (i.e., about one-third of the way into the scene).
6. Manual Focus When Shooting Stars
Finally, if you do decide to capture long exposures of stars, then make sure that you only use manual focus and point your lens at infinity. That way, you can get the sharpest possible stars!
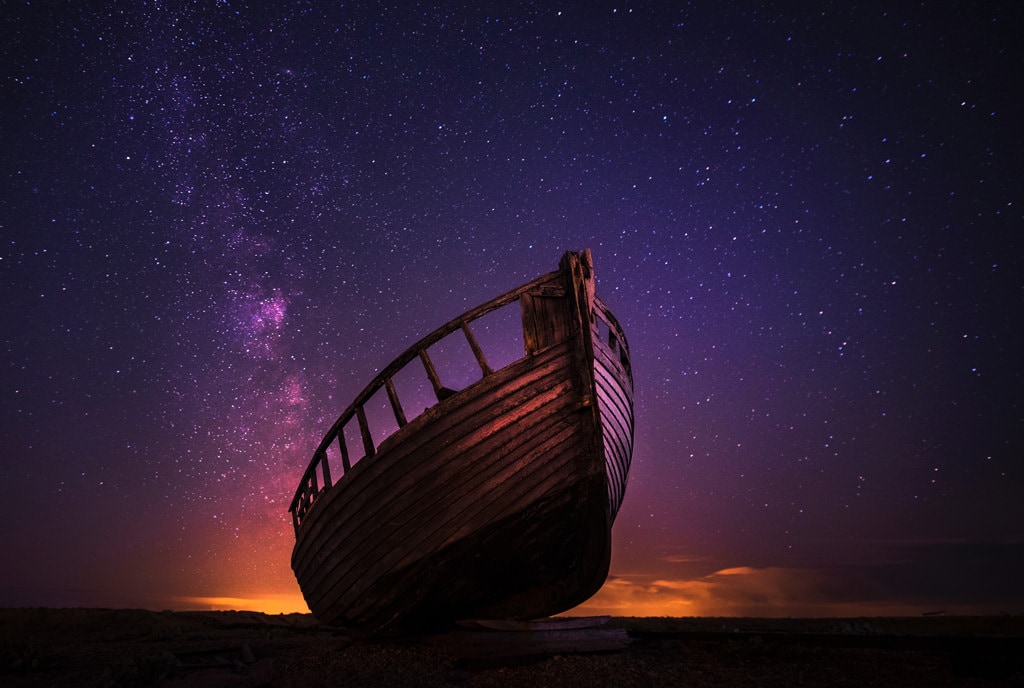
Photo Equipment for Long Exposure Photography
Long exposure photography is generally a form of landscape photography, which means that the equipment you use should closely mirror your landscape gear bag.
Cameras for Long Exposure
If you plan to shoot long exposure images at your camera’s base ISO, then you can get away with using pretty much any sensor (and pretty much any camera).
But as you raise the ISO, smaller-sensored cameras struggle to give good results. So if you plan to increase your ISO frequently, you’ll want to work with a full-frame camera that offers an impressive low light performance.
Lenses for Long Exposure
Long exposure photography generally uses wide-angle lenses (though you can also use telephoto lenses for interesting long exposure close-ups).
If you plan to shoot sharp stars at night, then a lens with a wide maximum aperture (of f/2.8) is a necessity. Otherwise, your long exposure lens can offer a maximum aperture of f/4 and beyond.
Tripod Selection
Here’s the truth:
You cannot capture beautiful long exposure images without a tripod.
A tripod keeps your camera steady while the subject of your image moves, so that you can achieve that beautiful “moving subject, still background” effect.
So how do you choose a tripod?
It’s important not to skimp on sturdiness, because there are a lot of poorly-built tripods out there. And if you plan to take your camera on hikes and vacations, you’ll want a tripod that doesn’t weigh too much. That’s why I’d recommend a sturdy, carbon fiber tripod–because while these can be expensive, they’re absolutely worth the price!
Neutral Density Filters
As I mentioned above, if you want to capture daytime long exposure photos, a neutral density filter is essential.
(You can also use neutral density filters when shooting evening images!)
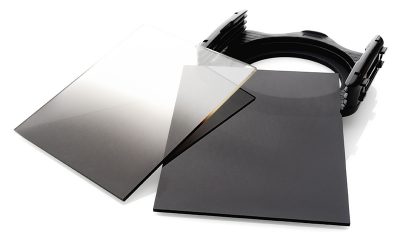
With a neutral density filter in hand, you can capture stunning motion blur even in bright sunlight.
But note that neutral density filters go in front of your lens and degrade the optics, if only slightly. So you want to make sure that you’re using the highest-quality glass. Don’t purchase cheap filters off of eBay! Instead, buy from a reputable company.
To learn more about ND filters and the role they can play in your photography, see this article: What is an ND Filter? Neutral Density (ND) Filter Chart
Shutter Release
A shutter release allows you to trigger your camera’s shutter button without physically pressing it. For instance, you might use a wired shutter release, which hooks up to your camera and trips the shutter; a wireless shutter release, which signals to your camera to take a photo, often over a great distance; an app, which allows you to control your camera remotely; or even an old-school cable release, which is very simplistic but gets the job done.
The reason for a shutter release is to prevent vibrations that come from pressing the shutter button. Such vibrations have the potential to blur your photos, same as if you bump the camera while it sits on the tripod.
But, in a pinch, you can get away with using the two-second (or ten-second) self-timer, which will delay the shot until after the “shutter button” vibrations have faded.
Make sense?
For more on shutter releases, check out this article: What is a Remote Shutter Release? Do I Need One?
Long Exposure Camera App
If you enjoy capturing photos with your smartphone, you may be interested in one of the long exposure apps on the market (such as Slow Shutter Cam). These long exposure apps allow you to increase your shutter speed in order to capture light streaks, motion blur, and more–using only your mobile phone.
But bear in mind that you’ll still need a tripod if you want stunning results!
Ideas for Long Exposure Photography
Long exposure photography may seem like a niche field, but there are long exposure opportunities everywhere.
For instance, you could photograph:
- Running rivers, streams, or waterfalls
- Leaves waving in the wind
- Cars driving down the road
- Clouds moving across the sky
- Fireflies flitting about at night
- Waves washing in and out
And much, much more!
Conclusion
Long exposure photography is exciting, it’s fun, and it can get you great results.
So go out and take some long exposure photos!