
How to fix overexposed photos in Lightroom is an essential skill every photographer should master because it is impossible to get the perfect exposure with every shot.
It is a simple and straightforward process that requires you to understand how exposure adjustment tools work in Lightroom.
To fix overexposed photos in Lightroom, you always start with the Highlight slider moving it to the left. Next, you follow with the White adjustment, slowly dragging it to negative values. In the last step, you use the Exposure slider to bring the overall exposure to the desired level.
Understanding Exposure and Overexposer
Exposure is one of the most fundamental concepts in photography. It is also a concept that we learn at the very beginning of our photography journey.
Exposure in photography determines the amount of light that you, as a photographer, permit to reach the camera’s sensor. Exposure defines how bright or how dark your photographs are.
When you take photos, you—along with the help of the aperture, shutter speed, and ISO—have full control over how much light you allow the camera to record. You can capture the same scene differently, which means the brightness of the photos will vary.
When your photo is too dark, we call this “underexposed.” When the photo’s brightness is spot on, we call this “properly exposed.” When the photo is too bright, we call this “overexposed.”
Today, we will learn how to fix, or at least attempt to fix, overexposed images in Lightroom.
Why do we get overexposed photos?
The camera meter does a pretty good job of evaluating the right exposure in evenly lit scenes. But more often than not, the subject we intend to photograph has uneven lighting. As a rule, the scenes with the most complex light produce the most interesting and dramatic photos.
For example, when shooting sunrises or sunsets, we can have large dark areas in the shadows and extremely bright regions in the sky. In these situations, the camera meter gets fooled and, as a result, sets the wrong exposure.
Overexposed photos occur when the exposure meter assumes that the scene is darker than it actually is; it boosts the exposure and makes the image too bright.
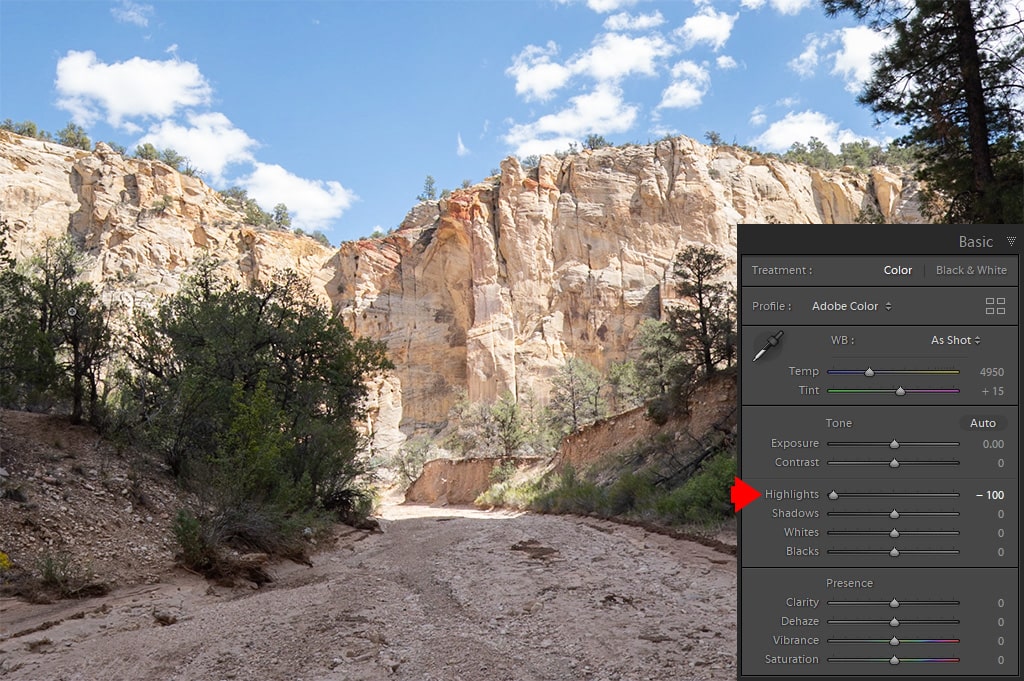
For example, here is a photo I took in Utah while hiking at the bottom of a canyon. The scene is extremely contrasted with the dark areas at the bottom of the canyon and the small, bright area of the sky at the top.
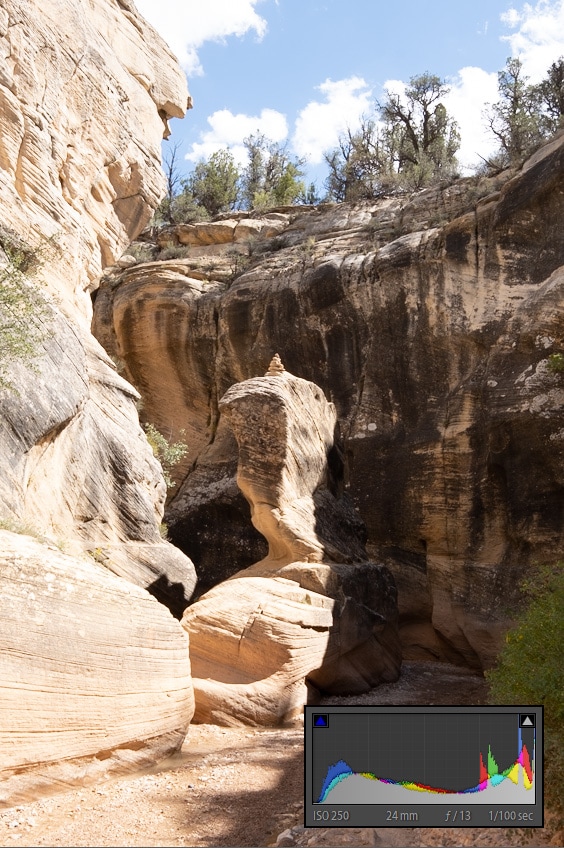
The darker area, which represents 80% of the frame, fooled the exposure meter by making it believe that the scene is too dark and, as a result, increased the exposure. By doing this, it blew the area of the sky and made the photo overexposed.
See also: How to Smooth Skin in Lightroom
Overexposed photos happen to all of us. We must learn how to fix them in post-processing.
How to Fix Overexposed Photos in Lightroom
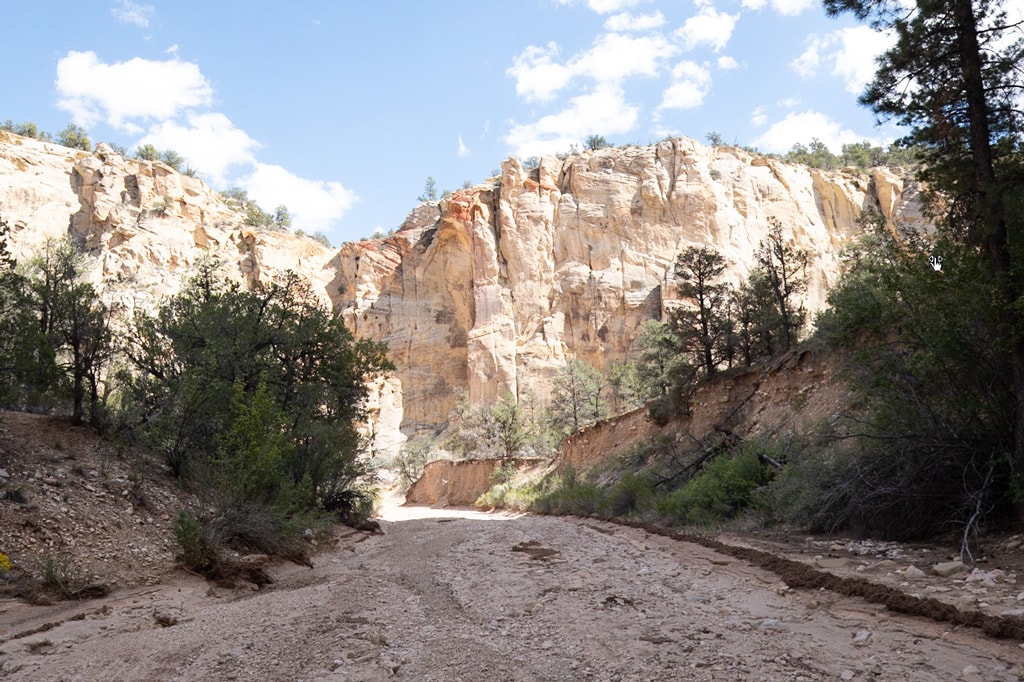
When you import photos to Lightroom and see that some of the photos are too bright or overexposed, the best way to evaluate the overexposed areas of the photo is by using the Histogram.
Jump to the Develop Module and open the Histogram panel from the top right corner if it does not open by default.
Next, hit the “J” keyboard shortcut to activate the Clipping Indicators.
The Clipping Indicators show the areas of the photo that are too bright (highlighted in red) and the areas that are too dark (highlighted in blue).
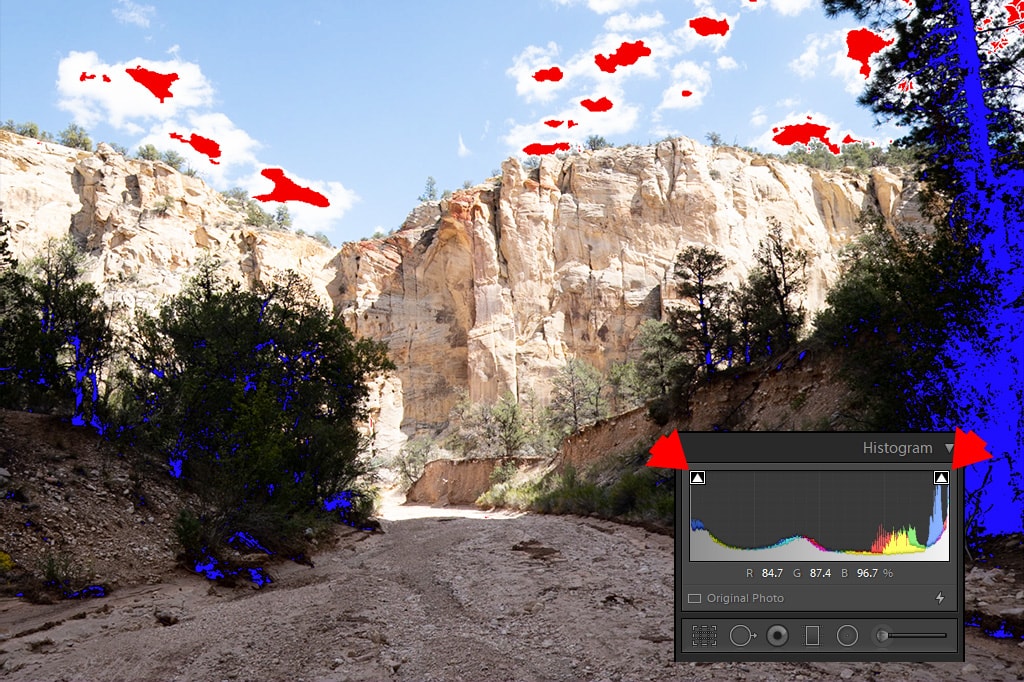
Since our goal is to learn how to deal with overexposed photos, we will only concentrate on the red highlights.
The red highlights identify the areas of the image that are blown out. This means that the highlighted areas are pure white and do not have any information in them; as a result, they cannot be recovered.
But this is only true for JPEG images because the Lightroom Histogram is based on JPEG images and not RAW information. Even if you shoot RAW, Lightroom converts the photo to JPEG and then builds the Histogram based on the JPEG version of the image.
This means that if you shoot in JPEG and see blown-out areas of your image, you are out of luck and the photo cannot be salvaged.
Related: How To Edit Your Photos Look Like Film
If you shoot in RAW, which I always recommend, you still have a chance to recover the image.
Since the Histogram is not an accurate representation of the RAW image, you won’t be able to assess the possibility of recovery by looking at the image and its histogram. You must start by moving the sliders to see if recovery is possible.
Step 1 -Recover Highlights
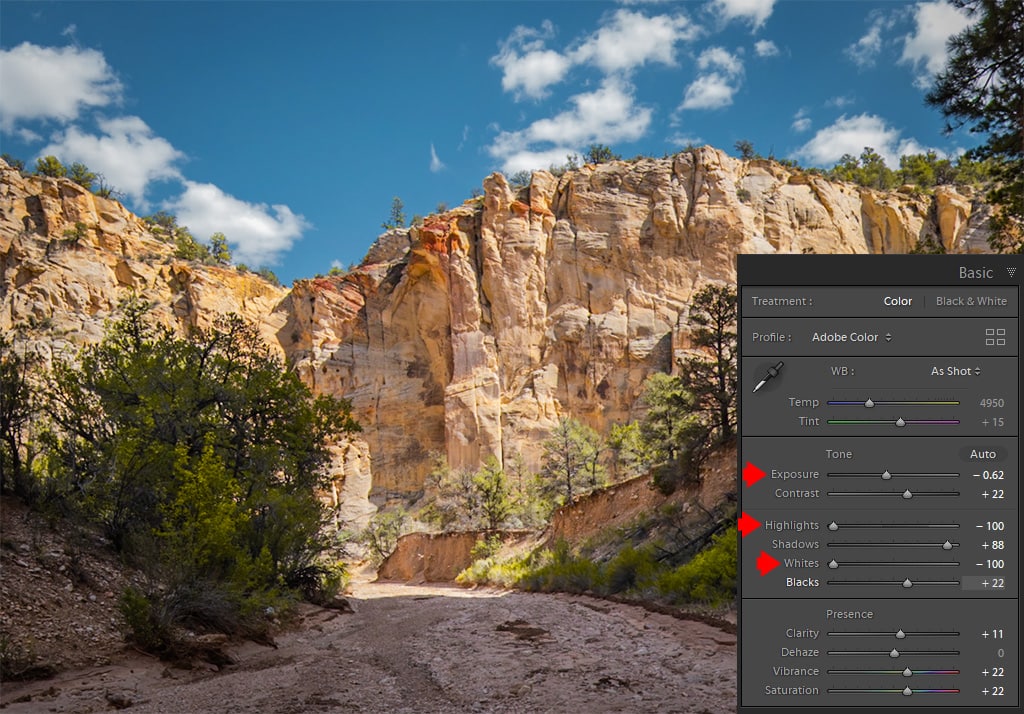
I always start the process of recovering overexposed images with the Highlights Slider. I drag the slider all the way to the left until it reaches a value of -100.
The Highlights Slider affects the bright areas of the image without affecting the pure whites, mid-tones, and shadows.
The reason the Highlights Slider is the most effective tool for recovering blown photos is that it has a special recovery algorithm. If, for example, one of the three color channels (red, green, and blue) has no information due to overexposure, the program will try and rebuild it based on the other two channels. In essence, it creates something out of nothing.
Next, I evaluate if the Highlights adjustments fully recovered the overexposed areas.
If it did not, I move to the next recovery option.
Step 2 -Adjust Whites
The Whites Slider affects the brightest areas of the image including pure white. It does not have a mechanism of rebuilding color information.
The Whites Slider is most often used for setting the white point in the images for a wider tonal range.
See also: How to Batch Edit in Lightroom
I drag the Whites Slider to the left until it reaches a value of -100 and assesses if it fixed the overexposed image.

If it does not, I move to the next tool.
Step 3 – Balance Exposure
The Exposure Slider affects the overall brightness of the image and tries to mimic the effect produced by the camera’s exposure settings (aperture, shutter speed, ISO).
For example, you take two photos of the same scene where one is properly exposed and the other is underexposed by one stop. You import them into Lightroom and boost the Exposure by one stop in the underexposed image. This will produce an identical image to the properly exposed image; both images will be indistinguishable.
I grab the Exposure Slider and start by slowly moving it to the left, making the image darker.
If at this point you can see that the image is getting darker, but the brightest areas of the images are still blown, this tells you that recovery is not possible.
See also: How to use soft proofing in Lightroom
Based on my experience, if you overexpose an image by one stop, the Highlights Slider will be able to recover the brightest areas of the image. You can balance the overall brightness of the photo later by using the Exposure Slider.
If you overexposed your image by more than 1.5 to 2 stops, you will need to use all three tools. The result is not always predictable as you will simply have to try to determine if recovery is possible.
Final Thoughts
The best way to avoid overexposed photos is to learn how to use the Histogram in your camera to always get the right exposure while shooting.
To maximize your chances of recovering the overexposed image during post-processing, always shoot in RAW format. By shooting in JPEG, you minimize the chance of exposure correction after the fact.