
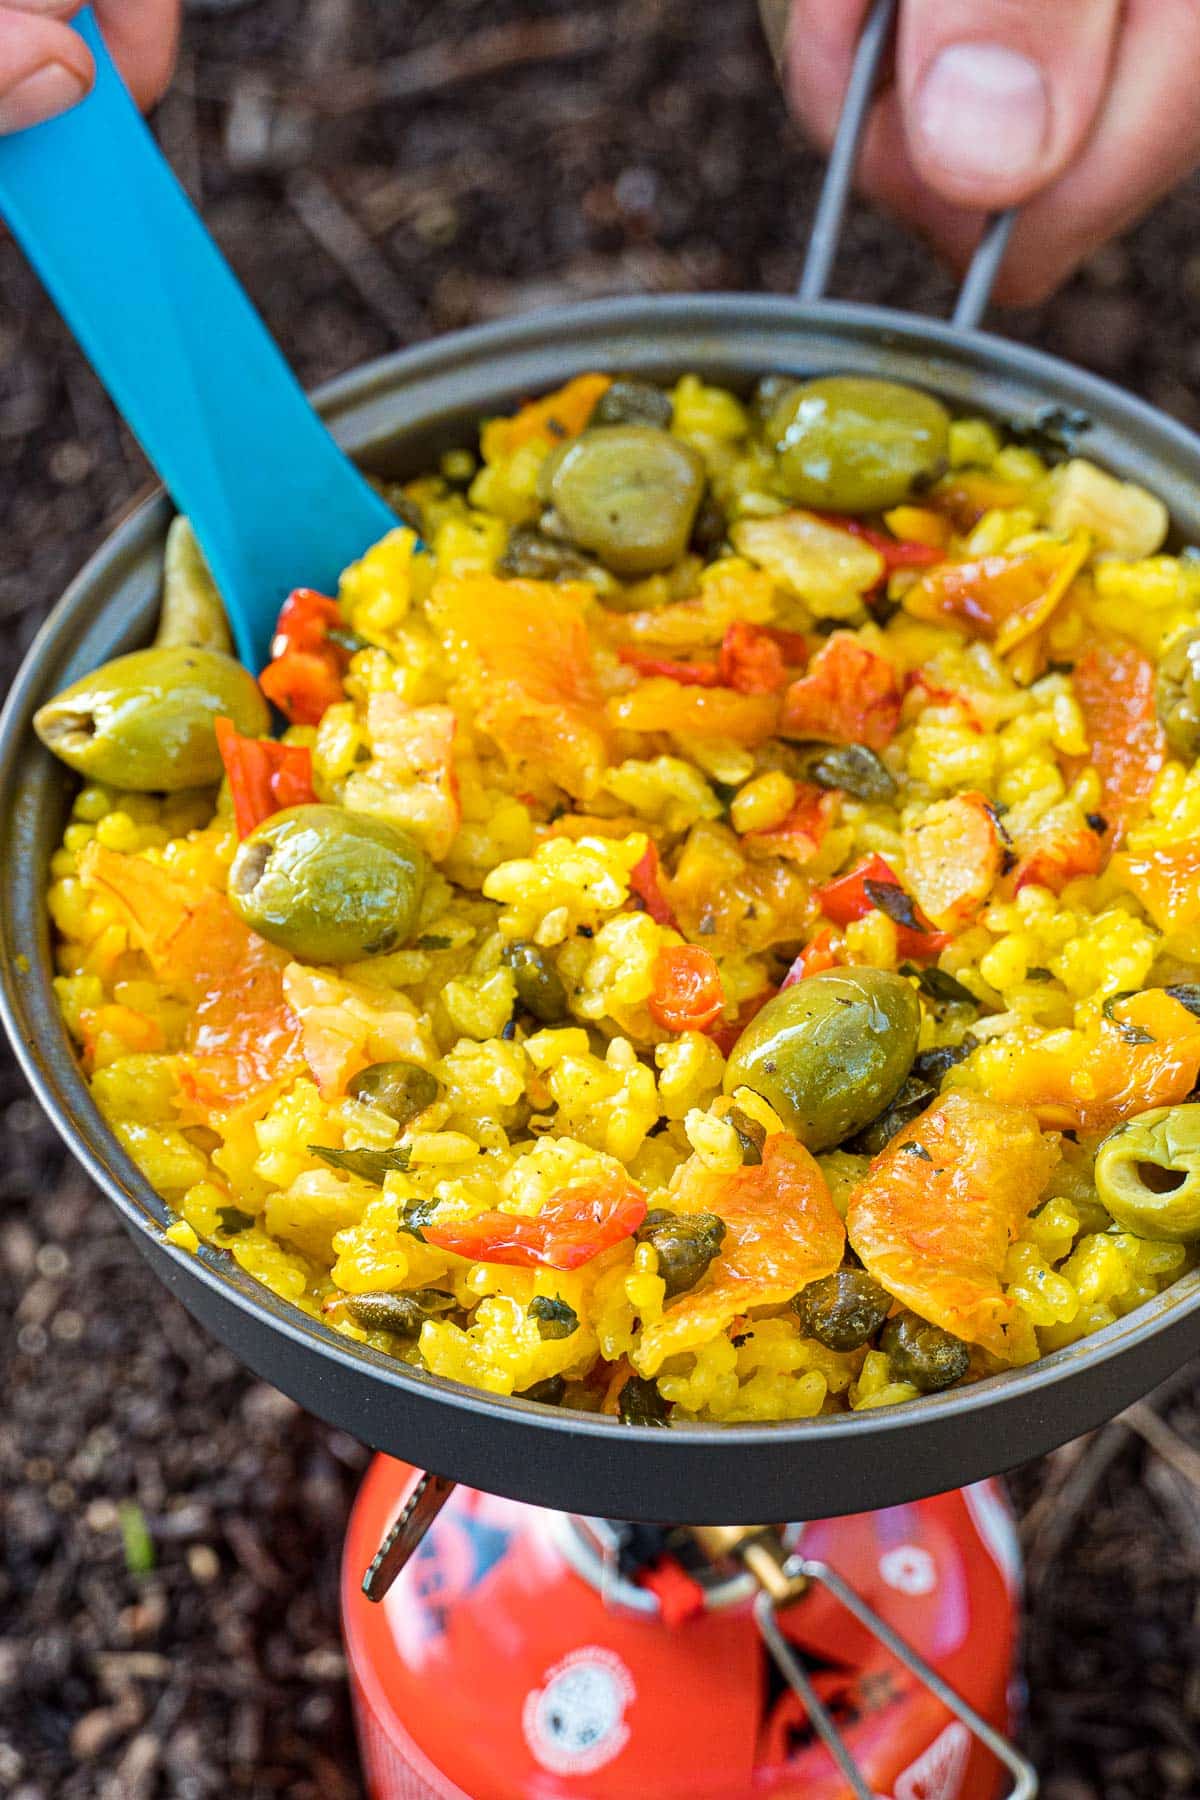
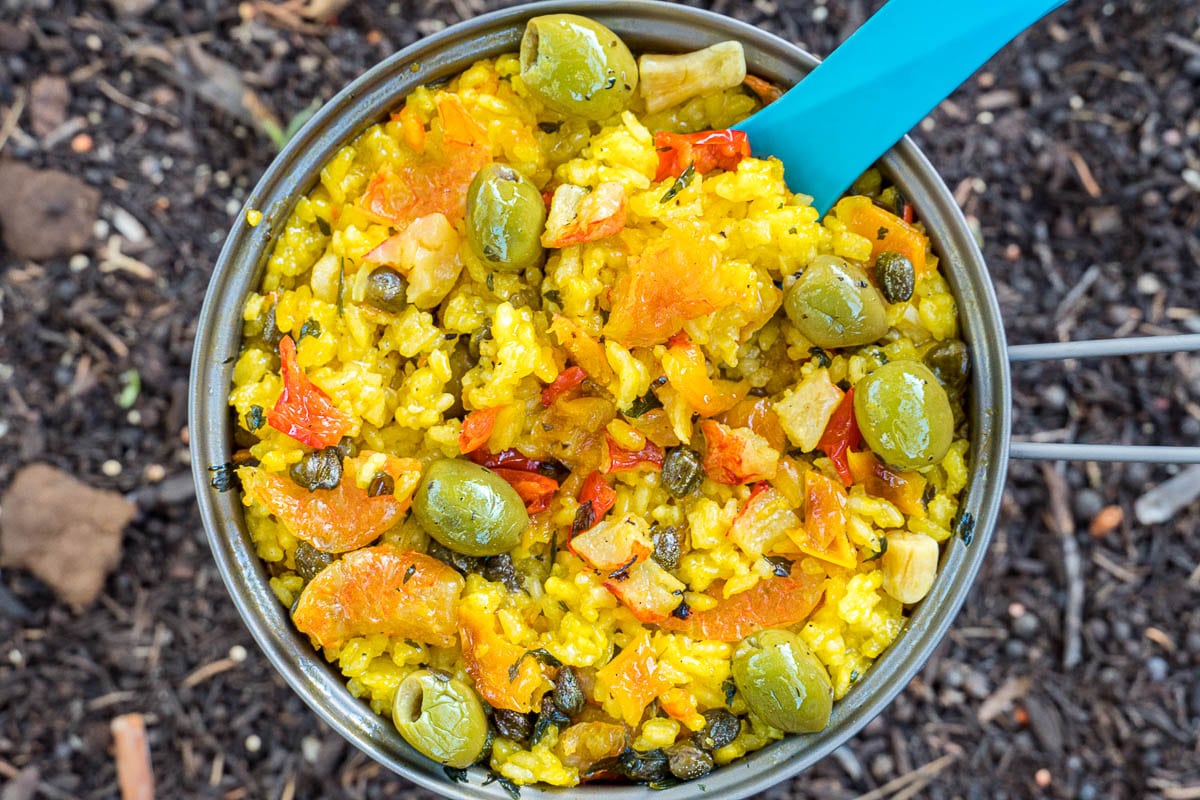
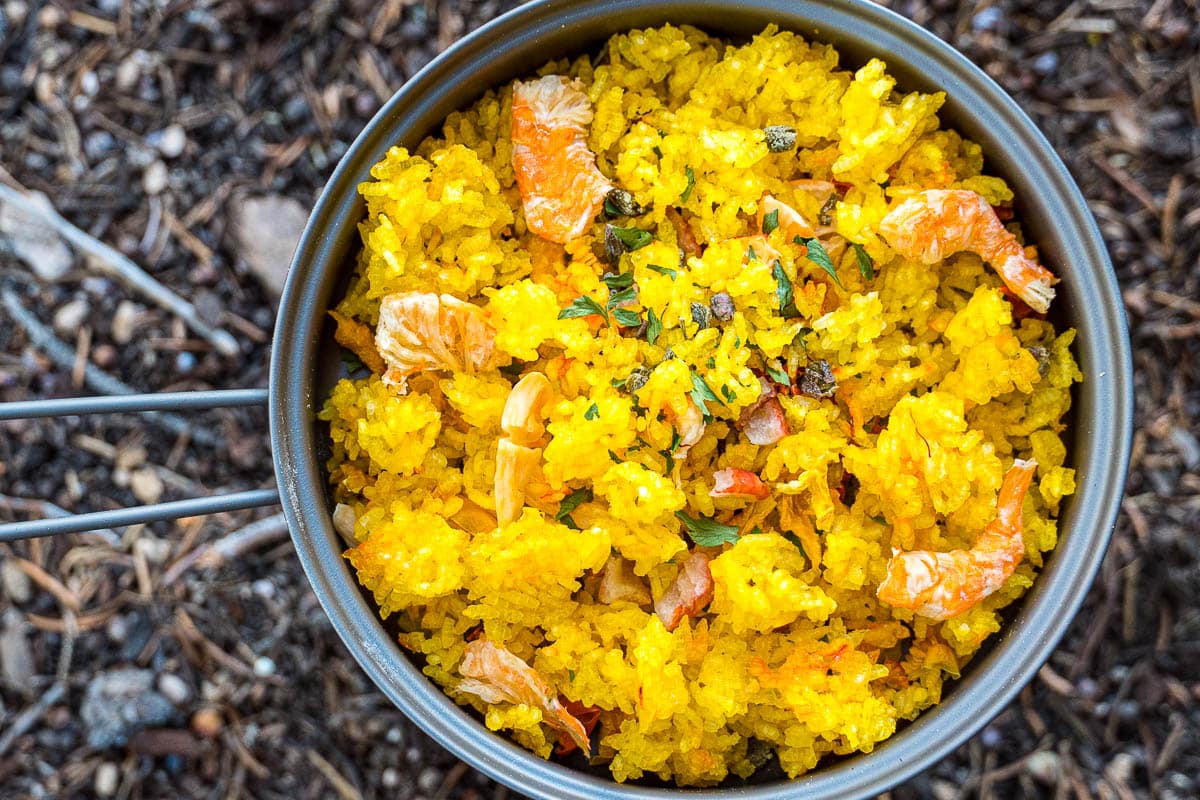
This dehydrated seafood paella is some serious next level gourmet backpacking food. Shrimp, crab , olives, capers, and veggies in a bed of golden saffron rice.
Sponsored by Brod & Taylor
We’ve dabbled in “gourmet” backpacking meals with our Mushroom Risotto and Chicken Marbella recipes, but this dehydrated seafood paella takes the cake. Not only is it loaded with fresh and exciting flavors, but it is actually easier to make than some other backpacking meals.
Fully cooked shrimp and imitation crab meat give this paella its seafood flair. They are both easy to find at your local grocery store, simple to prep, and rehydrate reasonably well. This recipe also features a variety of salty Mediterranean flavors like capers and olives. And to hold it all together is a vibrant bed of golden saffron rice.
So if you enjoy the flavors of paella and want to impress your fellow trail mates with your backcountry culinary skills, this dehydrated paella is for you!
For this recipe, we used our Brod & Taylor Sahara dehydrator. We absolutely love this unit. It is loaded with clever features like a fold-able design for easy store, positive close glass-doors, and intuitive digital controls.
Brod & Taylor also makes a line of silicone and mesh mats that fit perfectly inside the Sahara. These mats are great for smaller ingredients that would fall through the larger stainless steel racks.
Ingredients
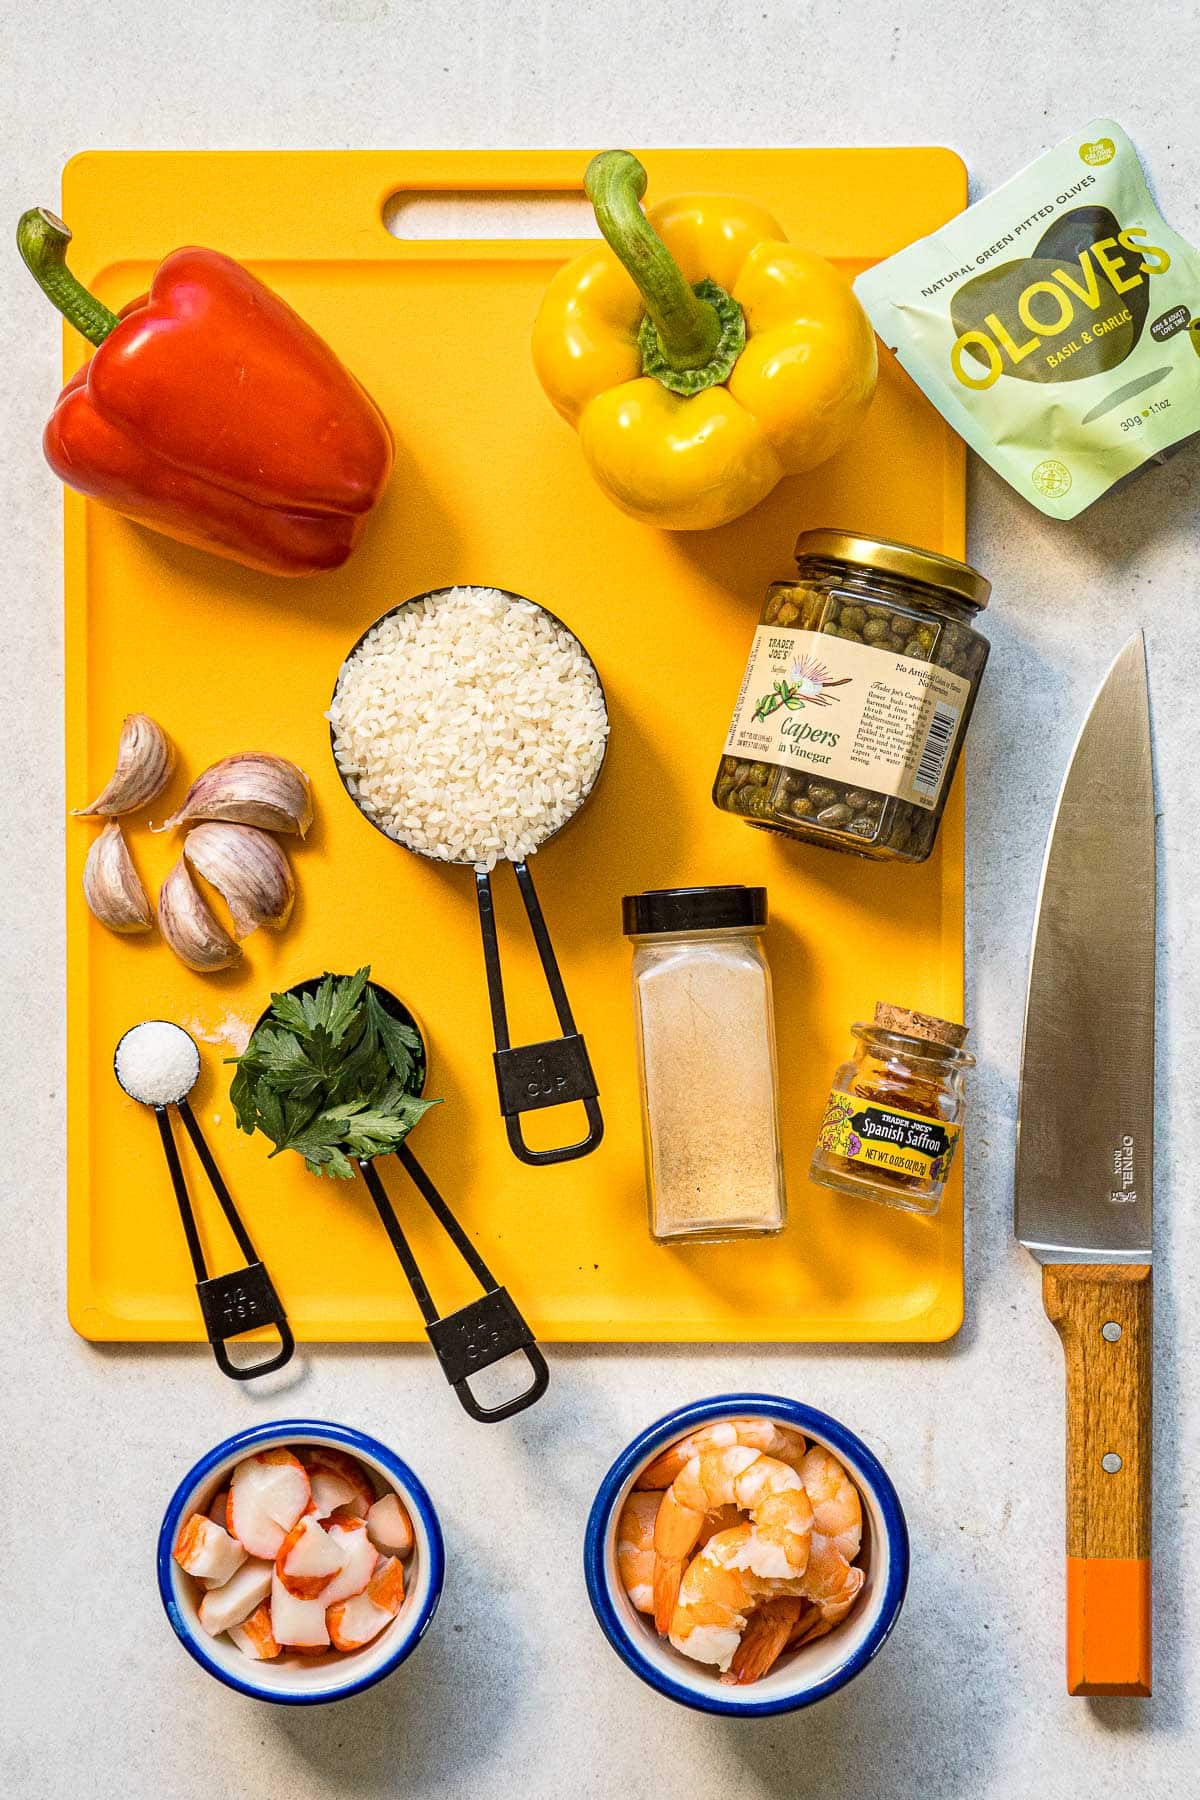
The Rice: Traditional Spanish paella is made with a highly-absorbent short-grain rice, typically Bomba (which is sometimes sold as Calasparra). However, we’ve never seen this sold in our grocery stores. So instead, we opt for any short grain rice we can find, like Calrose rice.
When making the rice, we like to add salt, garlic powder, and saffron into the water. This infuses the rice with flavor while it cooks, so it comes out perfectly seasoned.
The Seafood: Paella can actually be made with any type of meat or be entirely vegetarian. However, in the US, we are kind of enamored by one type of paella in particular: seafood paella (paella de marisco).
Seafood paella actually works out great for the backpacking version because shrimp and imitation crab meat are very easy to dehydrate and don’t require any pre-treatment.
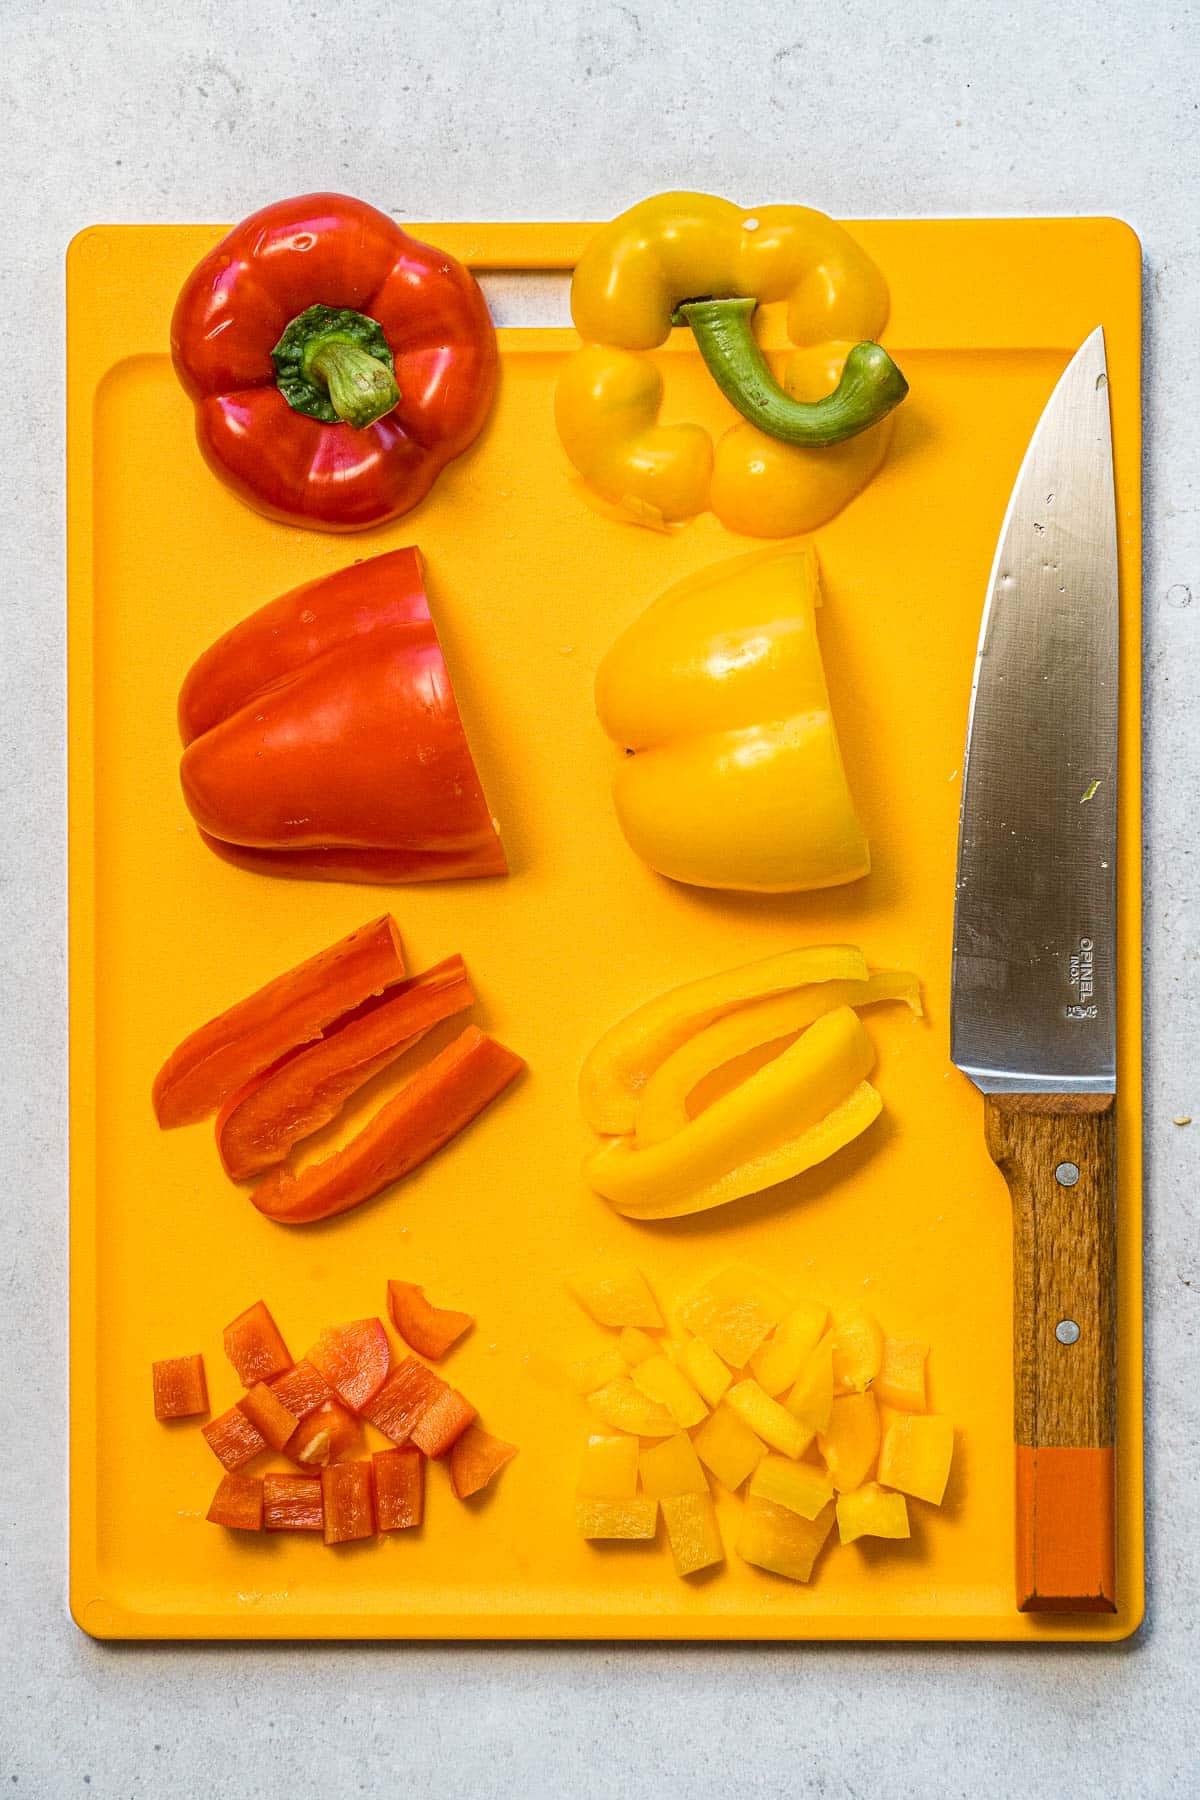
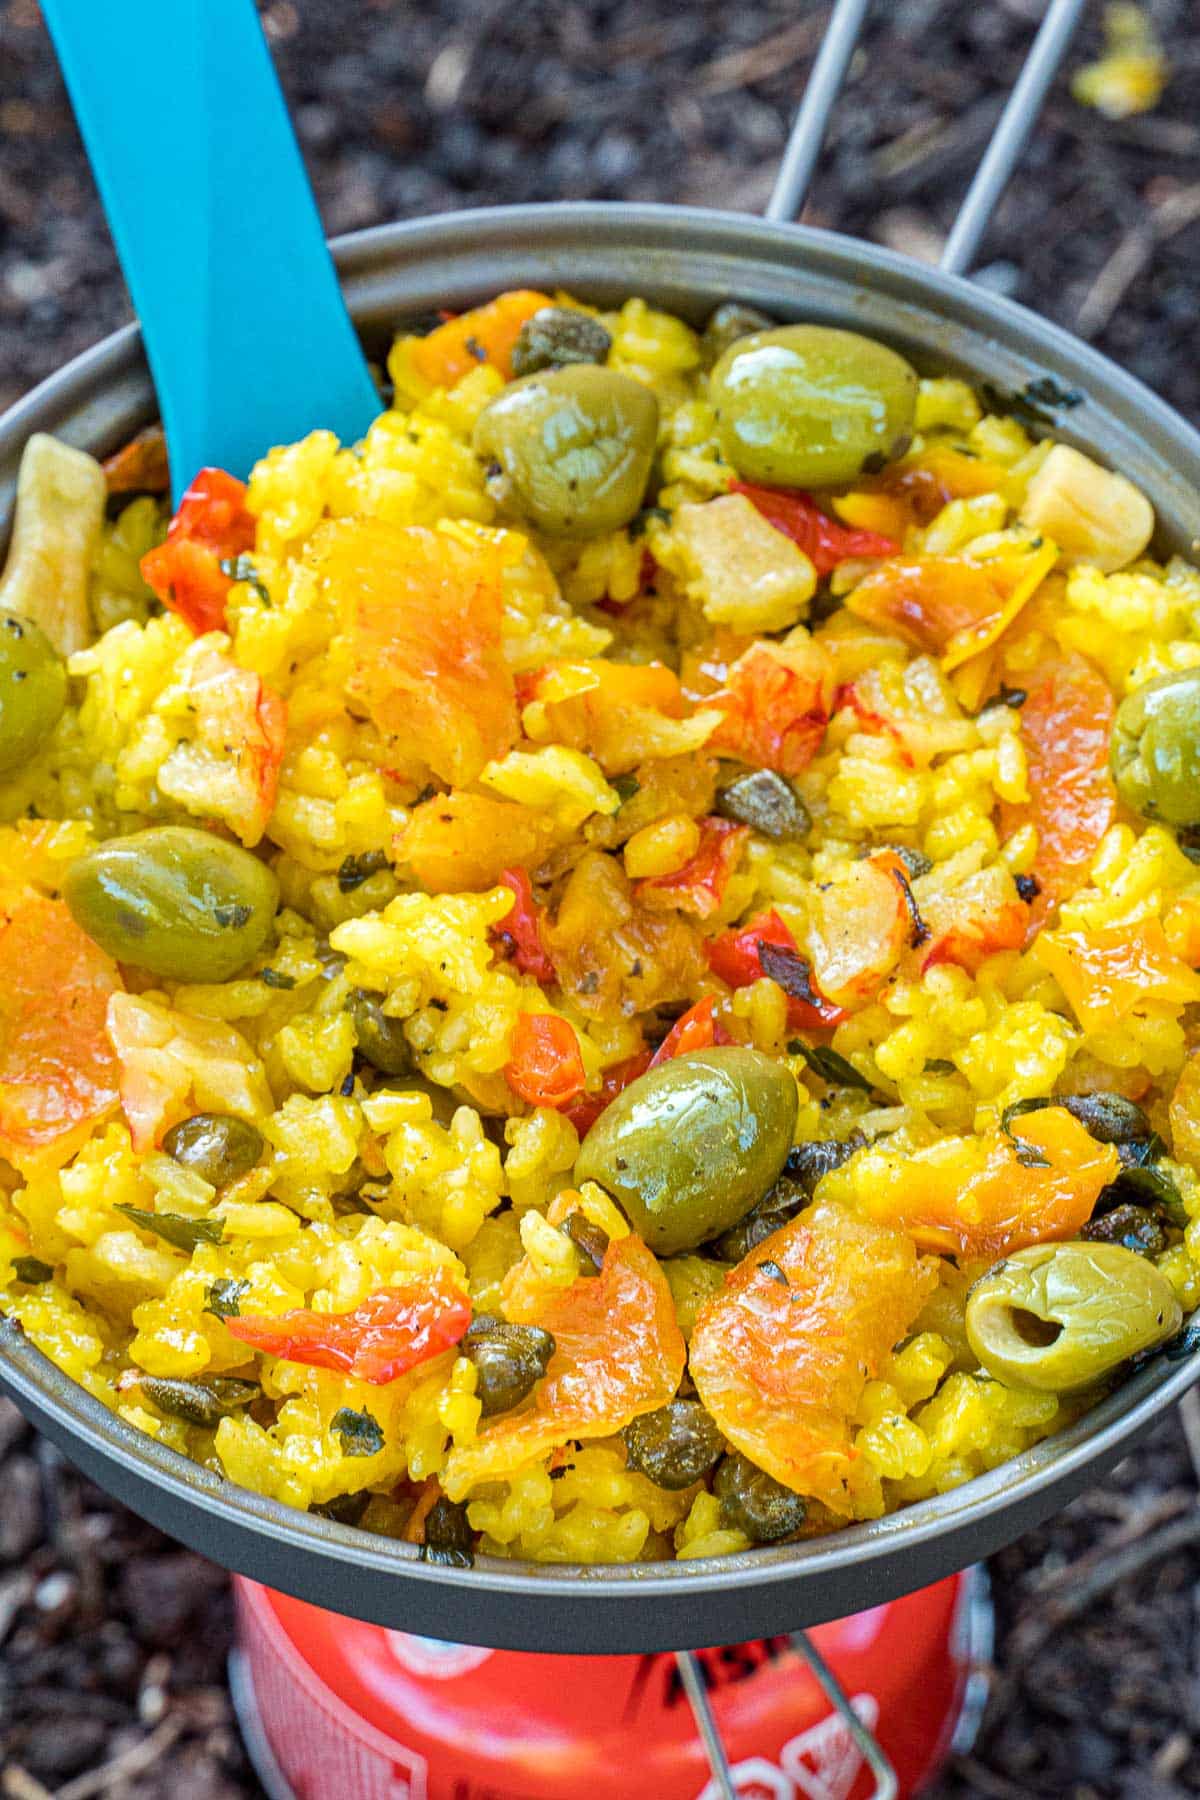
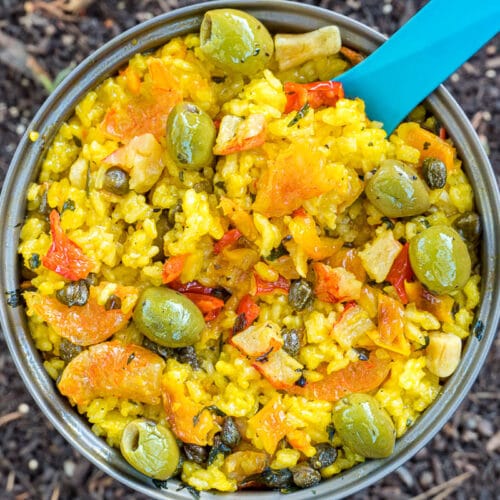
The Add-Ins: You have some flexibility when it comes to your add-ins ingredients, but we tried to keep it simple by just using red & yellow bell pepper, parsley, capers, and smashed garlic. Other good add-ins could include: artichoke hearts (in brine, not oil), green beans, and peas.
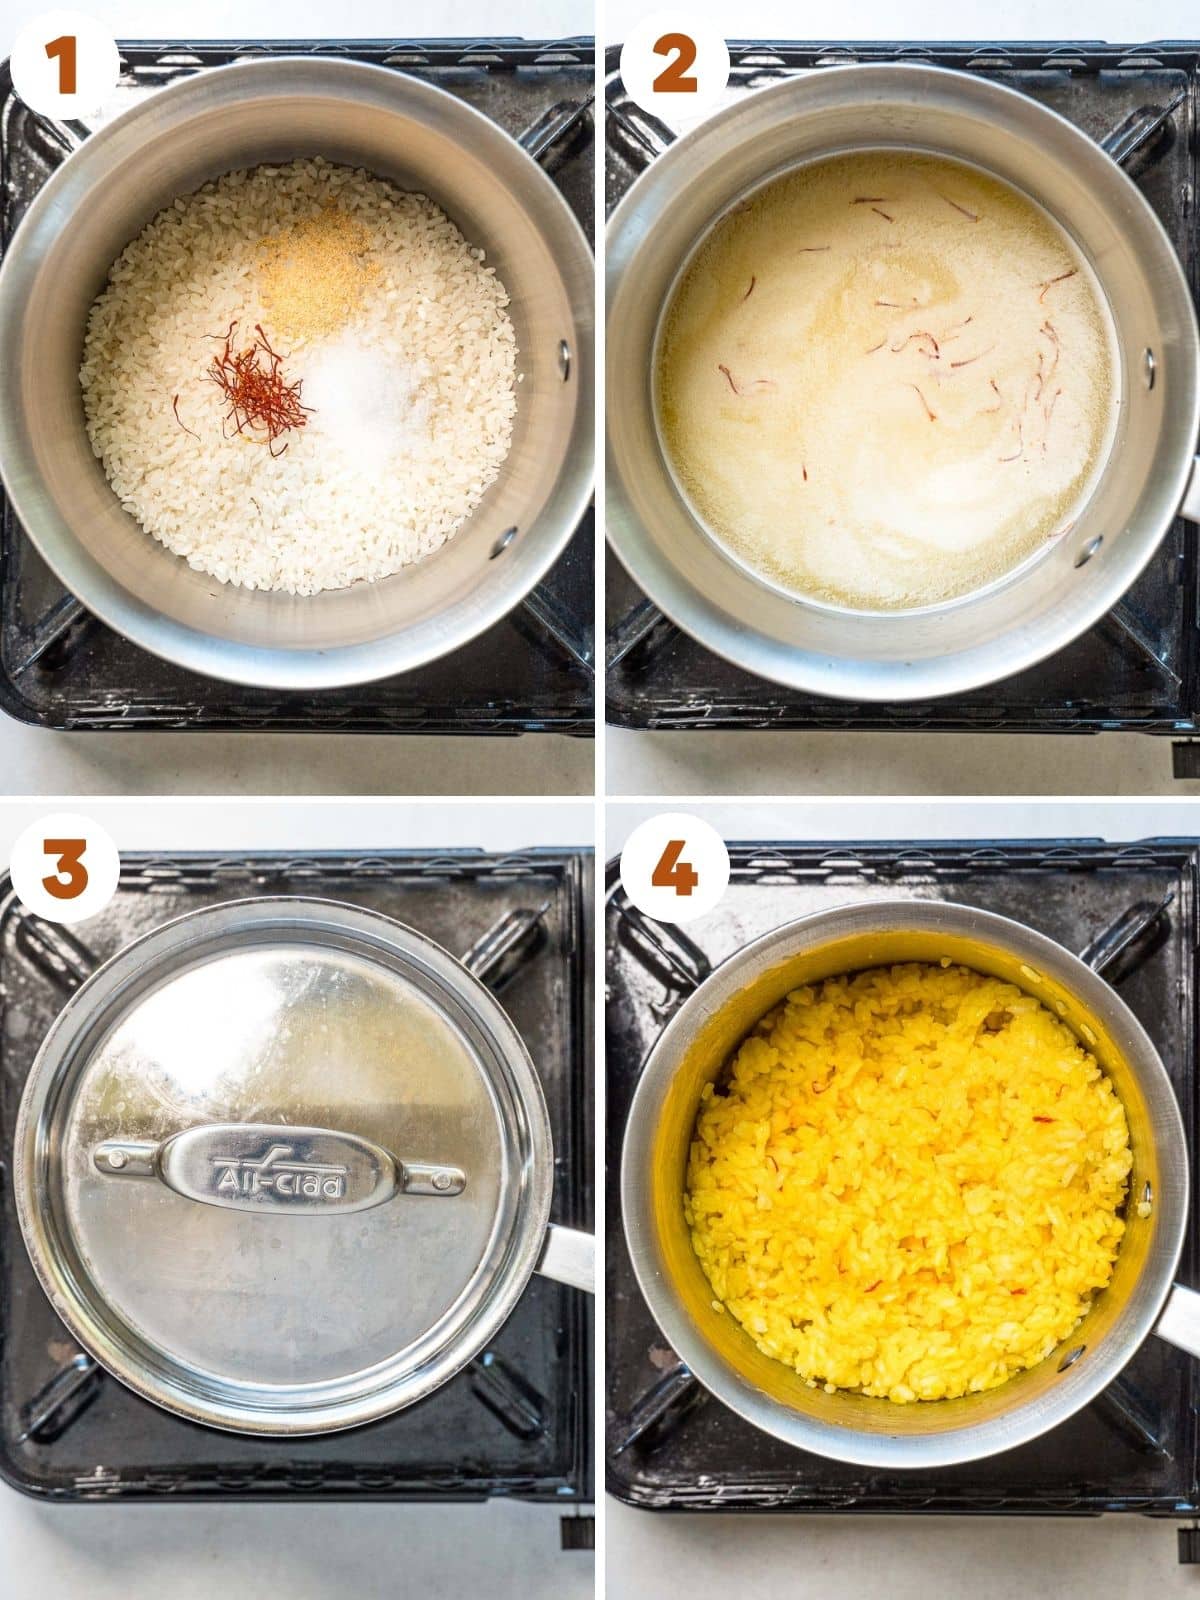
1. Making the Rice
It’s best to follow the cooking directions on the package for the specific rice you have. Cooking times can vary for different types of rice. For paella, don’t rinse the rice; you actually want some starch to develop.
Mix the salt, garlic powder, and saffron into the water you are going to use to make the rice.
After the rice is done cooking, lightly fluff with a fork and remove it from the heat.
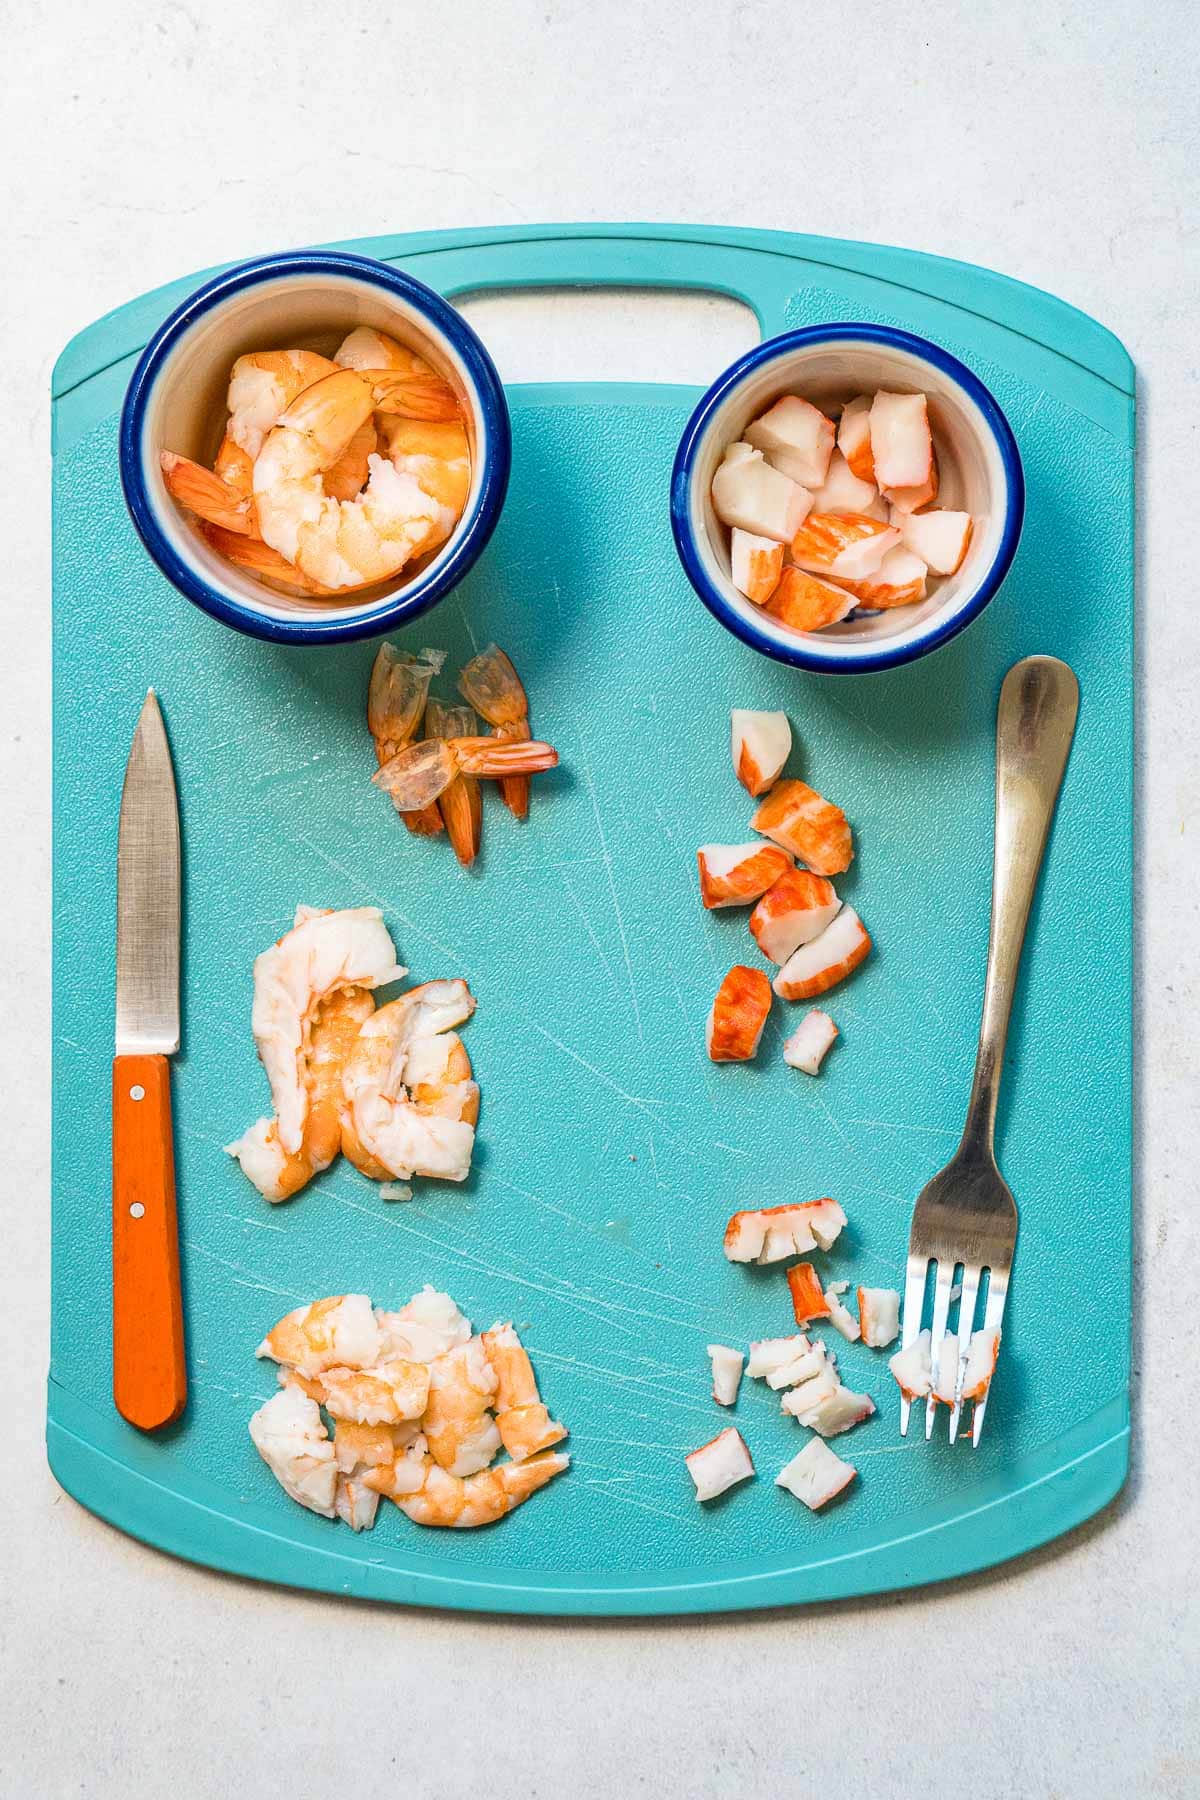
2. Preparing the Seafood
Buying pre-cooked, deveined, shell & tail removed shrimp really cuts down on the amount of prep work you need to do. This type of shrimp will typically come frozen, so prior to dehydrating, you will want to thaw it in a bowl of water.
To help the shrimp dehydrate/rehydrate better, slice them in half lengthwise and then chop the two pieces in half. (Basically quartering the shrimp). This will provide more surface area to allow the shrimp to rehydrate. *It is worth noting that re-hydrated shrimp will have a bit of a chewy texture. To us, the flavor outweighs the texture, but if it’s going to bother you, sub with more imitation crab, which rehydrates with a better texture.
Imitation crab meat can come in lots of different styles (legs, chunks, and flakes). Any of them will work, but when making this recipe we used chunks—flakes will also work well. We cut the chunks in half and then pressed on them with a fork to shred them. Again, this increased surface area will help them rehydrate.
3. Prepping Your Add-ins
Bell Peppers: We cut them into roughly 1/4” cubes.
Parsley: We removed the leaves from the stalks and left them whole. But you can chop them if you would like it to blend into the paella more.
Garlic: We smashed a few cloves with the side of our knife and sliced them into manageable sizes.
Capers: The easiest of the lot, just remove them from the brine and that’s it.
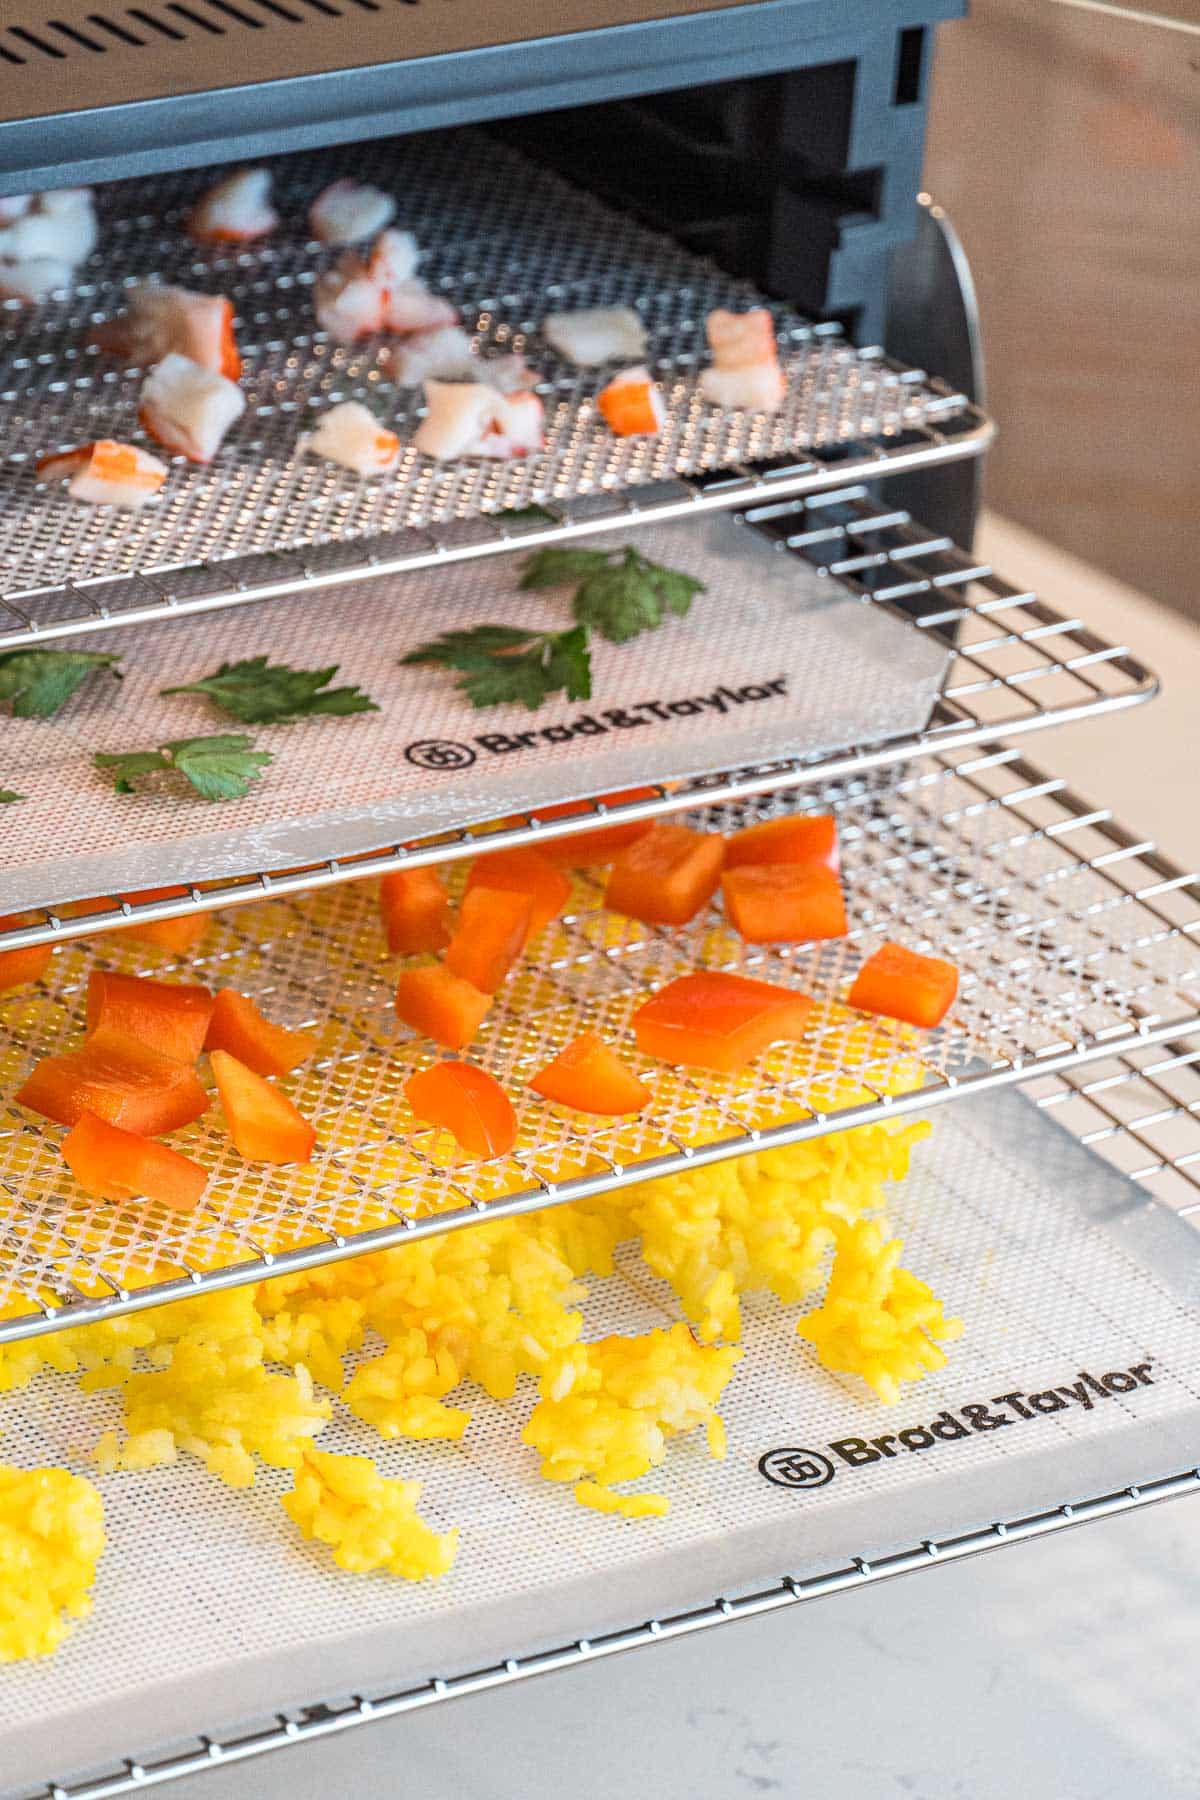
4. How to Load the Dehydrator
When loading your dehydrator racks make sure you use the appropriate silicone or mesh mat for the ingredients you are planning to dehydrate so they don’t fall through the holes of the dehydrator trays.
We used a silicone mat for the rice, capers, garlic, and parsley
We used a mesh mat for the shrimp, crab, and peppers
Set the dehydrator for 145F and run for 8-12 hours. We did this overnight.
5. How To Store and Package
Once everything is finished dehydrating, all the ingredients can be mixed together. Depending on when you plan on using this meal, you have a couple of storage options.
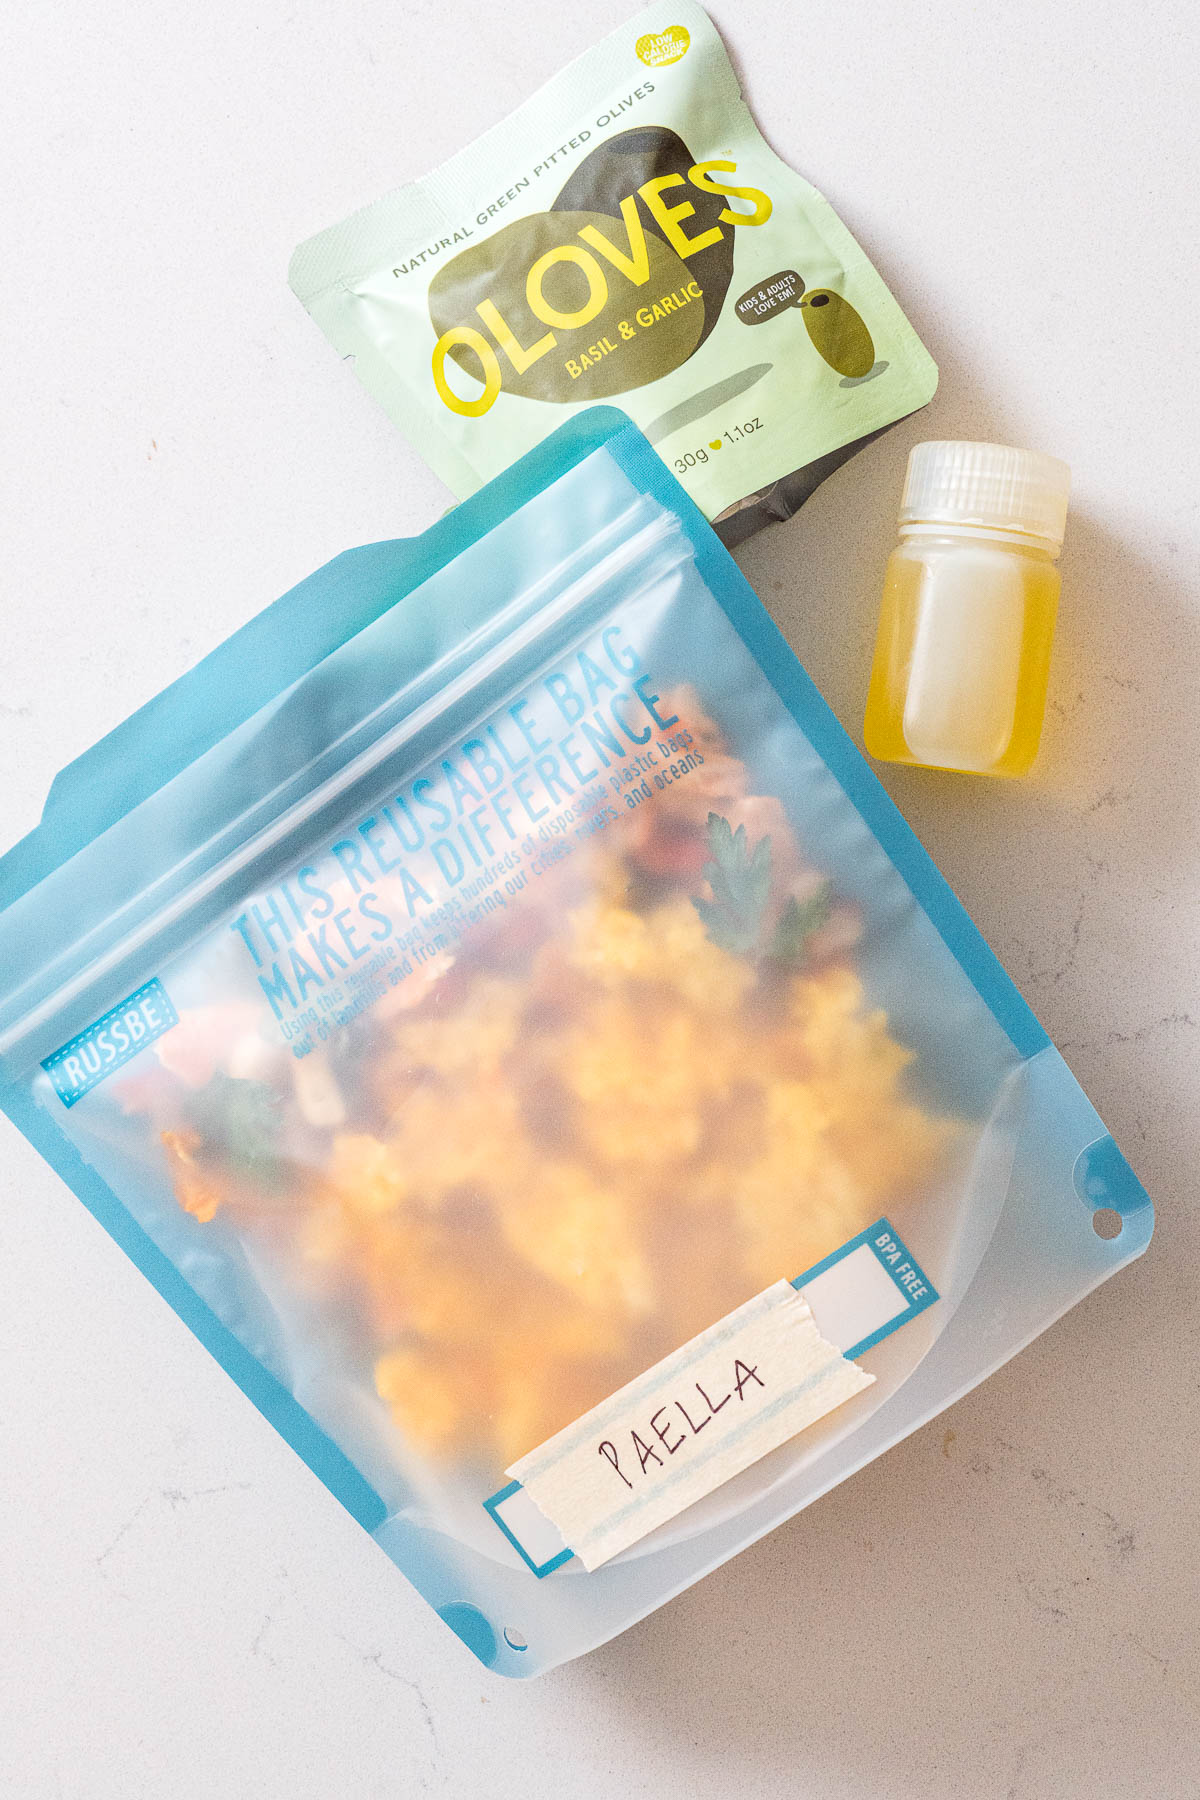
Short-term use (within the next few days): store everything in a well-cleaned, resealable bag.
Mid-term Storage (for next month or two): store the meal inside a sealed mason jar in a cool, dark place. If you live in a particularly warm/humid climate, then storing in the fridge will be better.
Long-term storage (upwards of a year): store the meal inside a vacuum-sealed bag in the freezer.
When packing this meal for the trail, you will want to make sure you additionally bring along a small bottle of olive oil as well as a package of pitted olives (like these from Oloves).
6. How to Rehydrate on Trail
Rehydrating this paella on the trail can be easily done in a pot with a lid.* Just add all the dried ingredients and the package of olives to your pot and add water until everything is just barely covered.
You can either:
- Bring to a boil and simmer for 10-12 minutes
- Bring to a boil for 2-3 minutes, cover, remove from heat and place inside an insulated cozy.
Once almost all the water has absorbed, add a tablespoon of olive oil. It will sink to the pot of the rice and you will hear it start to crackle and pop as it fries the bottom a little. Only let this go for a few seconds, otherwise you risk scorching the bottom of your pot.
*We made our paella in a titanium skillet so we could photograph it better. We guarantee it will taste just as good in a backpacking pot with higher sides, too!
- 1 cup short grain rice
- 1 teaspoon sea salt
- ½ teaspoon garlic powder
- ½ teaspoon saffron
- 1 red bell pepper
- 1 yellow bell pepper
- ¼ cup parsley, just the leaves
- 2 tablespoons capers
- 3 cloves garlic, smashed and sliced
- 6 large shrimp, cooked, deveined, shell and tail removed
- 6-8 pieces of imitation crabmeat
- Pack for the trail: 1 tbsp olive oil + 1 package olives (such as Oloves)
Prevent your screen from going dark
Make the rice
-
Make the rice according to package directions for 1 cup (uncooked) rice, adding the salt, garlic powder, and saffron the the water at the beginning of the cooking process.
Prep remaining ingredients
-
While the rice is cooking, chop the bell peppers into ¼” pieces, roughly chop the garlic, quarter the shrimp, and chop or shred the imitation crab.
Load the dehydrator
-
Transfer all the ingredients (cooked rice, veggies, herbs, and seafood) to the dehydrator trays, utilizing mesh or solid liners to prevent small pieces of food from falling between the holes in the trays.
-
Load the trays into the dehydrator.
-
Dehydrate at 140°F for 8-12 hours until everything is completely dried & hard.
Pack or store the meal
-
Short-term use (within the next few days): Divide and store everything in well-cleaned, resealable bags. Additionally, pack 1 tablespoon olive oil and a small package of olives per serving.Mid-term Storage (for next month or two): store the meal inside a sealed mason jar in a cool, dark place. If you live in a particularly warm/humid climate, then storing in the fridge will be better.Long-term storage (upwards of a year): store the meal inside a vacuum-sealed bag in the freezer.
On Trail
-
Add all the dried ingredients to your pot and add water until everything is just barely covered.
-
Bring to a boil and simmer for 10-12 minutes ORBring to a boil for 2-3 minutes, cover, remove from heat and place inside an insulated cozy.
-
Add oil towards the end of the cooking process.
-
Once the meal has rehydrated, add the package of olives and enjoy!
*Nutrition is an estimate based on information provided by a third-party nutrition calculator