
A frameless backpack is a core element of any ultralightweight backpacking strategy. Since the beginning of the 2000s, they’ve been my backpack model of choice for the majority of hiking trips that I’ve done. The following article contains a rundown of why you should consider using a frameless backpack, addresses some of the most frequently asked questions on the subject, and finally provides a list of 15 highly regarded frameless models, including specs, prices, and links for detailed long-term reviews.
Why Choose a Frameless Backpack?
1. Simplicity: Frameless packs generally have simpler designs. Fewer zippers, fewer compartments, fewer straps, no stays – less that can break, rip, or go wrong.
2. Fit: With frameless backpacks, it’s the load itself that provides the structure. With an unrolled or folded sleeping mat (either CCF or inflatable) acting as a makeshift framesheet, ideally, a frameless pack should mold to the contours of your back. In order for that to happen, particular attention must be paid to the manner in which your pack is filled (see How to Load a Backpack). A moderate or heavy load packed indiscriminately into a frameless model, will be a lot more uncomfortable than it would be in a more forgiving internal or external frame backpack.

Joshua “Bobcat” Stacy and the Gossamer Gear Kumo | Lowest to Highest Route, USA, 2014.
3. Weight and Durability: Because of their simpler design and lack of framesheet or stays, frameless packs are lighter than other models. Generally speaking, they tip the scales at 0.6 kg (21 oz) or less. That said, over the years I have found that the weight saving doesn’t come at the cost of durability. A case in point was the first two Mountain Laurel Design Burn packs that I used between 2009 and 2018. Each pack lasted at least 9,000 trail miles (14,484 km). The one caveat to this is if you regularly overload them, in which case the stitching tends to fail quicker than framed backpacks; particularly around the shoulder strap area.

Sometimes you just have to go big, and one of the largest loads I’ve carried in the MLD Burn was during an approximately 240 mile (386 km), seven-day stretch between East Glacier and Helena, MT, on the Continental Divide Trail in August 2012.
4. Size: People who buy backpacks with large carrying capacities (e.g. 65 litres or more) generally find ways to fill them. You have all that space, it would be a shame to see it go to waste, no? An inherent advantage of frameless packs is that they are relatively small. They are not made to haul loads over 10 kg (22 lbs) for extended periods of time. This limitation forces the hiker to pare down their backpacking kit from the outset. With a frameless pack, the focus needs to be on carrying the necessities, with superfluous luxuries either left at home or kept to a bare minimum (Note: Generally speaking, if your base weight is less than 4.4 kg/10 lb, you don’t need any more than 50 L capacity in order to fit 5 to 7 days of food plus a few litres of water).
5. Cost: Fewer materials and simpler designs mean that frameless models are usually cheaper than their internal and external framed equivalents.

Paul “Mags” Magnanti and his ULA CDT in Utah’s La Sal mountains, 2018 (photo courtesy of Pmags and Rambling Hemlock).
FAQs about Frameless Backpacks
“In regard to weight, how much is too much when using a frameless backpack?”
If your base weight is north of 5 kg (11 lb) and you regularly carry a total weight of more than 9 or 10 kg (20-22 lb), you are most likely better off with a lightweight internal frame backpack. Why? Internal frame packs with a fixed hip belt offer superior load distribution between your shoulders and hips and thus are more comfortable to use when carrying heavier loads for extended periods of time.
It’s worth noting that what constitutes “comfortable” can vary significantly between hikers. We all have different levels of shoulder and back strength, and your muscle conditioning will vary according to how in “trail-shape” you are at any given time. For example, a thru-hiker may struggle to carry six days worth of food and a couple of liters of water in their frameless pack during the initial weeks of a hike. However, after two or three weeks on trail, they will most likely find that the same weight feels relatively comfortable (or at least more manageable).
To mitigate this breaking-in period, the simple solution is preparation. Personally speaking, before undertaking any extended hiking trip I’ll progressively increase the amount of weight I’m carrying on my training hikes. I’ll generally do this over an eight-week period so that when I eventually set out, my body is already habituated to the types of weights I’ll be required to carry during the journey. The benefit of this strategy is not only a more comfortable and enjoyable experience but just as importantly, it also makes you less likely to incur body-stressing injuries. This point particularly holds true for those among us that are getting up there in years.

For the traverse of Southwest Tasmania, I began the trip carrying more than two weeks of food in a framed HMG 2400 Southwest pack.
“What about hip belts, and the theory that they aren’t necessary for frameless backpacks if your base weight is under 4.5 kg (10 lb)?”
I disagree, with the following caveat – if the majority of your hiking is done on well-maintained trails in three-season conditions, then yes, you can definitely manage sans hip belt without too many issues. This particularly holds true if you rarely hike for more than four or five days between resupplies (i.e. your total pack weight doesn’t exceed 10 kg / 22 lb). When hiking on such pathways, more often than not I’ll leave my hip belt loose or clip it around the backside of the pack.
All that said……………I never give it the chop. Why? Because for a 1.5 or 3 oz weight penalty, even the most minimalist of hip belts can make a difference in regard to load stabilization, which is particularly useful from a balance perspective when hiking in technical, off-trail conditions for extended periods.
Note: Not all hip belts are created equal. While the webbing hip belts or “wings” that you see on many frameless packs can make a difference stability-wise, they don’t do a great deal in regard to weight transfer. For that, you really need to go with an internal frame pack in which the frame/stays are integrated into the pack’s hip belt (see below).

Justin “Trauma” Lichter (the one doing the pushing) under the strain of a heavy load during the Copper Canyon Traverse (Note the hip belt!) | Mexico, 2013.
“Apart from a hip belt, what other features should I look for in a frameless pack?”
This will vary between hikers. Personally, I like a frameless pack with a slim profile, 30-40 litre capacity, wide and padded s-shaped shoulder straps, shoulder pockets, and a good compression system (i.e. side and top straps) which allows me to maintain a firm and stable pack irrespective of the fluctuations in the perishable weight I’m carrying (i.e. food and water). Additionally, I’ll occasionally use a removable hip belt pocket if I’m carrying a dedicated camera apart from my phone.
“What about a bottom pocket? “
Some folks seem to like them, I find them superfluous. I have all the space I need for snacks in either my shoulder pockets, my occasional hip pocket/s, or the pockets on the side of my pack beside my water bottles. If I need anything else I’ll simply swing my pack around or stop and get it out.
“What fabric/s would you recommend for frameless packs?”
As of 2020, the main options for premium frameless backpacks are Xpac, Dyneema Composite Fabrics (DCF), and high tenacity nylons such as Dyneema X, Robic, and Cordura. Which is best? It really depends upon what you’re looking for. Personally, I don’t think there is “one material to rule them all.” Big picture-wise I’m not even sure it matters that much which one you go with. When it comes to backpacks it has always struck me that factors such as workmanship, comfort, volume/compression, functional pockets, and load-carrying ability are more important than which lightweight fabric you end up choosing. That said, here are a few thoughts:
- Value for Money / Budget Pick – If money’s tighter than a hairpin turn, go with Cordura, Robic, or Dyneema X. They’re a little heavier and not as water-resistant as XPack and DCF, but for most folks, the latter point is no deal-breaker if you’re lining your pack with a trash compactor bag (Note: Which you should do in most environments regardless of your fabric of choice).
- XPac and DCF – These two are lighter and perform better in wet conditions than nylon models, but they’re also more expensive. In regard to durability, much depends on the density/weight of the material used, and although I can’t personally speak to the long-term performance of Xpac’s multiple variants, I can say that I’ve put my DCF HMG Southwest 2400 through the bushwhacking wringer since 2015/16, and apart from discolouration and a few scratches here and there, it’s still in good shape. The same goes for my DCF MLD Burn which I’ve had since 2018. Does that mean that DCF packs will hold up as long as my Granite Gear Cordura models from the early 2000s? No, but I don’t think the discrepancy in long-term durability is that much that I’d give up the weight and water resistance advantages (i.e. sheds more/retains less) of DCF.
- My Preference?: If I’m heading out for extended trips in wet environments such as Tassie, Scotland, Scandinavia, or the south island of New Zealand, I’ll be reaching for one of my DCF packs. For all other types of conditions, I’ll grab whichever pack is handy and not give it another thought.

Yours truly and the Granite Gear Virga during a descent of Taracuera Canyon | Copper Canyon Region, Mexico, 2005.
“I suffer from back pain. Would you still recommend a frameless backpack?”
No. A pack in which the frame stays are integrated into the hip belt will help reduce pressure on your back and shoulders by transferring more weight to your hips. As someone who has experienced disc issues in recent years, I can personally vouch for the difference it can make comfort-wise when carrying heavyish loads. That said, it’s not a panacea. Irrespective of which type of backpack you carry, for folks dealing with back problems the onus is even greater to minimize the amount of weight you carry, make sure the heaviest/densest items are packed close against your back in the middle of the pack, and do everything you can to rehab/strengthen the areas in question before heading out into the field for extended periods.

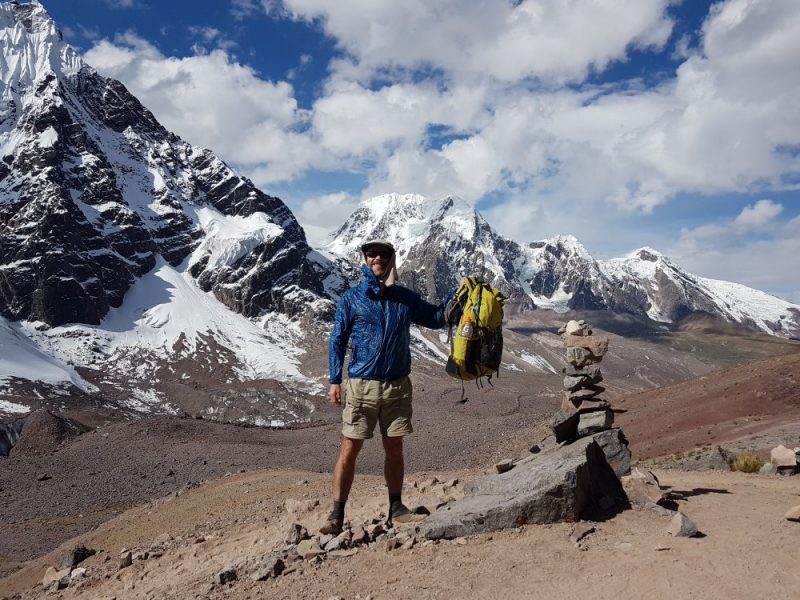
Crossing the Salar de Uyuni with the HMG Southwest 2400 | Altiplano Traverse, Bolivia, 2017.
Recommended Frameless Backpacks
Since the early 2000s, I’ve used frameless packs from OG ultralight companies such as Mountain Laurel Designs, Gossamer Gear, and Granite Gear. In recent years, a new wave of cottage industry backpack manufacturers have joined the UL party, and there are now more options than ever before from which to choose. Listed below are 15 of the top frameless backpacks currently on the market (in alphabetical order):
| Company / Model | Weight (oz/kg) | Volume (L) | Fabric | Price (US$) | Notes |
| Atom Packs The Atom 40 | 14.7 | 40 | XPac | £185 (US$217) |
Highly regarded UK-based company / Also available in 30L and 35L models / Click here for a 3,000 mile review. |
| Gossamer Gear Kumo | 18.9 | 36 | Robic | 165 | Very comfortable pack, I’ve used the Kumo periodically since the CT in 2015. Long-time favourite of “desert king”, Ryan “Dirtmonger” Sylva. |
| Gossamer Gear G4-20 | 21.7 | 42 | Robic | 180 | A sleeker, cushier, and heavier remix of the classic GG G4 from the early 2000s. |
| Granite Gear Virga 2 | 19 | 54 | Cordura | 140 | Hard to beat for durability and value. I used the original version between 2003 and 2008; still in good condition after 17 years. |
| KS Ultralight Gear 40 | 12.7 | 38 | Xpac | 17,300 JPY (US$165) | Barebones weight and price. Add cash and oz for basic accessories. Packs receive good reviews, but the website is headache-inducing. |
| MLD Burn | 16.5 | 38 | Dyneema X or DCF | 220 | Long-time favourite. More bells and whistles than my original models from the late 2000s/early 2010s, but the workmanship continues to be second to none. See 19,000 mile review. |
| MLD Prophet | 17 | 48 | Dyneema X or DCF | 230 | Larger sibling of the Burn. Best for folks with a three-season base weight of 9 to 11 lb. |
| Nashville Pack Cutaway | 12 | 40 | Xpac / DCF / Robic | Relatively new company, that has received consistently high marks. Lots of customizations available. Click here for a detailed review. | |
| Palante Packs V2 | 17 | 37 | Xpac | 240 | Popular choice among US ultralight backpackers. Also available in 31 L model |
| SMD Flight 30 UL | 20 | 31 | Robic | 190 | Available with vest harness and different types of hip belts. Click here for a review from Outdoorsmagic.com. |
| SWD Superior 35 | 14.5 | 43 | Xpac or DCF | 175 | Lots of customization options. Also available in 30 L and 40 L models. Click here for a 3,000 mile review. |
| ULA CDT | 24 | 54 | Robic | 145 | Affordable, durable, simple design. Also available in XPac. See review from Pmags |
| Ultimate Direction Fastpack 35 | 25 | 38 | Robic | 185 | Largest model of UD’s Fastpack series. |
| Zimmerbuilt Quickstep | 9.75 | 36 | DCF | 150 | Barebones weight and price. Add cash and Oz for basic accessories such as sternum strap & padding for shoulder straps. Click here for review by long-time user, Rafael Mujica. |
| Zpacks Nero | 10.7 | 38 | DCF | 199 | Uber-light, but mixed reviews concerning its durability. |
Recommended Internal Frame Backpacks
While most of the time I prefer frameless packs, I’ll use an internal frame model on trips when I’ll regularly be carrying more than five or six days of food and/or large amounts of water. Below are listed 10 of the most highly regarded lightweight internal (along with one external) frame packs, none of which tips the scales at more than 1.1 kg (2.5 lb):
| Company / Model | Weight (oz/kg) | Volume (L) | Fabric | Price (US$) | Notes |
| Atom Packs The Mo 50L | 30 | 50 | XPac | £257 (US$305) |
Highly regarded UK-based company / Also available in 40L and 60L models. |
| Gossamer Gear Mariposa | 32.7 | 60 | Robic | 270 | Larger sibling of the Gorilla. |
| Gossamer Gear Gorilla | 30.6 | 48 | Robic | 245 | Pack of choice for triple crowners POD and Disco from “The Trail Show”, as well as Heather “Anish” Anderson, who took the pack on her record-setting Appalachian Trail hike in 2015. |
| Granite Gear Crown2 60 | 33 | 60 | Cordura | 199 | I carried a forerunner to this bomber pack, the Vapor Trail, from 2003 to the early 2010s. Justin “Trauma” Lichter used its immediate predecessor, the Crown V.C., during our traverse of the Copper Canyon region in 2013. |
| Hyperlite Mountain Gear 2400 Southwest | 29.3 | 50 | DCF | 310 | I’ve used this pack extensively since 2016. Comfortable carrying 30 to 35 lbs. Smaller sibling of the 3400, which offers 15L more volume. Click here for review. |
| Osprey Exos 48 | 40 | 48 | Robic | 200 | Go-to model for thru-hikers that don’t like sweaty backs. Also available in 58L model. |
| Seek Outside Flight One | 36 | 61 | XPac/Spectra | 299 | Built for rugged conditions and comfortable carrying loads between 35 and 50 lb. Click here for a detailed review. |
| SMD Minimalist | 35 | 54 | Robic | 210 | Available with vest harness and different types of hip belts. |
| SWD Long Haul 40 | 27 | 50 | Xpac or DCF | 259 | Lots of customization options. Also available in 35L and 50L models. |
| ULA Ohm 2.0 | 34.5 | 63 | Robic | 210 | Affordable, durable, simple design. Also available in XPac. |
| ZPacks Arc Blast (External Frame) | 21 | 55 | DCF | 325 | As with all external frame packs, the Arc Blast offers excellent on-trail stability but is not ideal for off-trail excursions. |
Closing Thoughts
Frameless backpacks aren’t an ideal option for all hikers and/or all types of backcountry excursions. They require a higher level of discernment in how they are filled and are less forgiving than framed models when loaded with more than 10 kg (22 lb). However, if the rest of your gear is of an appropriate size and weight, frameless packs represent a functional, durable, and affordable option in which to carry your lightweight kit on your next wilderness journey.

Sean “Mittencamper” Gauvreau and the SWD Superior 30 (DCF), Michigan, 2020 (photo courtesy of Sean Gauvreau)
Related Posts
Disclosure: This post contains some affiliate links, which means ‘The Hiking Life’ receives a small commission if you purchase an item after clicking on one of the links. This comes at no additional cost to the reader and helps to support the website in its continuing goal to create quality content for backpackers and hikers.