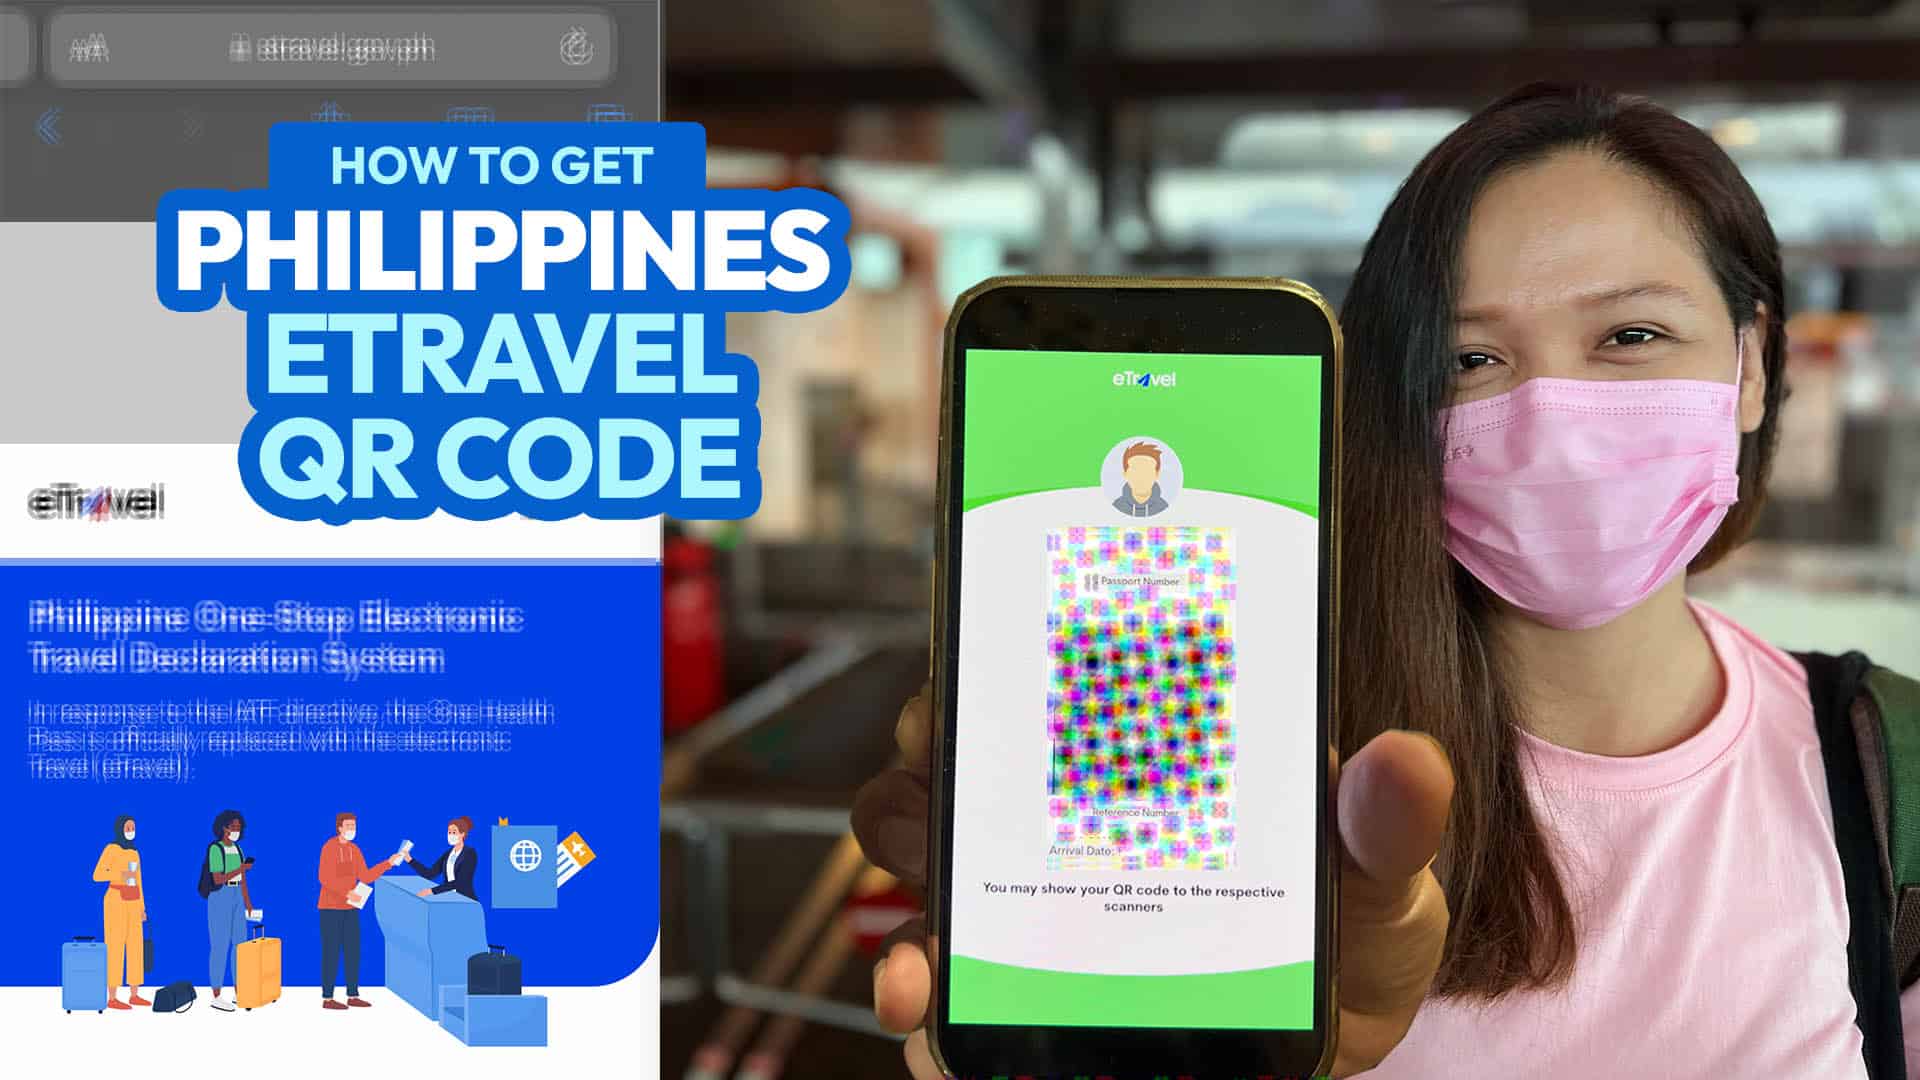
Are you traveling to the Philippines? ALL incoming international travelers including Filipino citizens and foreigners, adults and children, must secure an eTravel QR code online 72 HOURS or THREE DAYS before your arrival.
Just like the old One Health Pass and eArrival Card, this new eTravel QR system serves as an all-in-one online platform for the arrival card, health declaration, and contact tracing.
But don’t worry, it’s easy to get one. In this article, we’ll walk you through the process one step at a time. Here’s how to do it.
WHAT’S COVERED IN THIS GUIDE?
The official website is https://etravel.gov.ph.
Make sure it’s the legitimate website. Note that eTravel QR Code is FREE of charge. If you landed on a website requiring you to pay for the service, it’s a scam.
On the home page, you’ll see the registration section. For Filipino citizens, click the PHILIPPINE PASSPORT HOLDER box. Then, start entering the following details:
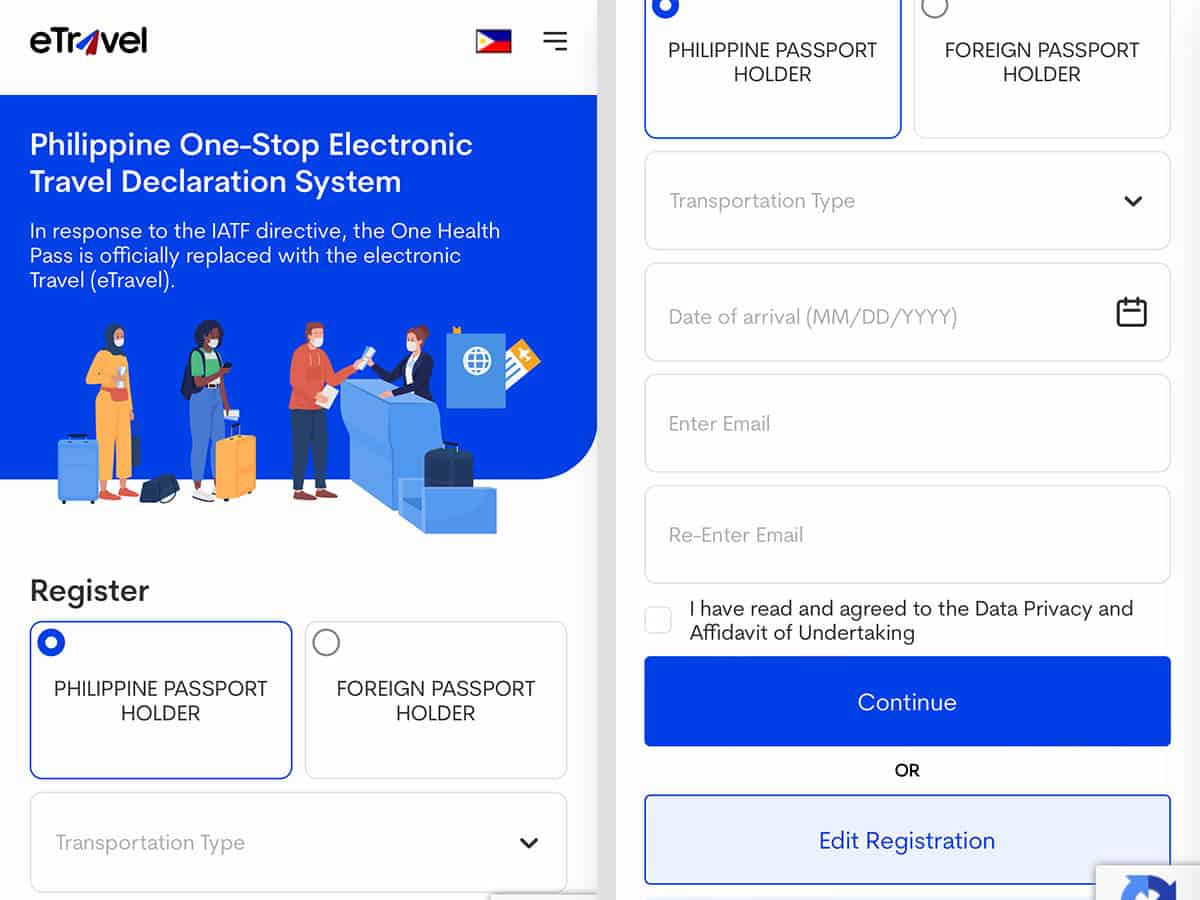
- Transportation Type
- Date of Arrival
- Email Address
Tick the DATA PRIVACY AND AFFIDAVIT OF UNDERTAKING box. It’s easy to miss because the tick box is quite small, but you’ll find it before the CONTINUE button.
When you check that, a page will pop. Read first, then click the YES, I AGREE button.
Finally, hit the CONTINUE button.
Enter the following details:
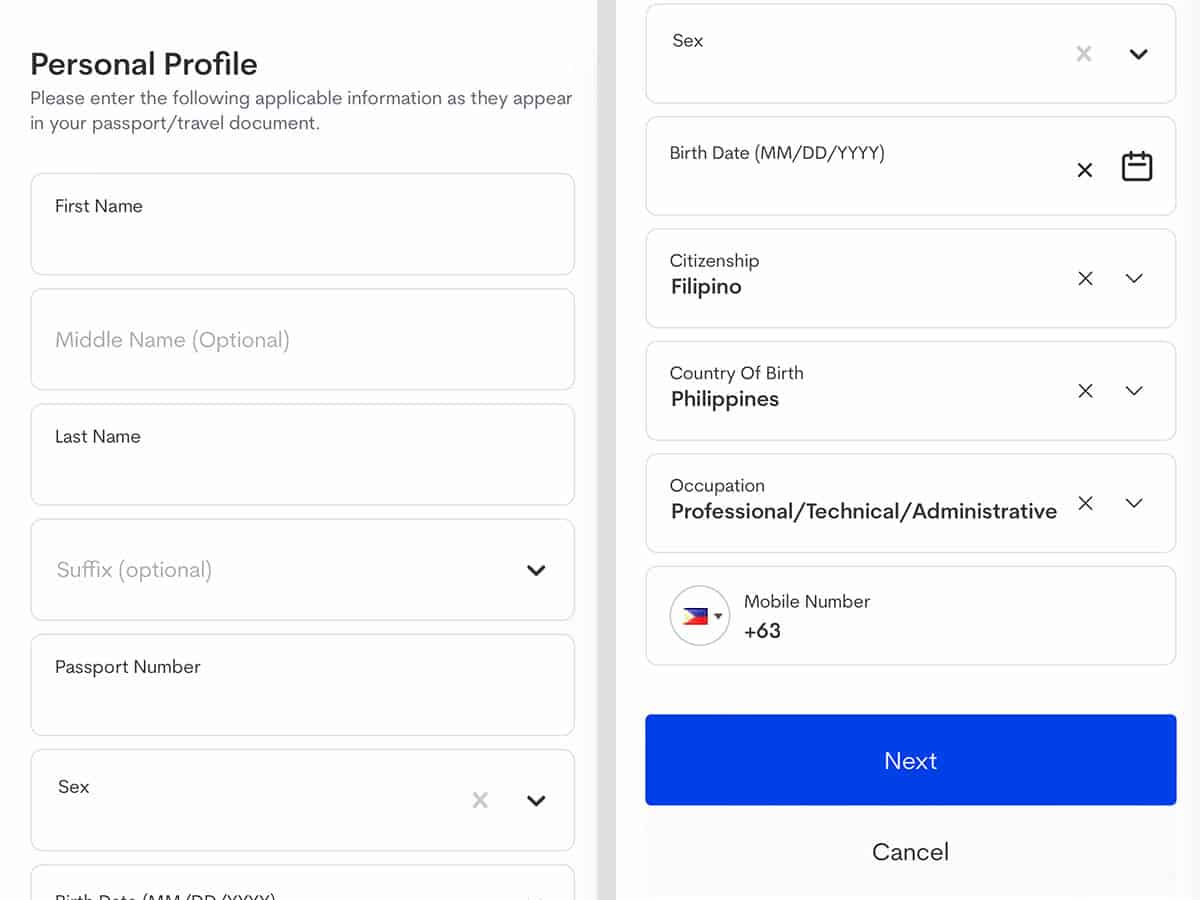
- Name
- Passport Number
- Sex
- Birth Date
- Citizenship
- Country of Birth
- Mobile Number
If the system detected that you belong to the (legal) working age group, it will require you to answer the OCCUPATION section. Choose your professional field. If you can’t find it in the choices, select OTHERS. When you are done, click NEXT.
You will be asked to provide your specific address down to house number or unit number.
If you live in Metro Manila, choose National Capital Region or NCR.
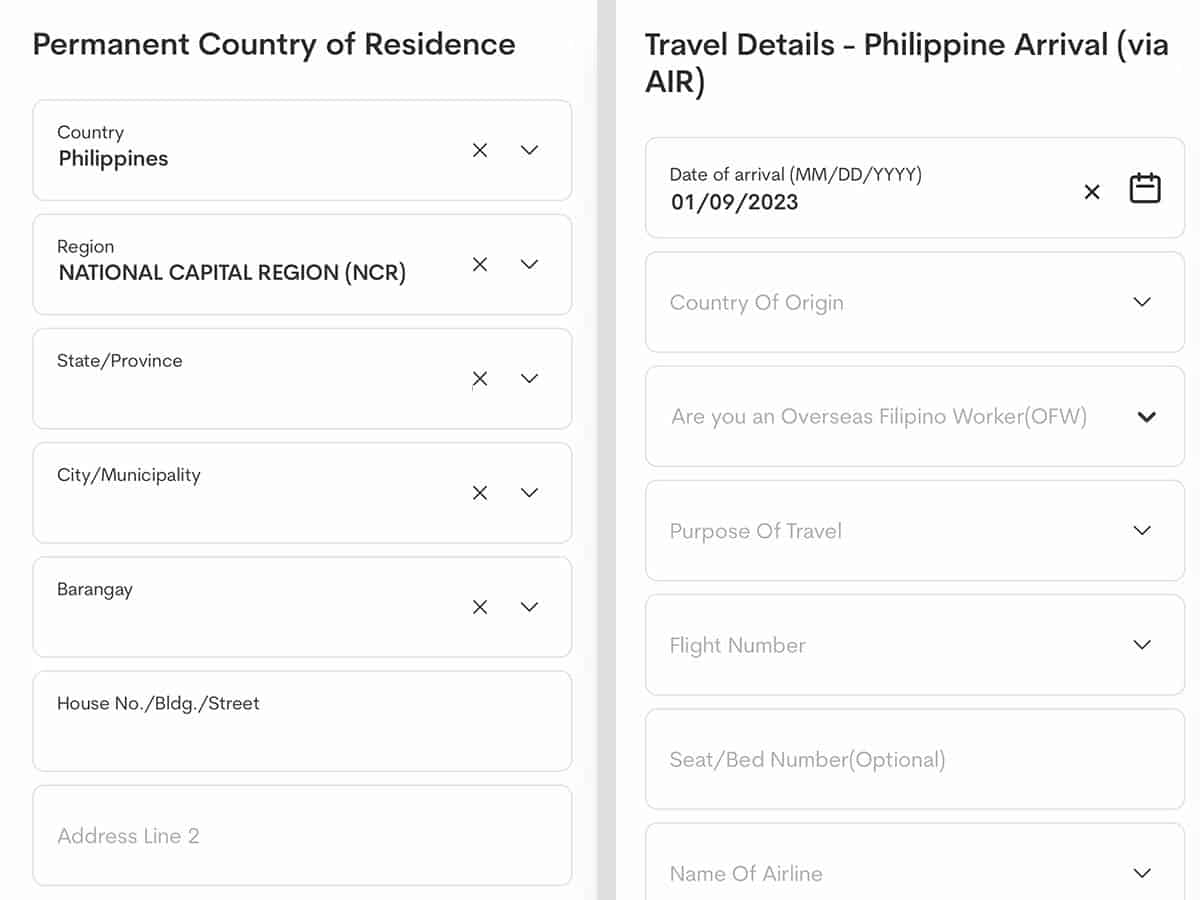
Enter the following travel information:
- Arrival Date
- Country of Origin
- Purpose of Travel
- Flight Number
- Seat Number (optional)
- Name of Airline
- Airport of Arrival
- Traveller Type (aircraft passenger or flight crew).
When you are done, click NEXT.
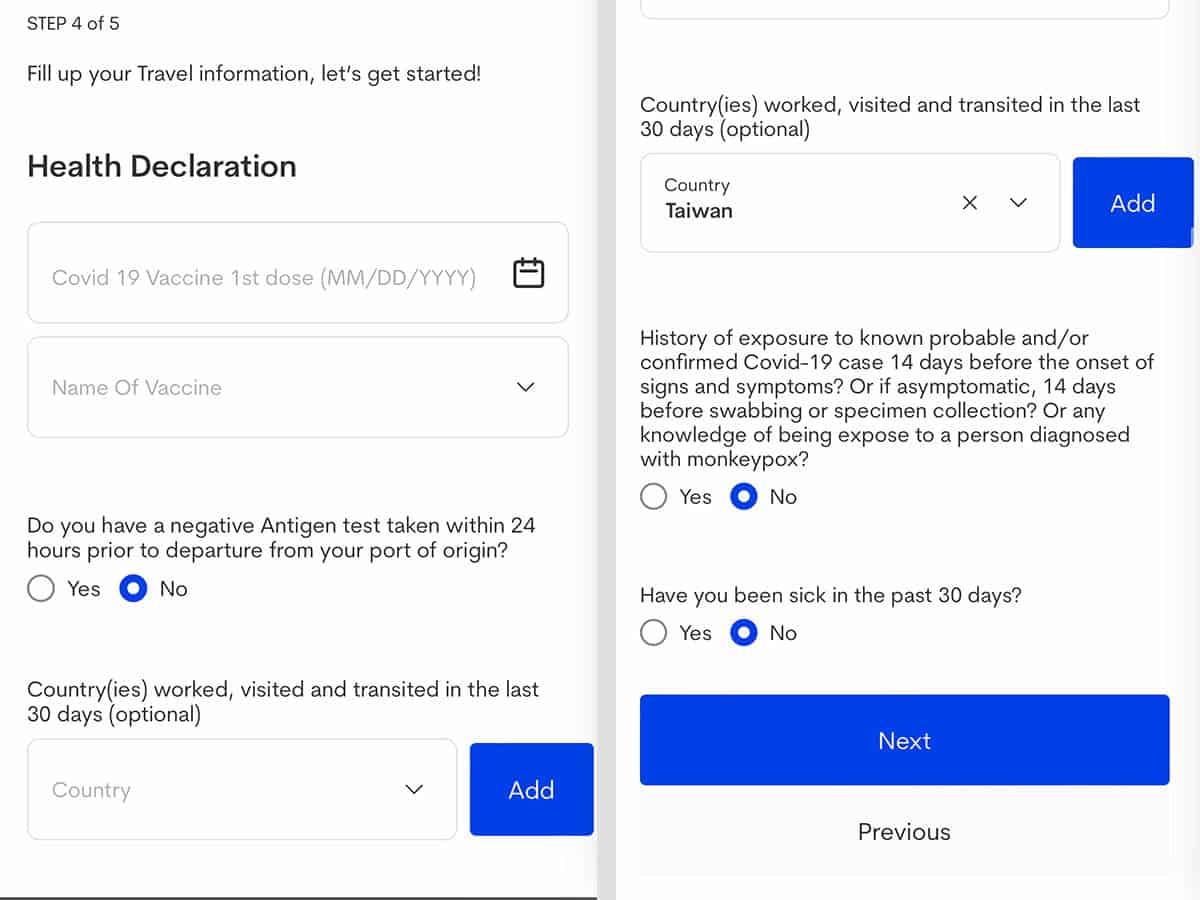
This includes your Vaccination Details. If you are fully vaccinated, answer NO for the section asking if you have a negative Antigen Test result. After that are the usual ‘Yes or No’ questions about history of exposure and if you’ve been sick in the past 30 days. After answering all the items, click ‘NEXT’.
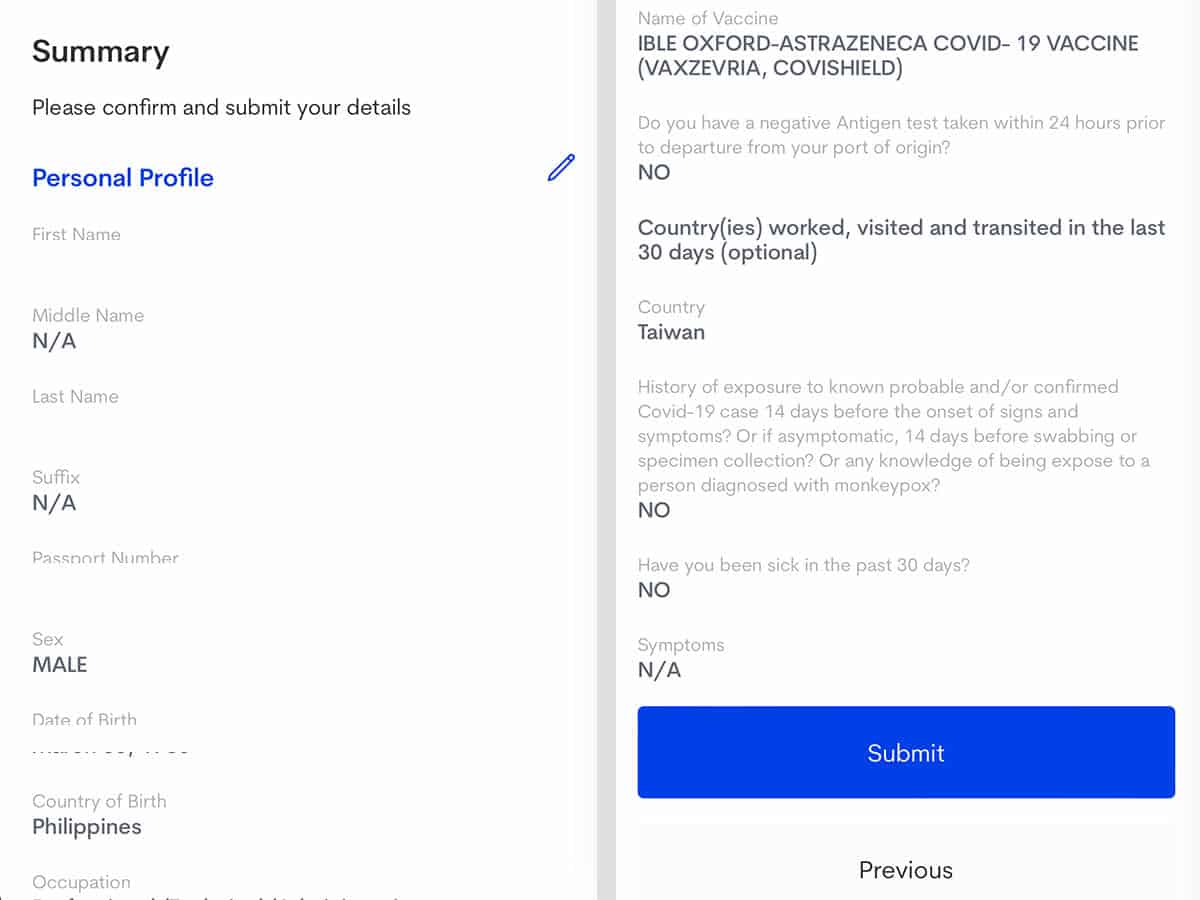
Read the summary of all the details you provided. If you need to change or correct something, just click the pencil symbol on the upper right portion of the category you want to edit. If you are good and you have nothing to correct, click SUBMIT.
Congratulations! You will instantly receive your QR Code.
Don’t forget to download or screenshot it! You’ll be presenting it upon arrival in the Philippines.
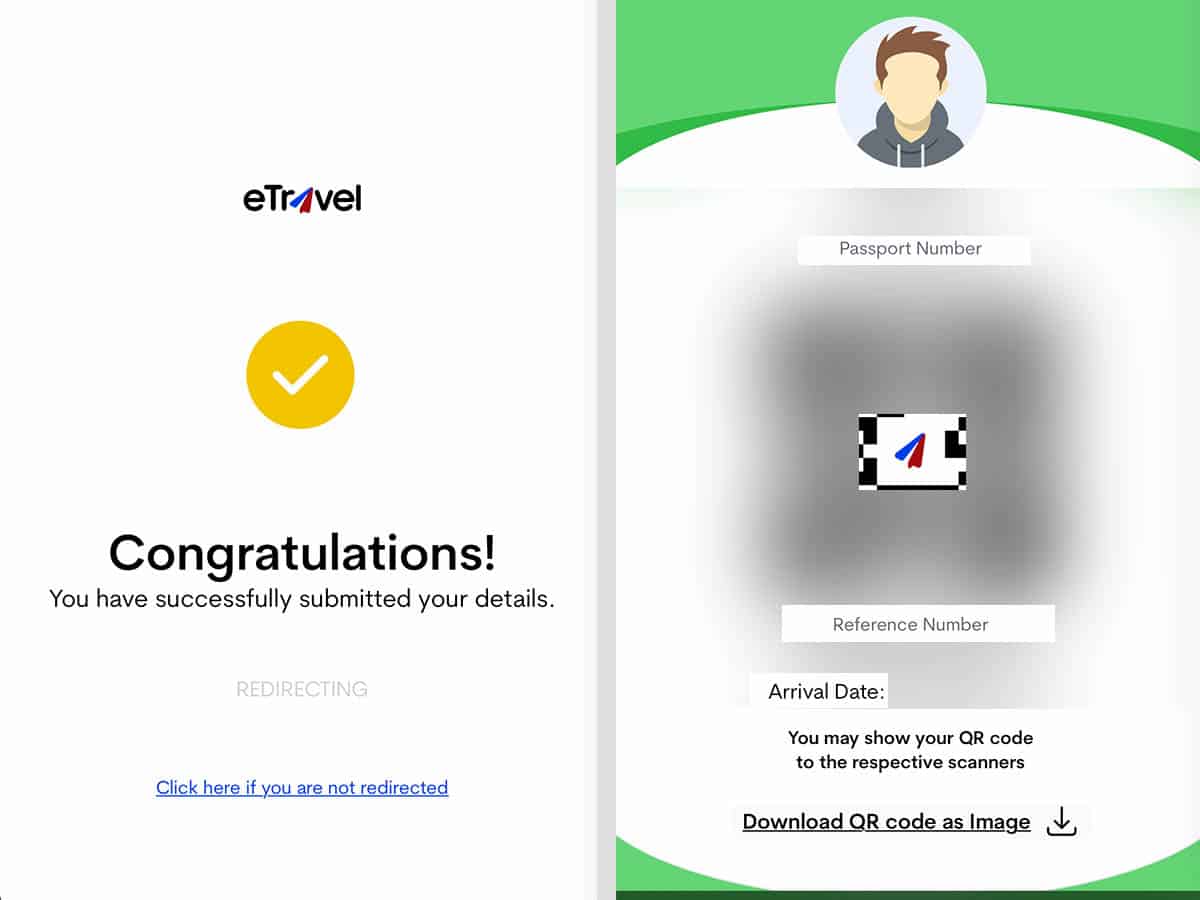
- If your QR Code page is GREEN, it means you met the travel requirements and you can directly go to express lane where you will have the BOQ officer scan your QR Code.
- If your QR Code page is RED, you have to let the Quarantine Officer manually verify the required additional documents to determine if you are compliant with the entry protocols set by the Philippine government. Travelers who usually get RED-marked QR Code are the unvaccinated and the partially vaccinated. Again, check the entry guideline set by the Philippine Government first before traveling to the Philippines.
One QR Code is issued per transaction and per entry. You can only use it once and you need to register again and get a new QR Code the next time you travel to the Philippines.
I want to change something after generating the QR code. How to correct it?
You can still edit your info if you noticed a typo error or you entered wrong data. However, note that you can only do this BEFORE it gets validated or verified by the BOQ officer upon your arrival sa Pilipinas. Ensure that you make your corrections before your flight to the Philippines.
To do this, just go to the main page or home page of eTravel, then click the UPDATE REGISTRATION button. Provide your reference number or transaction number and birth date.
At what point of the airport process should I present the QR code?
From the team’s experience, we were asked to present our QR Codes at these stations:
- Check-in Counter, before departure abroad (at the country of origin)
- Bureau of Quarantine Area, after deplaning and before the Immigration counters in the Philippines. The staff/officers will be scanning the QR code. It’s a very quick and smooth process if you have a green QR code.
The staff may also ask for it at the boarding gate (country of origin/abroad), so just ready your copy during these times.
ATTENTION! Travel requirements change from time to time, so it’s best to check with the government of the country you want to visit the updated travel restrictions and requirements before you travel. For the Philippine’s updated entry requirements, you can check the official eTravel website: https://etravel.gov.ph/entry-guidelines.
Do I still need to accomplish One Health Pass and eArrival Card?
No need. The eTravel has officially replaced the now obsolete One Health Pass and eArrival Card starting 2 December 2022.
To be honest, all these systems are very similar. The changes are not too drastic. Some items were removed such as the Philhealth Number, and then some required items are now optional. The noticeable difference is not really the content but the appearance or the user interface.
Do I have to pay for eTravel QR Code? How much is the charge?
No, you don’t need to pay anything for the eTravel QR Code. It is FREE of charge. If you landed on a website requiring you to pay for the service, it’s a scam.