“Photography is all about light.” This is an expression we often hear in the photography industry but one we give little thought to. Why? Common belief is that composition is everything when it comes to photography. But this is not the case. Photography is defined by light.
Let me explain.
Years ago, during a camping trip with my family, I set out to conduct my first true photography experiment to better understand why photography is all about light. We set up camp on the beach of a small lake nestled in the Laurentian Mountains just north of Montreal. Because it was a family camping trip, we had a very relaxed schedule and I had plenty of time to experiment with my camera.
Related: How to View, Edit and Delete the EXIF Data in Our Photos
I set up my new Canon Digital Rebel on a tripod and took one picture every hour without changing the position or the settings of the camera. I took 17 shots total.
Once I returned home, I analyzed the photos in Photoshop (because Lightroom did not yet exist) and was completely astonished by the results. The location was entirely unrecognizable depending on the time of day. The photos taken during the middle of the day were washed out and boring, but the photos taken during sunrise and sunset were vibrant and full of life.
That is when I discovered that photography really is all about light.
Anatomy of Light in Sunset Photography
It is no surprise that the sun is the predominant light source in outdoor photography. The Earth’s atmosphere acts as a giant diffuser that softens the light as it passes through.
For example, during the middle of the day, the position of the sun allows sunlight to travel through the atmosphere almost vertically. The sunlight takes the shortest distance to reach the Earth’s surface, which means that the light is barely diffused by the Earth’s atmosphere. This midday light produces photos with harsher shadows and stronger highlights.
Related: How to Use a Dedicated Light Meter
Just before sunset, the sun is low on the horizon. This means that sunlight has a much longer distance to travel through the Earth’s atmosphere. Because of this, the light is even more diffused and the effects are noticeable with softer light, softer shadows, and softer highlights. The same effect occurs at sunrise, which is why the hours before sunrise and sunset are known as the Magic Hours in photography.
What exactly are the Magic Hours?
The Magic Hours are made up of the Golden Hour, which occurs just before sunset, and the Blue Hour, which occurs after sunset. They start 30 to 60 minutes before sunset and end 30 to 60 minutes after sunset, which gives photographers anywhere between one to two hours of favorable light.
Golden Hour
Technically speaking, the Golden Hour begins when the sun is 6 degrees above the horizon and ends when it is -4 degrees below the horizon. Images captured during this time typically feature soft, diffused light with a warm golden glow and long, soft shadows.
Blue Hour
The Blue Hour begins immediately after the Golden Hour when the sun is anywhere between -4 and -6 degrees below the horizon. This hour produces images with a much darker sky and softer textures featuring predominantly cool, blue hues.
Sunset Photography Tips and Techniques
With the quality of light constantly changing during the Magic Hours, sunset photography produces different visual effects in a short period of time. This also makes sunset photography incredibly complex since photographers must be ready for the changes and adjust their techniques accordingly.
That is why I have come up with 18 photography tips to help you take stunning sunset photos!
Tip #1: Scout Your Location
Sunset photography starts long before you pick up your camera and press the shutter button. Scouting and researching the location is the most critical part of sunset photography because you have to know where to show up, when to show up, and what to shoot.
The duration of favorable light during sunset is limited and the lighting condition changes by the minute. This leaves us little time to experiment in the field.
I try to scout the location a day prior to shooting sunset to increase my chances of success. Arriving at the location in the middle of the day gives me plenty of time to evaluate the setting in terms of composition, camera placement, lens selection, focal length, etc. I even take a few photos with my cell phone as a reminder of potential composition options.
Other than snapping a few photos, I also use the Exsate Golden Hour app on my smartphone to identify the sun’s trajectory and the exact location where the sun will touch the horizon. The app also pinpoints the exact time of the Golden Hour, sunset, and the end of the Blue Hour. It truly takes the guesswork out of timing my shots!
With the Magic Hours pinpointed, I usually arrive 1.5 hours before sunset to give myself enough time to set up my camera and tripod.
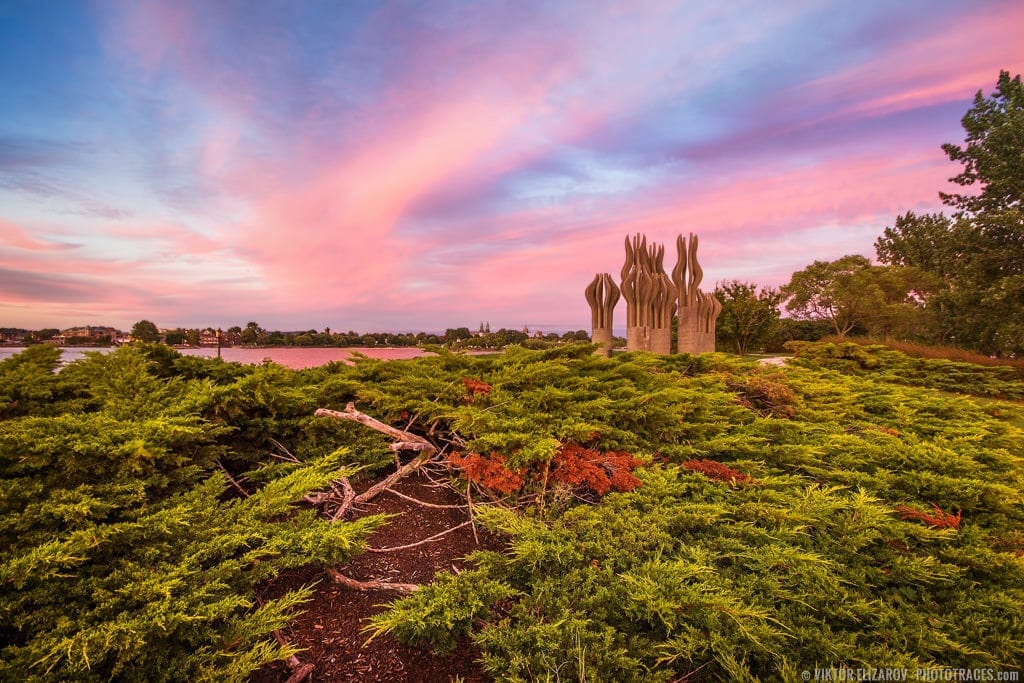
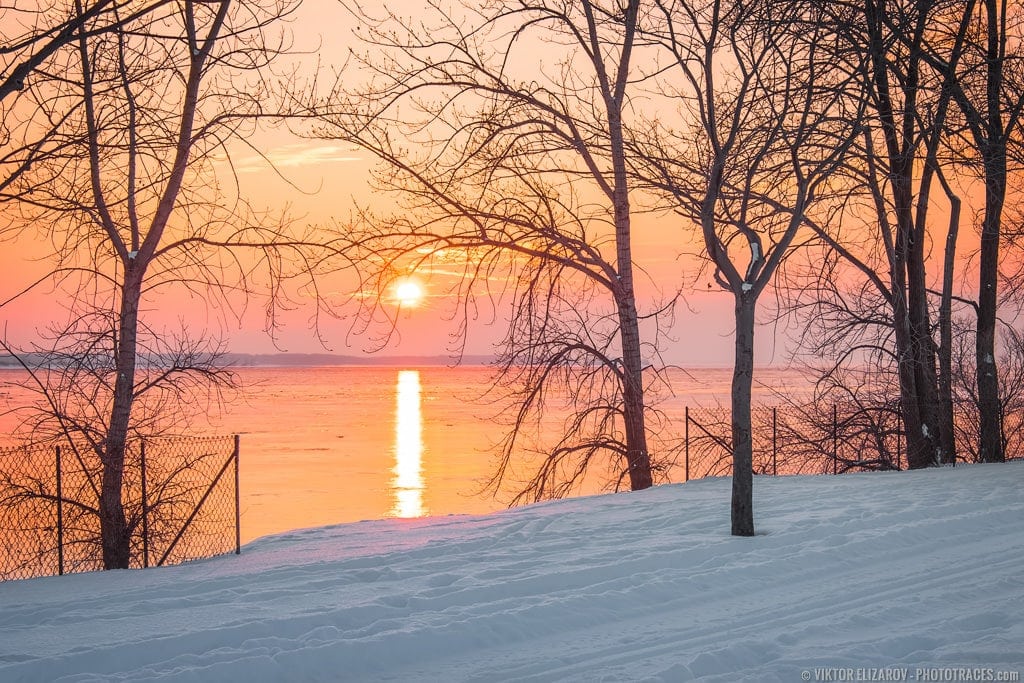
Tip #2: Identify Elements in the Foreground
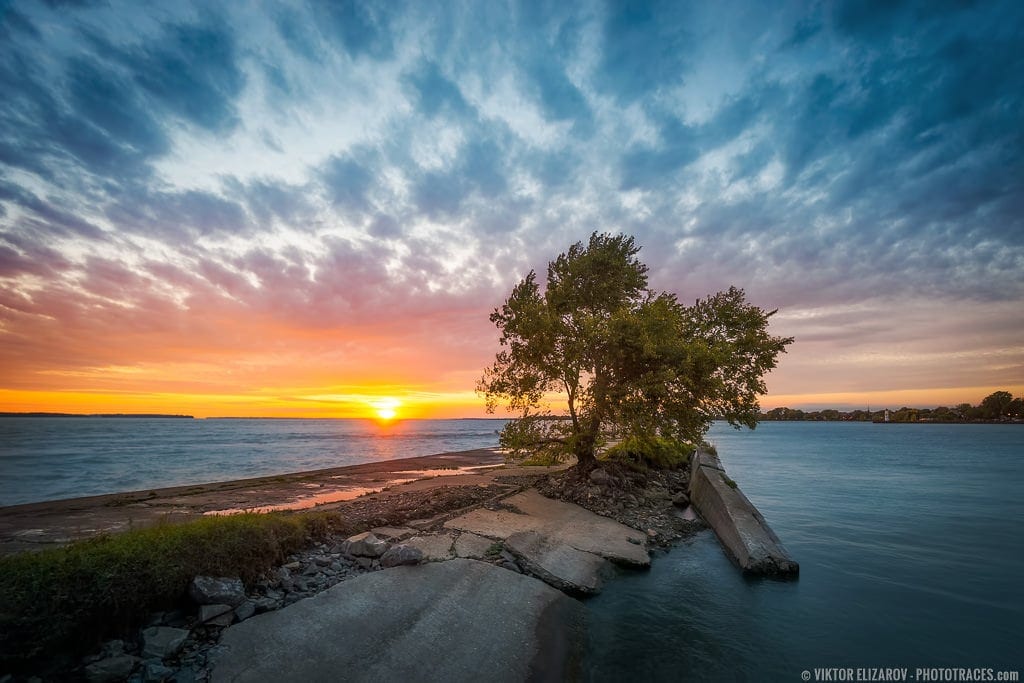
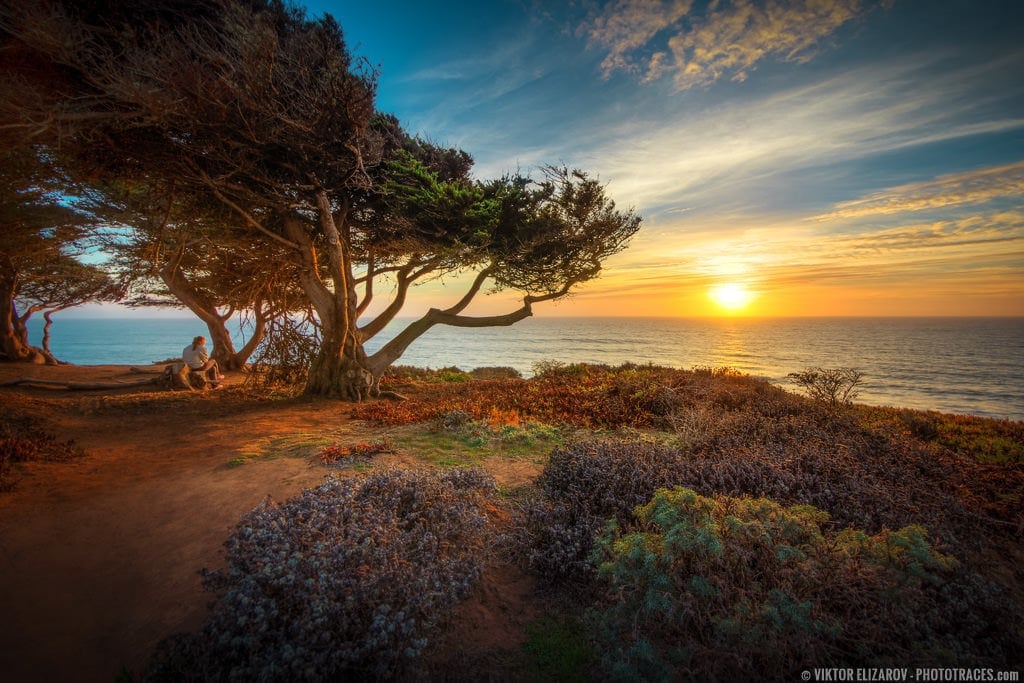
While you are scouting your location, it is important to identify various points of interest in the foreground. It is easy to focus solely on the beautiful colors of the sky, but these hues do not produce a meaningful composition by themselves. Use a point of interest in the foreground like a tree, the beach, a stream, or a rock to connect the foreground to the background. This creates a more expressive image that draws viewers further into the composition.
Tip #3: Shoot RAW
If you follow my blog, you know I am a huge fan of shooting RAW. This is even more important when shooting sunsets for many reasons. First, it eliminates any concern about the composition’s White Balance since this setting can be nondestructively adjusted during the editing process.
Related: Snow Photography Tips: How to Photograph and Edit
Second and even more importantly, shooting RAW gives you more control over the extended dynamic range of light that spans from the darkest shadows to the brightest highlights. You can produce a stunning image without clipped shadows or blown highlights by shooting RAW.
Tip #4: Embrace HDR Photography
I know HDR photography sounds intimidating, but it is especially useful in sunset photography when the dynamic range of light is so extreme that it can exceed the dynamic range of the camera’s sensor. In these cases, you cannot capture the entire range of light even when shooting RAW. That’s when HDR technology comes into play.
Related: Top 6 Wildlife Photography Tips
The process of producing HDR images is simple and straightforward thanks to the introduction of the HDR Merge module in Lightroom 6. You no longer need a dedicated HDR program or Photoshop to get the job done!
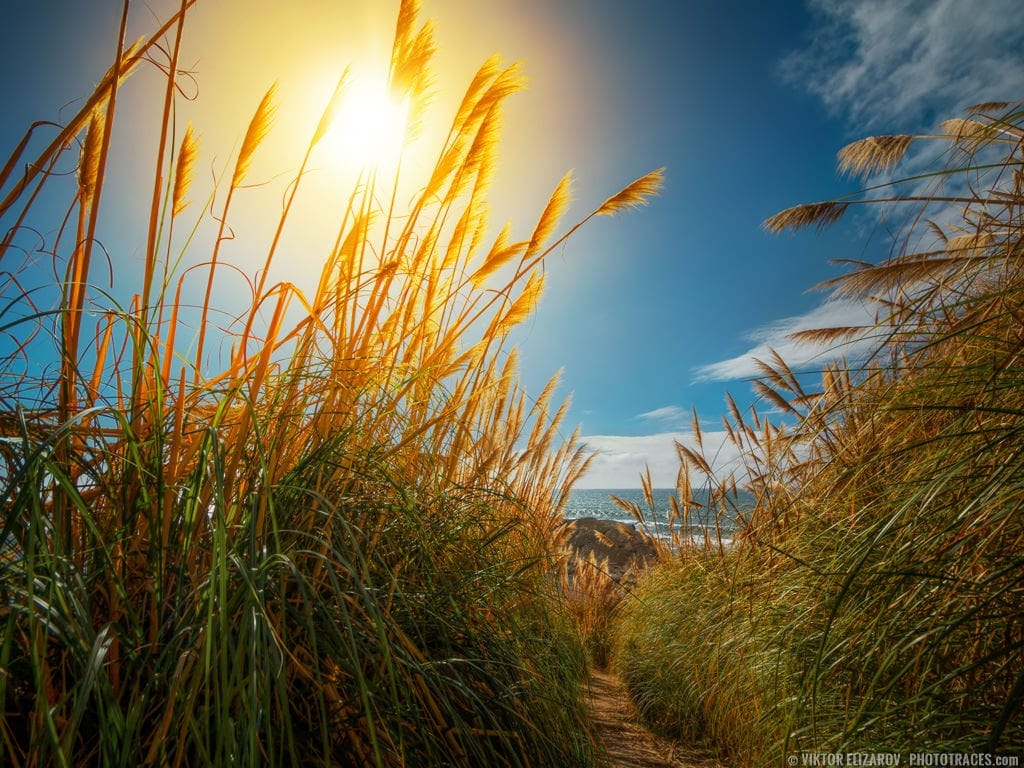
Tip #5: Shoot into the Sun
Shooting into the sun can be challenging because of the extreme dynamic range that can trick the camera’s meter and ruin an image with unwelcome flares from the bright sun. But if you master shooting into the sun, you can create unique photos that are legions beyond the typical sunset images captured with smartphone or point-and-shoot cameras.

Tip #6: Try the Starburst Effect
The Starburst Effect is a great technique for creating unique sunset images with exaggerated and more prominent rays of light. This technique involves shooting directly into the sun with the smallest possible aperture.
I always start with a normal aperture when I shoot directly into the sun. At the end of the series, I reduce the aperture to f/20-f/22 to create a Starburst Effect. Later, during the editing process, I have the option of using the starburst or the regular image.

Tip #7: Use Aperture Priority Mode
As a new photographer, I was encouraged to shoot in Manual Mode in difficult lighting conditions like sunrises and sunsets. However, I soon learned that this is not always helpful since shooting in Manual Exposure Mode slows me down tremendously.
Lighting conditions constantly change during sunsets because, most often, the light is continuously decreasing. Cloud cover is a different story, however, because the amount of light that affects the camera’s meter can rise and fall in waves. For me, using Manual Metering Mode is inefficient because I am constantly reevaluating and changing the exposure.
I find that Aperture Priority Mode suits me the best since the Exposure Metering systems on modern cameras are accurate and advanced enough to handle almost any condition. I set the ISO to 100 and the aperture between f/9-f/11 and let the camera automatically adjust the shutter speed.
Tip #8: Use Exposure Compensation
When shooting directly into the sun in extreme conditions, the camera’s metering system usually needs a little help. In these situations, I like to use Aperture Priority Mode in combination with Exposure Compensation because I can manually adjust the exposure. Shooting into the sun requires the same logic used in shooting snowy scenes where the bright snow tricks the camera’s metering system. You have to use Exposure Compensation to correct the issue.
Related: Top 12 Beach Photography Tips
Here’s an example: Like in snowy conditions, the camera’s metering system is fooled by the extremely bright conditions when shooting directly into the sun. The bright area around the sun causes the camera to think the scene is brighter than it truly is. The camera’s metering system underexposes the image unless we set the Exposure Compensation value to +1EV.
Tip #9: Set the Exposure for the Brightest Area of the Scene: The Highlights
One of the basic rules of landscape photography is to set the exposure for the brightest areas or the highlights of the scene. This rule is even more critical in sunset photography since you can always recover the darker areas of the scene during the editing process. The brightest areas of the scene—like the sky and the sun—are harder to recover when they are blown because they lack information.
To avoid this, shoot in RAW and set the exposure for the highlights. Underexpose the shadows and recover them later during your editing workflow in Lightroom.
Tip #10: Bracket your Shots
Auto Exposure Bracketing gives us the option of taking multiple shots of the same subject with different exposure values. You simply press the shutter button and the camera takes multiple shots at predefined exposure increments.
Why is this helpful? Think of Auto Exposure Bracketing like added insurance in case you do not get the right exposure with one shot. It also allows us to use Luminosity Blending or the HDR photography technique later during the editing process.
Tip #11: Use a Tripod
With all the challenges that already come with sunset photography, using a tripod can make things much simpler.
Shooting sunsets handheld and without a tripod makes the entire process even more complex. Because of the constantly changing light conditions, you have to ensure the shutter speed does not fall below 1/60s and 1/100s. Safe shutter speed calculations become even more challenging when you bracket your shots and, on top of this, you have to constantly boost the ISO to compensate for the diminishing light. This adds digital noise to your photos that cannot always be fixed in the editing workflow.

Tip #12: Beware of Lens Flare
When direct sunlight enters the lens, a lens flare occurs. While a lens flare can be artistic in certain situations, it typically looks like an oversight or an imperfection. This can easily ruin a potentially promising image.
Lens flares are hard to control since everything depends on the quality of light and the angle of the sun’s rays entering the lens. You can move the camera slightly to the left or right to change the angle of the lens relative to the light source, but this is never a predictable or sure way to avoid the lens flare effect. It also does not help that some lenses are more prone to producing lens flares than others.
Related: Top 10 Outdoor Photography Tips
The good news is that once you realize you cannot avoid lens flares, you can employ a proven, low-tech trick to prevent the flare from ruining your shot. Take the first shot without paying attention to the lens flare. Take the second shot using your finger to shield the sun. Although your finger is in the frame, it eliminates any lens flares. You can combine the two images later in Photoshop using transparency masks. Although this creates an extra step and requires Photoshop during the editing process, it is bullet-proof and a proven way to prevent a lens flare from ruining your stunning image.
Tips #13: Use the 2 Second Delay or a Remote Shutter Release
As you get further into a sunset, the environment becomes even darker and makes for truly stunning photos. However, the chances of introducing blur into your photos is even greater.
As the scene gets darker, the camera keeps readjusting the exposure by slowing down the shutter speed. Once the shutter speed reaches 0.5 seconds, it is easy to introduce blur into the image by even the slightest move or shake of the camera. To prevent this, you can use the 2 Second Delay functionality on the camera or invest in a Remote Shutter Release.
Tip #14: Wait for Blue Hour
Do not leave the location until the Blue Hour is completely over. Trust me, you will miss something incredible! Many rookies leave their location as soon as the sun disappears behind the horizon, which means they often miss the beauty that follows in the Blue Hour.
Related: 9 Types of Photography to Try When You Travel
The first 5 to 10 minutes after the sun disappears offers some of the most interesting photography opportunities. Although the sun has dipped below the horizon, its light illuminates the sky by softly brightening the entire scene and marking the transition from the Golden Hour into the Blue Hour.
Tip #15: Capture Reflections in City Sunsets
While most people imagine more rural sunsets, let’s not forget the beauty that cityscapes bring during the Magic Hours. Although tall buildings can often shield the sun even before the Magic Hours begin, always look for reflections of the sun in the buildings around you. Capturing these reflections can produce some truly amazing effects that you cannot find anywhere else in nature.

Tip #16: Use the Horizon as a Composition Tool
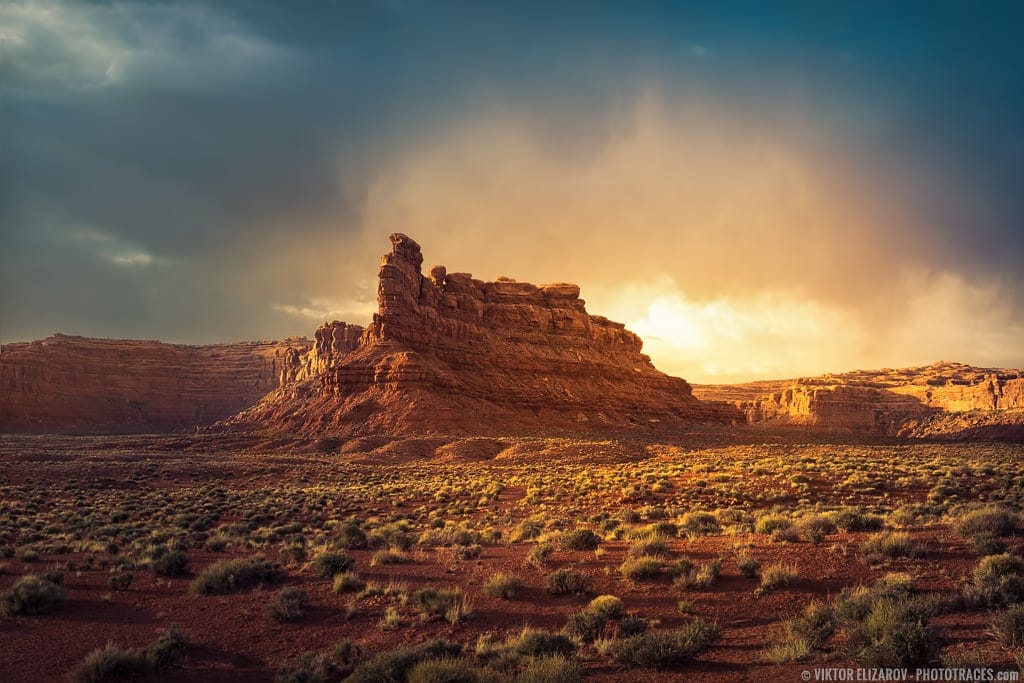
Sunset hours produce the best light for photography, but that does not mean that every sunset offers the same opportunities for beautiful images. Think about a sunset with a cloudless sky and hazy air. These conditions produce boring photos. Luckily, there is a remedy for that!
By strategically using the horizon, you can help viewers recognize different aspects of the photo. For example, if the sky is boring, you can place the horizon higher in the composition to minimize the sky’s impact on the overall image. Instead of focusing on the sky, you can draw attention to something in the foreground like a beautiful rock formation illuminated by the setting sun. Alternatively, if the sky is beautiful, you can place the horizon even lower in the composition to create a breathtaking focal point.
Tip #17: Pack a Flashlight and Warmer Clothes
We are often so excited at the prospect of shooting a sunset that we forget to plan for any after-sunset activities, specifically the hike back to the car or the campsite. This becomes even more worrisome since, by the time we finish shooting and packing up our gear, the temperatures have dropped and it is completely dark outside.
This happened to me in April on my trip to Zion National Park when I successfully shot the sunset only to find myself in complete darkness in freezing temperatures. That reality became even clearer as I set out on the 40-minute hike back to my car. With each step, I scolded myself for not bringing warmer clothes or a flashlight!
Tip #18: Do not Forget to Look Around
It is easy to get so caught up in a sunset that you forget everything else around you. While the sunset is certainly beautiful, do not forget that the setting sun can produce interesting effects on more than just what is in front of you. I suggest looking at your surroundings every five minutes to avoid missing out on something truly spectacular.