
It is a common misconception that professional photographers shoot only in manual mode, that is selecting the three most important settings – aperture, ISO number, and shutter speed – manually.
In my experience, the most useful and convenient shooting mode is actually the Aperture Priority mode. With it, you can still control your Aperture and ISO but your camera sets the shutter speed automatically, prioritizing your choice of aperture.
Why do I think so? Because the choice of aperture is the main way to control the depth of field – one of the most important concepts in photography.
Mastering the depth of field will unleash your creative freedom, allowing you full control over how sharp your image will look.
If you aren’t sure what depth of field is and how you can use it in your photography, keep reading. This article is right for you.
What is the definition of depth of field in photography?
In short, depth of field (DOF) is the distance between the closest and the farthest objects in your image that are acceptably sharp. It’s measured in feet or meters.
The depth of field can be shallow (narrow) or large. When it’s shallow, just a small part of your photograph appears sharp. When it’s large, a great area of your image is in focus.
There are three ways to work with depth of field: by means of aperture settings, the shooting distance, and the focal length of the lens. I’ll illustrate all three ways in greater detail below.
How does aperture affect depth of field?
As you already know, aperture refers to the “hole” in your lens through which light enters the camera. The bigger the hole (the smaller the aperture number), the more light gets in. The smaller the hole (the higher the aperture number), the lower the amount of light that hits the sensor.
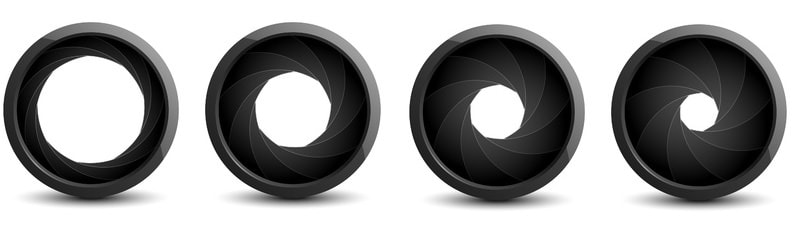
However, there is more to aperture than just controlling the amount of light you need to take a well-exposed photograph. The chosen aperture value (or f-stop number, as it’s called) directly affects the depth of field in your image.
The lower your f-stop number, the shallower the depth of field. At f/1.8 for example, only a part of your object of interest will appear sharp. The rest of the photograph will be blurred.
Related: F-Stop In Photography Demystified
If you want a great part of your image to appear sharp, though, you need to use a higher f-stop number like f/8 and above. An image shot with a small aperture should appear sharp all over.
Now that you know how important aperture is, you’ve surely figured out why I said most professional photographers shoot in Aperture Priority mode. This mode allows you to create the desired depth of field without having to think about the shutter speed.
Of course, there will be situations when you can’t select a particular f-stop number because the shutter speed that goes with it is too low. Luckily, you can often shoot at lower speeds when it comes to landscape photography since your objects are generally immobile.
How does shooting distance affect depth of field?
The distance between you and your object also affects the perceived depth of field in the final image. As a rule, the closer you are to your object, the shallower the depth of field and vice versa.
How does the focal length affect depth of field?
In photography focal length is the main characteristic of lenses. It tells us the angle of view and the level of magnification.
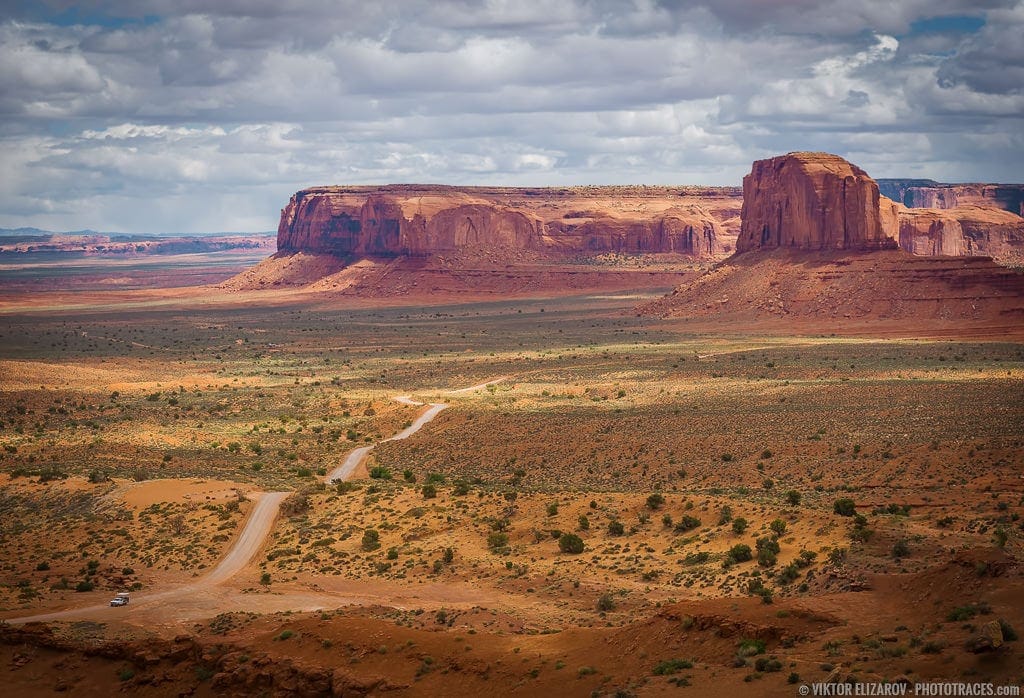
In regard to depth of field, wide-angle lenses give us a larger depth of field while telephoto lenses produce images with very shallow depth of field.
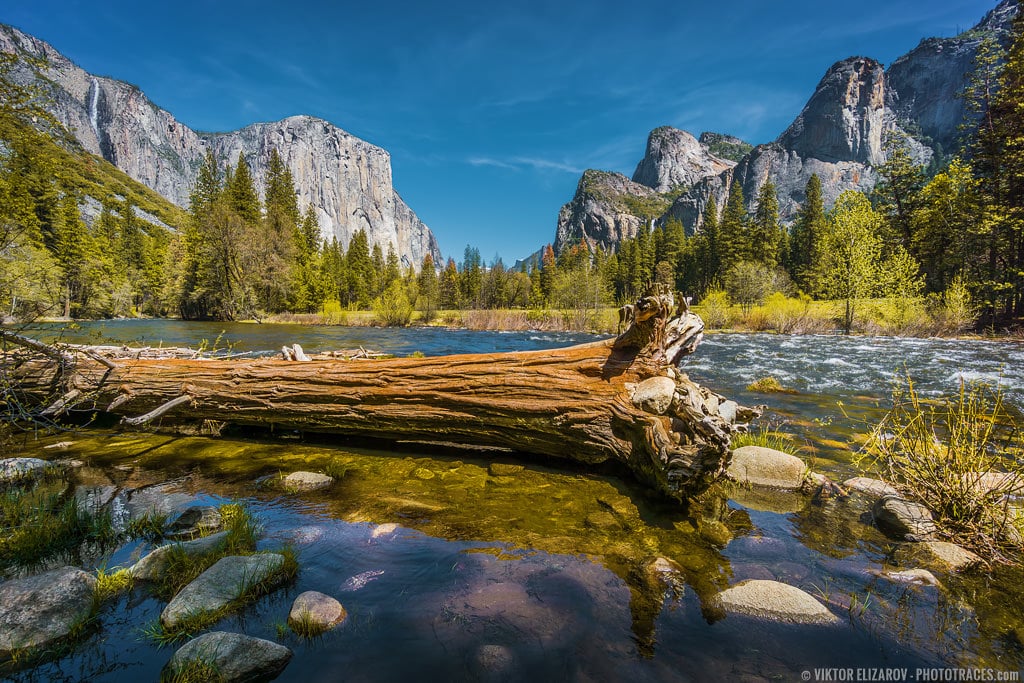
In landscape photography, the go-to lens is undeniably the wide-angle one. Not only does it allow us to fit a greater part of the scene into our frame (without going extra far from our object) but it also produces images that are more likely to be sharp from end to end.
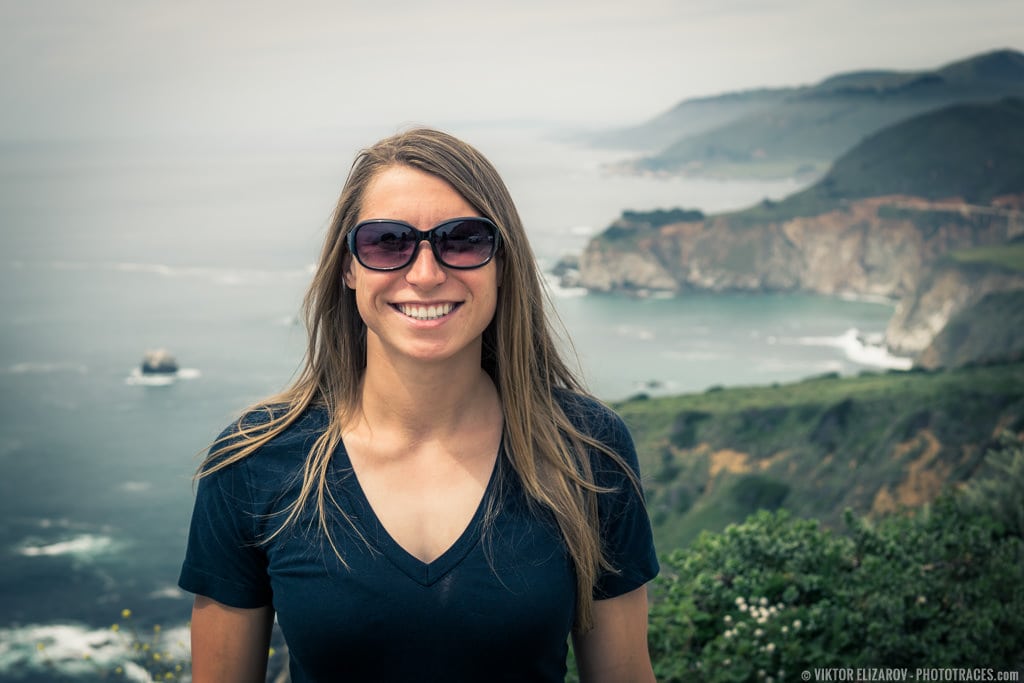
If we want to shoot portraits though, the classical choice is an 85mm lens. It allows us to “get closer” to the subject without actually moving towards him. And it will create a shallower depth of field which is what we need to make the subject stand out against a blurry background.
How to increase depth of field in photography
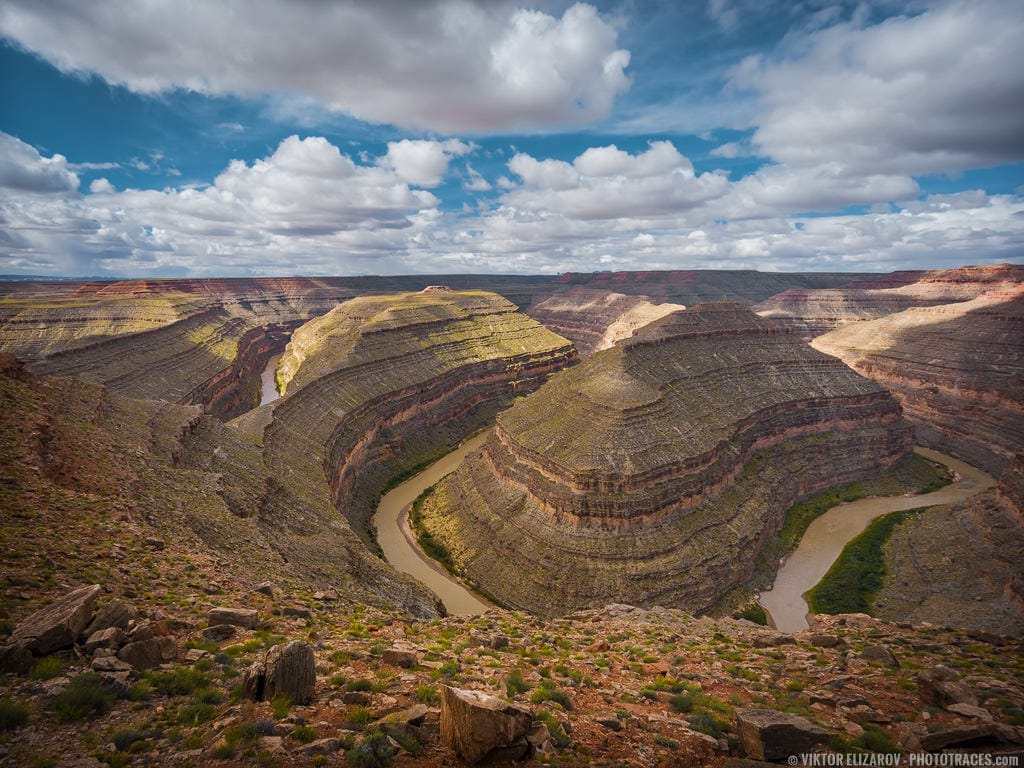
As I mentioned above, in landscape photography we want an image that is sharp all over. This means we need to have a large depth of field. So what can we do?
a) Close the aperture
We already know the smaller the aperture, the larger the depth of field. So, the first thing we should do is select an aperture value of f8 or above. In my experience, f/8-11 is the range that is most often used in landscape photography.
Closing the aperture will result in a smaller amount of light that hits the sensor. Your camera will compensate for this with a lower shutter speed. So make sure you use a tripod. I’d recommend one whenever possible, even at high shutter speeds.
b) Use a shorter focal length
To increase the depth of field you need a lens with a short focal length like 16mm – 35mm (10mm – 24mm on cropped sensor cameras). Prime wide-angle or zoom wide-angle lenses are the best but if you’re just starting, a general zoom lens will also do. Just make sure you use it at its shortest focal length when shooting landscapes or generally want a large depth of field.
c) Move away from your object
Your depth of field will be larger if you move away from your object. This is especially useful when shooting landscapes with objects of interest both in the foreground and background. If you move away from the object in the foreground, you’ll be more likely to shoot a photograph that’s sharp from end to end.
How to maximize depth of field
Sometimes you use a tripod, close your aperture on your wide-angle lens and move away from your object, and yet, your background or foreground still seems blurry. What’s the problem?
Related: Photography Basics: Articles, Tutorials, and Guides
It’s usually the focusing. There’s a concept called hyperfocal distance that’s especially valuable in landscape photography. It helps us focus our lens in such a way that we achieve a very large depth of field.
By hyperfocal distance, we mean the distance between the lens and the closest object that appears sharp and when the depth of field extends to infinity. It depends on the focal length of your lens and the chosen aperture and can be calculated with a formula but the good news is you don’t really need to figure it out yourself.
There are countless smartphone apps or charts online that give you your hyperfocal distance (in meters or feet) based on the focal length and the aperture you’re using.
Once you’ve found it, just focus your lens at this distance (using its focusing scale) and you’ll know that anything from half that point to infinity will appear sharp.
So if the chart says your hyperfocal distance is 6 feet, you should focus at 6 feet, and then anything from 3 feet away from you to infinity will be in focus in the image.
The hyperfocal distance with that setting is 45cm only.
It’s important to remember that the depth of field will start at 3 feet away from the camera. Anything closer will be blurred. So make sure you move away from any objects in the foreground that are too close to you and that you want to have sharp in the final image.
Related: Must-Know Photography Terms
The tricky thing with hyperfocal distance is you need to focus right. If let’s say, you fail to focus at 6 feet and focus at 5 feet instead, you won’t get an image that’s sharp from end to end. The good news is if you focus at a distance greater than the hyperfocal distance (let’s say 7 feet), the image will still be sharp to infinity.
So, if you get the hyperfocal distance wrong, just try to get it wrong the right way!
Hyperfocal distance sounds complicated, but a printed chart or a mobile app will help you get it right. It’s definitely something that will help you improve your landscape photography and potentially make better-looking prints.
As for me, I use the mobile app PhotoPills and highly recommend it.
How to achieve shallow depth of field
We normally want a shallow depth of field when we shoot portraits or still life. A small area of focus allows our subject to stand out and masks or erases possible distractions in the background. To achieve it we can:
a) Open up the aperture
The more we open the aperture, the shallower the depth of field. At f/5.8 we might still identify what the background is but at f/1.4 it will be just a blur.
b) Use a longer focal length
While you can make interesting portraits with a wide-angle lens, if you want to achieve a shallow depth of field, you should choose a lens with a longer focal length. The 85mm lens is the usual choice for portraits.
When you often need to isolate your object from the background in nature photography, the telephoto lens is your best option. Not only does it produce a very shallow depth of field but it allows zooming in from a large distance.
c) Get closer to the subject
Another thing you can do to make the depth of field shallow is to get closer to your subject. This way you’ll find it easier to blur an uninteresting or distracting background.
Understanding photography is understanding the depth of field
Depth of field is a vast topic that can easily overwhelm a beginner. But it is one of the most important concepts in photography and one that distinguishes a photographer from someone who just snaps photos.
Mastering depth of field is the key to creating images the exact way you want them to look. And as with anything else, it’s all about practice. The more you shoot and then analyze your images, the better you’ll become.
I would personally start with shooting a scene with as many different apertures as possible, with changing the focal length of the lens (or using another lens), and with moving closer or farther from my object. And then I would carefully examine the results.
I would also do this again and again until I know exactly what I want to achieve with my next photograph.
Do you think you can do it too? Or is there anything else that’s still unclear about depth of field? Let me know in the comments below.