
During my latest trip to Utah, the Kodachrome Basin State Park became the headquarters of the entire trip. It is not the most popular location in Utah, but it has a very strategic location.
Kodachrome resides in driving distance from such places as Zion National Park, Capitol Reef National Park, Canyonlands National Park, Arches National Park, Cottonwood Canyon Road, Lake Powel, Vermilion Cliffs National Monument, Burr Trail, Monument Valley, and even Grand Canyon. And it is located only 20km from Bryce Canyon.
Of course, I did not stay at Kodachrome every night. Since reservation during the high tourist season is very problematic, I had to make reservations well in advance for the duration of the entire trip.
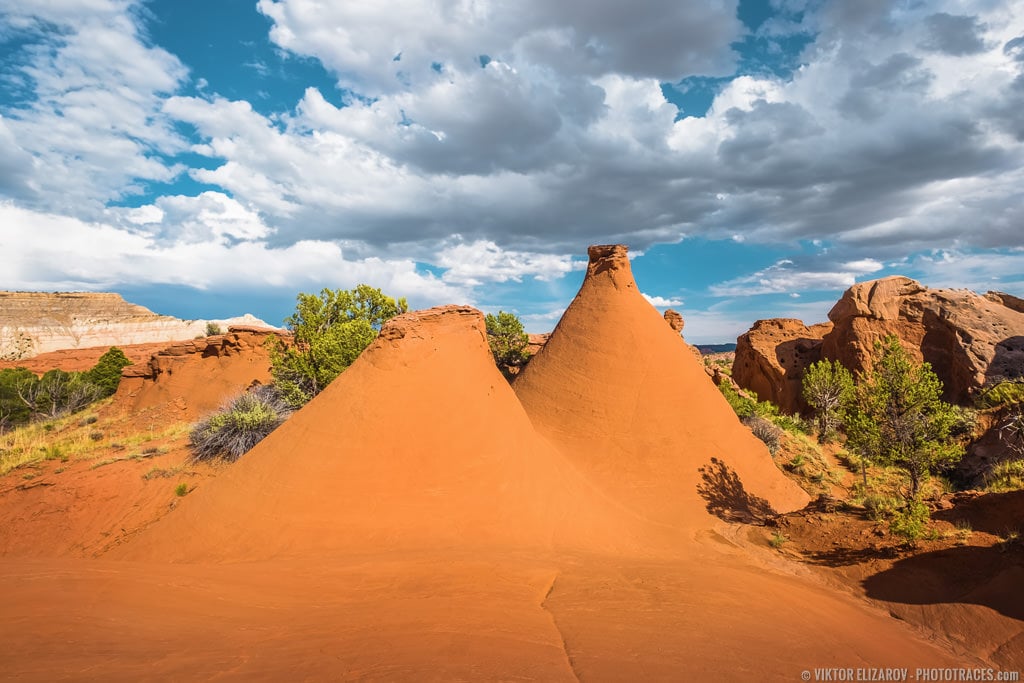
Kodachrome itself is full of amazing places to see and photograph. One such place is the Secret Passage. It is a part of the 10km Panorama Trail hike, and it is guaranteed that you miss it unless you are looking for it. It would be best if you searched for the Seacret Passage to get to a small pocket with absolutely fantastic rock formations.
I never visited Utah in Agust, and I got to experience the monsoon season for the first time. You have the same weather scenario every day. The clouds start to accumulate in the early afternoon and reach their peak around 5pm. And by the sunset, they get transformed into the dark stormy clouds, and around sunset, you get a heavy, cold rain.
I took the featured photo in the early evening when the clouds were at their best.
Shooting
It was my second year of shooting with Fujifilm gear, and by that time, I understood its capabilities and limitations. Even though it was a very contrasted scene, I knew that I could capture the entire range of light with only one shot without bracketing and HDR.
The main challenge was the minimal space in the pocket. I could not fit the entire scene, even when using the widest focal length (10mm). I had to climb a slippery rock, on the opposite side of the pocket, to compose the shot from higher ground.
Using the tripod was out of questions, I was shooting handheld.
Editing & Processing
It was a single RAW processing workflow.
Lightroom (80%)
I kept the original aspect ratio (3 x 2) but I had to crop the image slightly to make composition tighter.
Next, I
The Lightroom Preset Editing Formula: Napa (9, 24, 32)
Photoshop (20%)
In Photoshop, all I had to do was to boost details and reduce digital noise.
Plugins: DeNoise (noise reduction).
Total Time: 12min