
I took the featured photo during my hike along the Panorama Trail in Kodachrome State Park in Utah. I featured the location in my earlier post a few weeks ago: Secret Passage in Kodachrome
It was my very first exploration of the Kodachrome area and Panorama Trail in particular. I did not know what to expect, but I knew it was a long (10miles/16km) wide open trail in 30C (90F) degree weather at an elevation of 2000m (6500feet) above sea level.
I decided to hike as light as possible. I took with me Fujifilm XT2 camera and only one lens Fujinon 18-135mm. And I even left my tripod at a campsite because I was not planning to hike until sunset.
The hike was exhausting because of the heat, but I had a great time, managing to capture some interesting photos.
But when I reached the Secret Passage area of the hike, I realized that I had an issue to solve.
The Secret Passage is a tiny area surrounded by tall rock formations, and I needed an ultra wide angle lens to capture anything meaningful.
The solution was to capture multiple shots and merge them into wide angle panorama in Lightroom or Photoshop during post-processing.
That was precisely what I did, and it worked flawlessly.

Shooting
The rock formation I wanted to capture had minimal space in front of it. When I was leaning against the opposite wall, the shot’s subject was so close I almost could reach it with my hand.
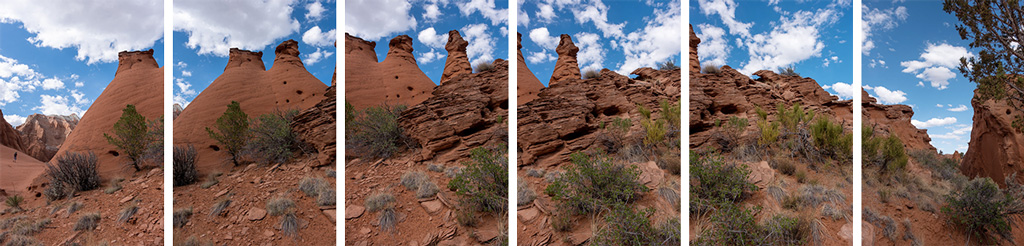
My original plan was to take 3, a maximum of 4 shots, to create a wide angle panorama. After a few attempts, I realized that I need more shots to cover an entire rock formation.
In the end, it took me six vertical shots in total to collect information from the entire scene.
I was shooting handheld, trying to be as still as possible during the shooting to minimize the camera movement. At the same time, even if I had a tripod with me, I would not be able to use it because of tight space.
Before taking the series of shots, I made sure to lock exposure (AE-L) and autofocus (AF-L).
Editing & Processing
It was a multi shot panorama processing workflow.
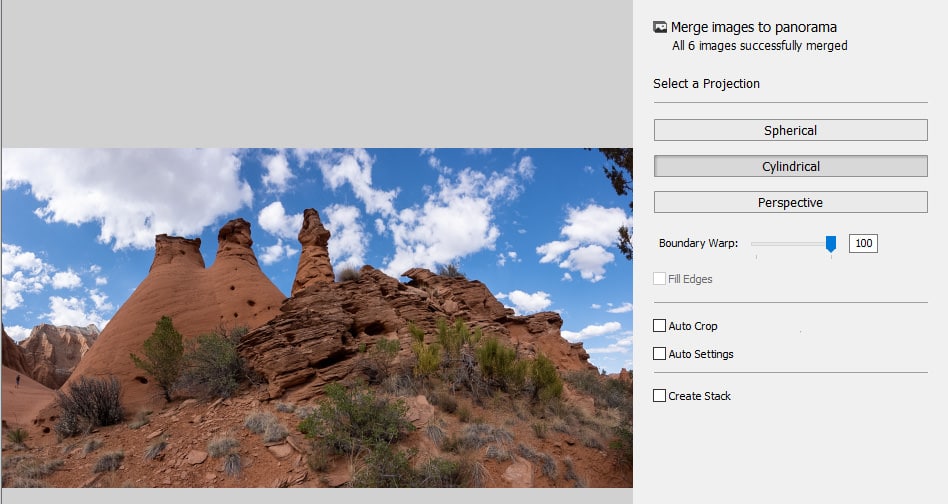
I started processing by selecting the entire sequence of 6 shots and sending them to the Photo Merge module of Lightroom, choosing the Panorama option.
Below is the screenshot of the Lightroom Panorama Merge settings:
Lightroom (80%)
Next, I use the Crop Overlay tool to conform the image to the 16×9 aspect ration.
To complete the Lightroom editing, I
The Lightroom Preset Editing Formula: Napa (2, 9, 13, 20, 32)
Photoshop (20%)
In Photoshop, I used the Spot Removal tool to clean up the image.
And finally, I used the Topz DeNoise plugin to reduce digital noise. That was the first time I used the latest version of DeNoise AI after upgrading from DeNoise 6. The newest version works differently compared to the old version. It does not only reduce the noise but sharpens the image as well.
After I am comfortable with the new version, I will update my review of Topaz plugins.