
If you want to learn how to delete rejected photos in Lightroom, you should read this article. Today I will show you my simple workflow of how I clean up my photo catalog by deleting unwanted or rejected images.
How to Delete Rejected Photos in Lightroom: Quick Answer
If you are in a rush and do not have time to read the entire article, here are two ways you can delete rejected photos in Lightroom.
- Use the keyboard shortcut CMD + DELETE (Mac) or CTRL + BACKSPACE (Windows).
- Use the top menu: Photo > Delete Rejected Files.
The Main Challenge of Digital Assets Management
Digital photography offers us many unprecedented benefits, such as instant visualization and no additional cost to take extra photos. But at the same time, it also comes with new challenges.
One of the biggest challenges we face is that most photographers (including myself) tend to overshoot or take more digital images than necessary.
Overshooting leads to the more complicated and time-consuming issue of digital asset management (DAM).
Over the years, I learned that using Lightroom is key for maintaining my sanity. I simplified my digital asset management workflow and unapologetically delete unneeded, unwanted, and unused images from my digital catalog.
Here is where image removal becomes an essential part of my photography.
How to Delete Photos in Lightroom Classic
Lightroom is no different than most DAM programs.
To delete a photo, you first select the picture intended for removal. Then, you hit the DELETE or BACKSPACE key on the keyboard.
What happens next is a step that is unique to Lightroom catalog management.
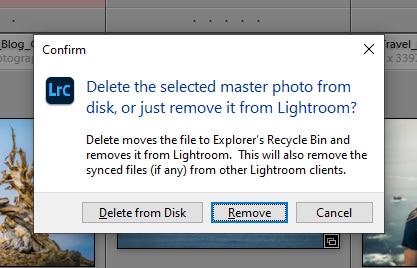
You are presented with a popup menu featuring two options: DELETE FROM DISK or REMOVE.
REMOVE means that the photo will be removed from the Lightroom catalog, but it will be preserved on the computer’s hard drive in its original location.
DELETE FROM DISK means that the photo will be removed from the Lightroom catalog and deleted from the hard drive.
Ultimately, instead of using the DELETE or BACKSPACE keyboard shortcuts, you can right-click on the image and select the REMOVE option.
It is a simple and straightforward process for deleting unwanted images in Lightroom, but it has one significant shortcoming. It is too time consuming when you need to process thousands of images.
Here is where the Rejection Method becomes extremely useful.
Rejecting Instead of Deleting
The key here is to first mark the unwanted photos as rejected and then delete the rejected photos in one sweep at the end of the culling process.
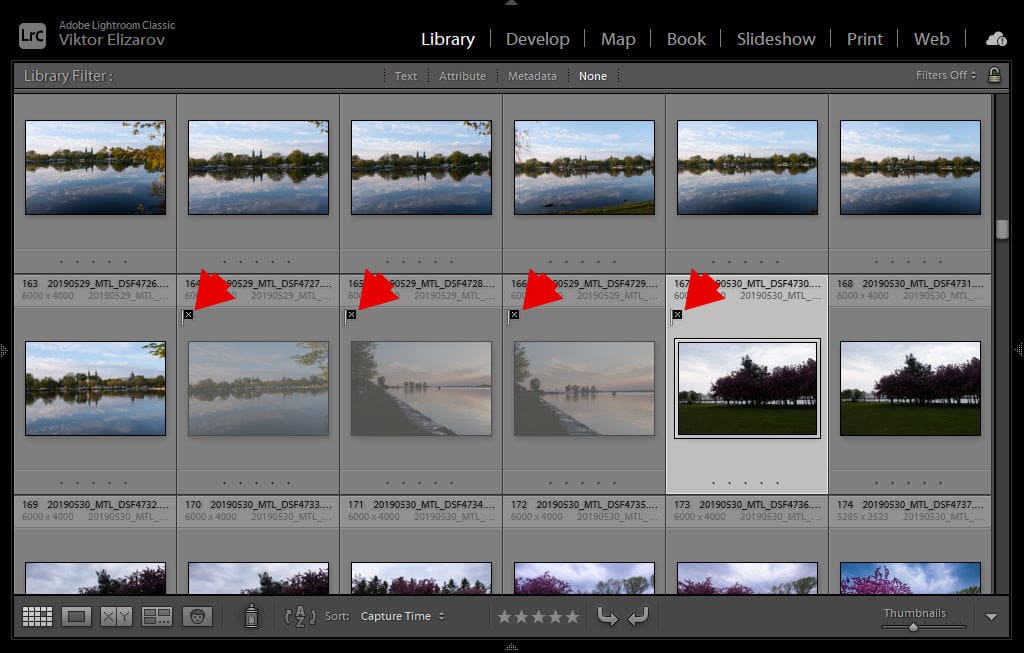
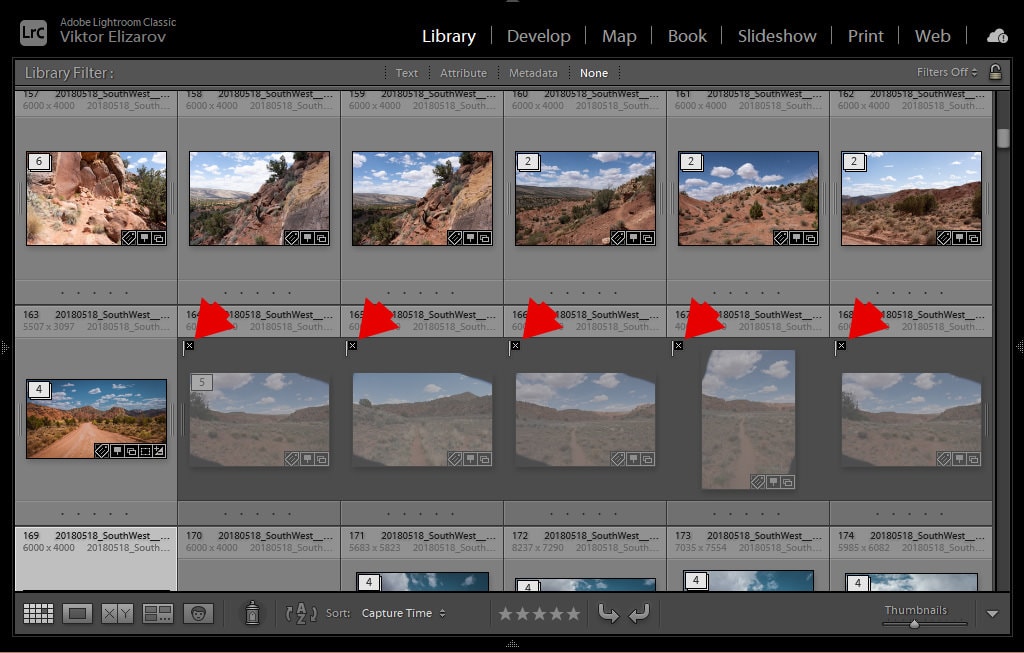
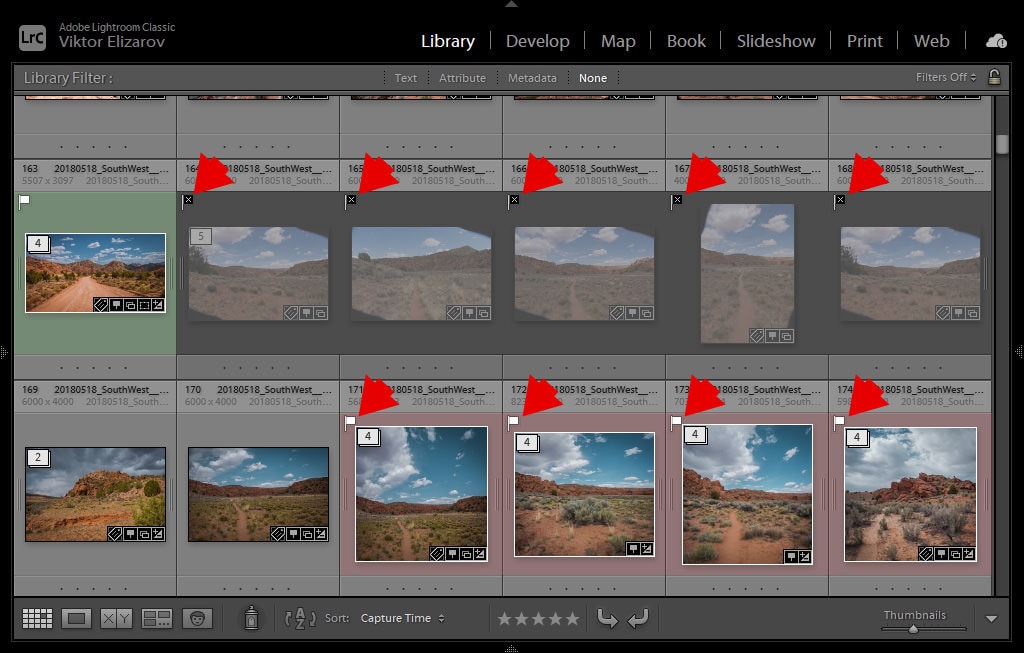
Use the “X” keyboard shortcut to mark the selected images as REJECTED. The image is not deleted from the catalog or the computer’s hard drive; it is simply greyed out with a black flag placed in the top left corner.
Auto Advance
Another useful option is to use the CTRL + X shortcut to auto advance to the next image after marking the selected photo as rejected.
The even better option is to use the Caps Lock key to activate the auto advance mode for every image after using the “X” keyboard shortcut.
Using the Caps Lock and “X” shortcuts speed up the culling process and allow me to cull thousands of photos in a matter of minutes.
My Culling Workflow
Culling means to select the keepers—the photos with the potential to be published—and delete any unneeded images. In some instances, the culling process involves rating the keepers by giving them between one and five stars.
My culling workflow is a three-step process.
Step 1 – Rejecting
In the Library Module of Lightroom, I hit the Caps Lock key to activate the auto-advance feature.
Next, I go through all my newly imported photos in Lightroom and only look for images to mark as REJECTED.
The most apparent criteria for rejecting photos include out of focus images, incorrect exposure, and accidental captures. I also reject photos with poor composition that cannot be salvaged by cropping.
resulting in severe vignetting in 5 captures.
If I cannot decide in one to two seconds if I should reject an image or not, I leave it unmarked and move forward so that I do not waste any more time.
Step 2 – Picking
In this step, I select the keepers by using the shortcut “P” to flag them as PICKED.
I do not give my keepers a star rating; I simply select the images that have the potential to be published. I might apply the star rating to some of them in the future when I start editing images.
Please note that I continue using the Caps Lock function for auto advancing.
By the end of Step 2, I have separated my photos into three categories: Keepers (picked or flagged), Unmarked, and Rejected.
Later, perhaps in a few months or so, I might go through the same process using the unmarked images to find more keepers or more photos to reject.
Step 3 – Deleting Rejected Photos
Finally, I am ready to delete all the rejected photos.
I use one of two methods:
- Use the keyboard shortcut CMD + DELETE (Mac) or CTRL + BACKSPACE (Windows).
- Use the top menu: Photo > Delete Rejected Files.
I unapologetically delete all the rejected images from the Lightroom library and the computer’s hard drive.
Final Thoughts
Deleting images from the Lightroom catalog and the computer’s hard drive seems like a trivial and unexciting task in a photographer’s life. But if you gamify the process by treating every deleted image as an investment in your mental health, it gets much easier.