
Capturing stunning panoramic photography may seem like an overwhelming task–but it doesn’t have to be.
As long as you have the right gear and the right know-how, panorama shooting can be easy, fun, and very rewarding!

After all, panoramas allow you to create sweeping, breathtaking photos that are impossible to record in a single shot.
And that’s what I’m going to talk about in this article. I’m going to explain why you might want to shoot panorama photography, the different types of panoramas you can shoot, and–most importantly–how you should go about capturing beautiful panoramic shots.
So if you’d like to start shooting some truly unique photos…
…let’s get started!
What Is a Panoramic Photo?
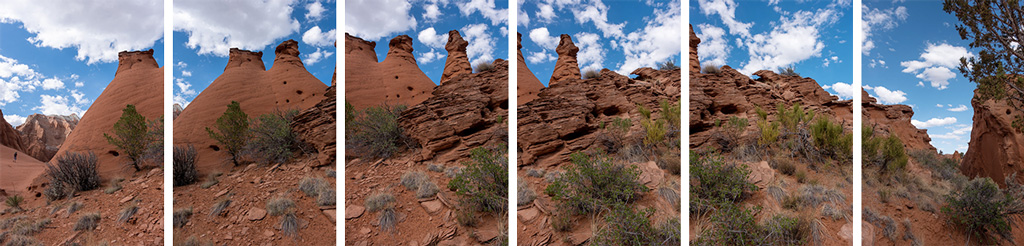
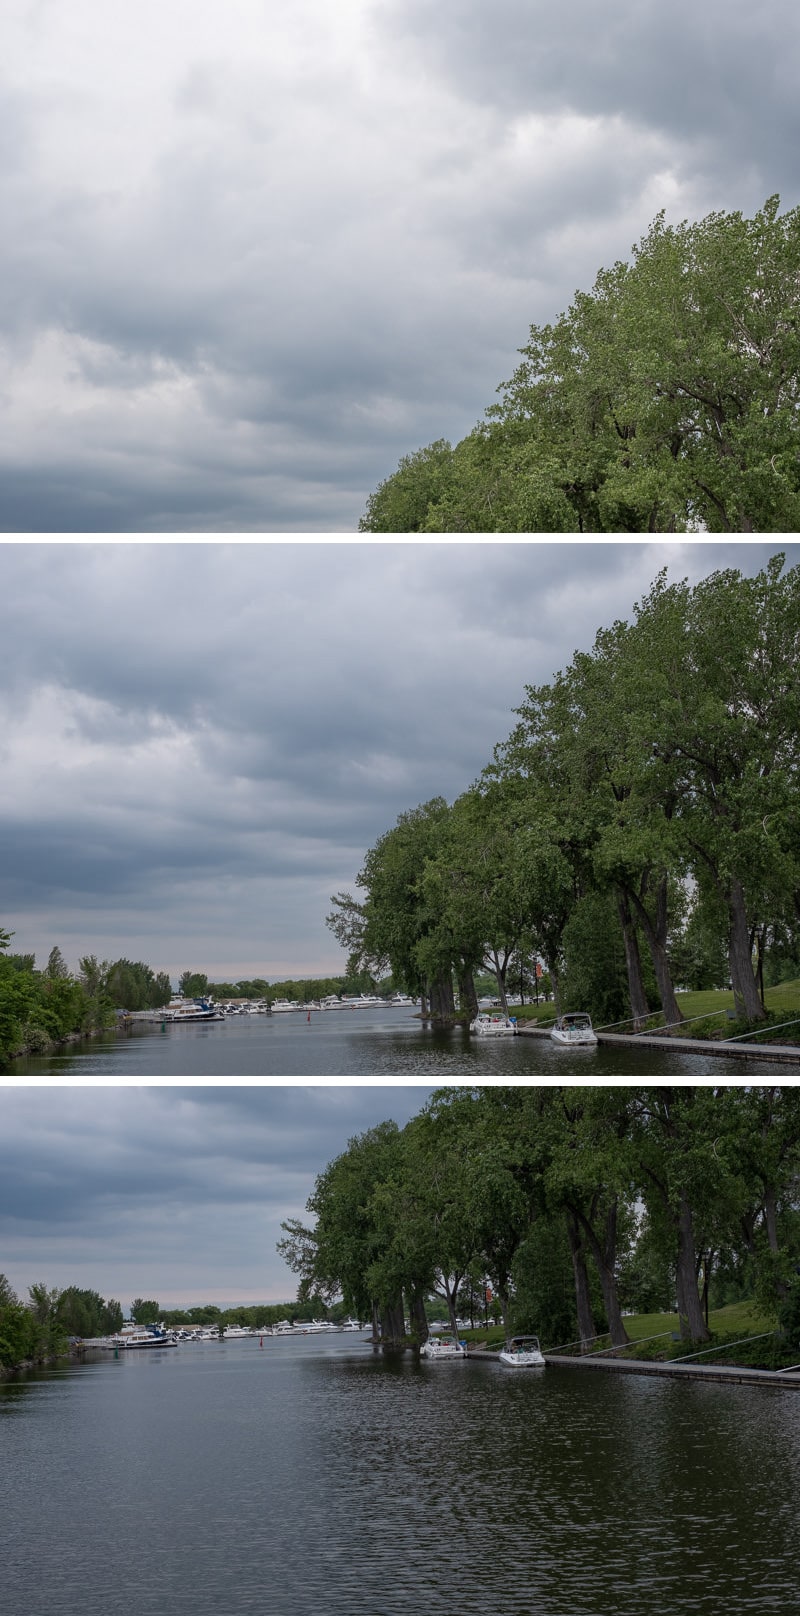
A panoramic photo is actually a combination of several images. Panoramic photography starts out in the field, where you take several overlapping photos of the same scene. And panoramic photography continues during post-processing, where you stitch the images together to create one larger, higher-resolution shot.
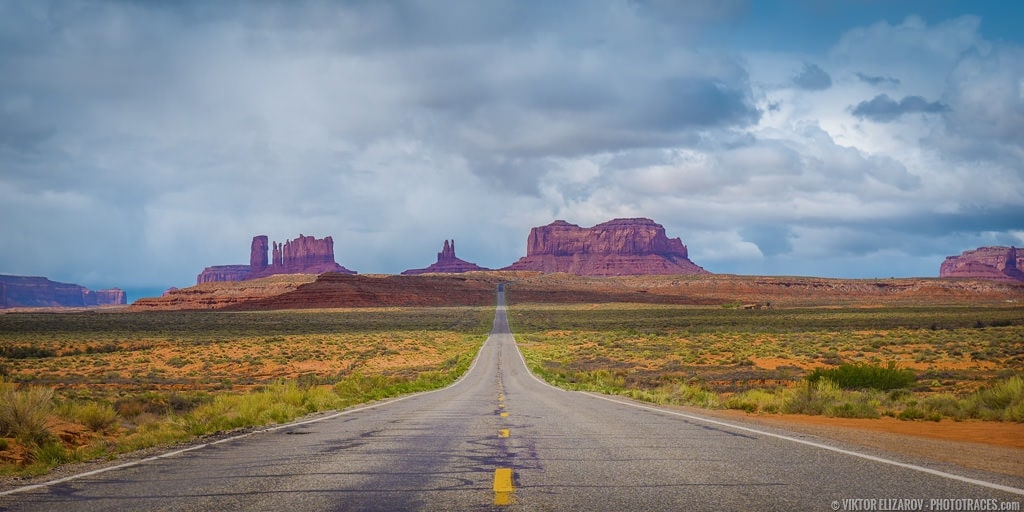
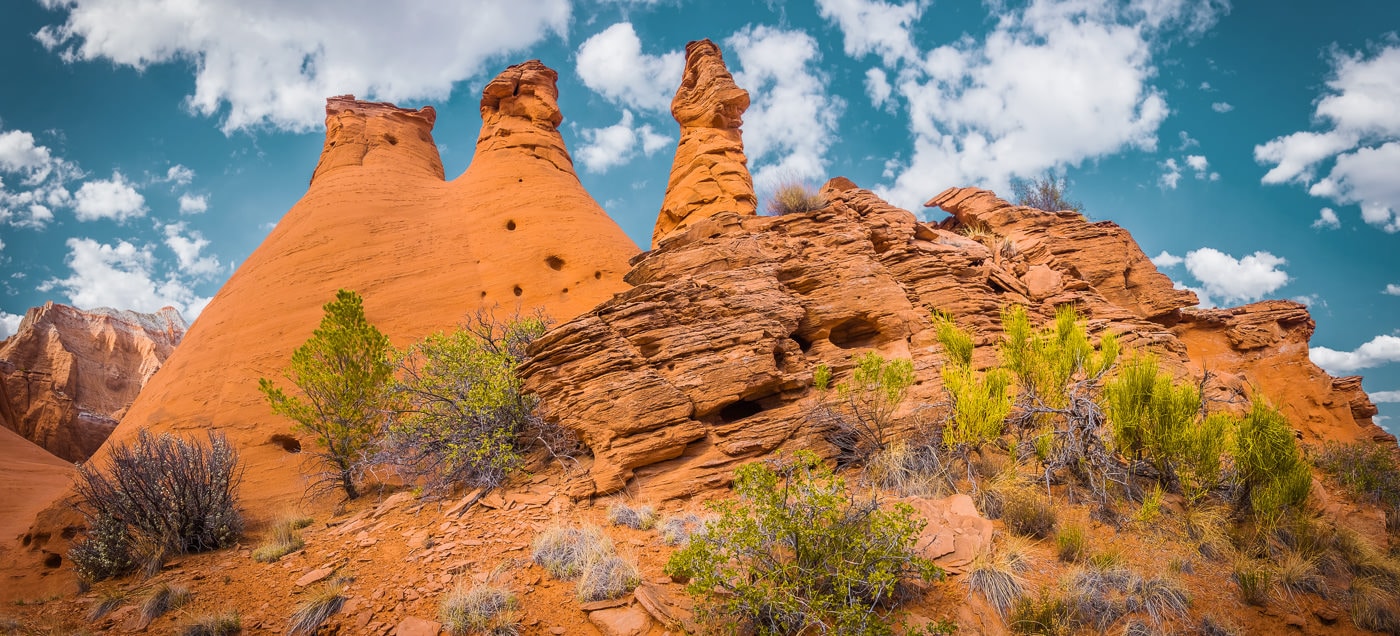
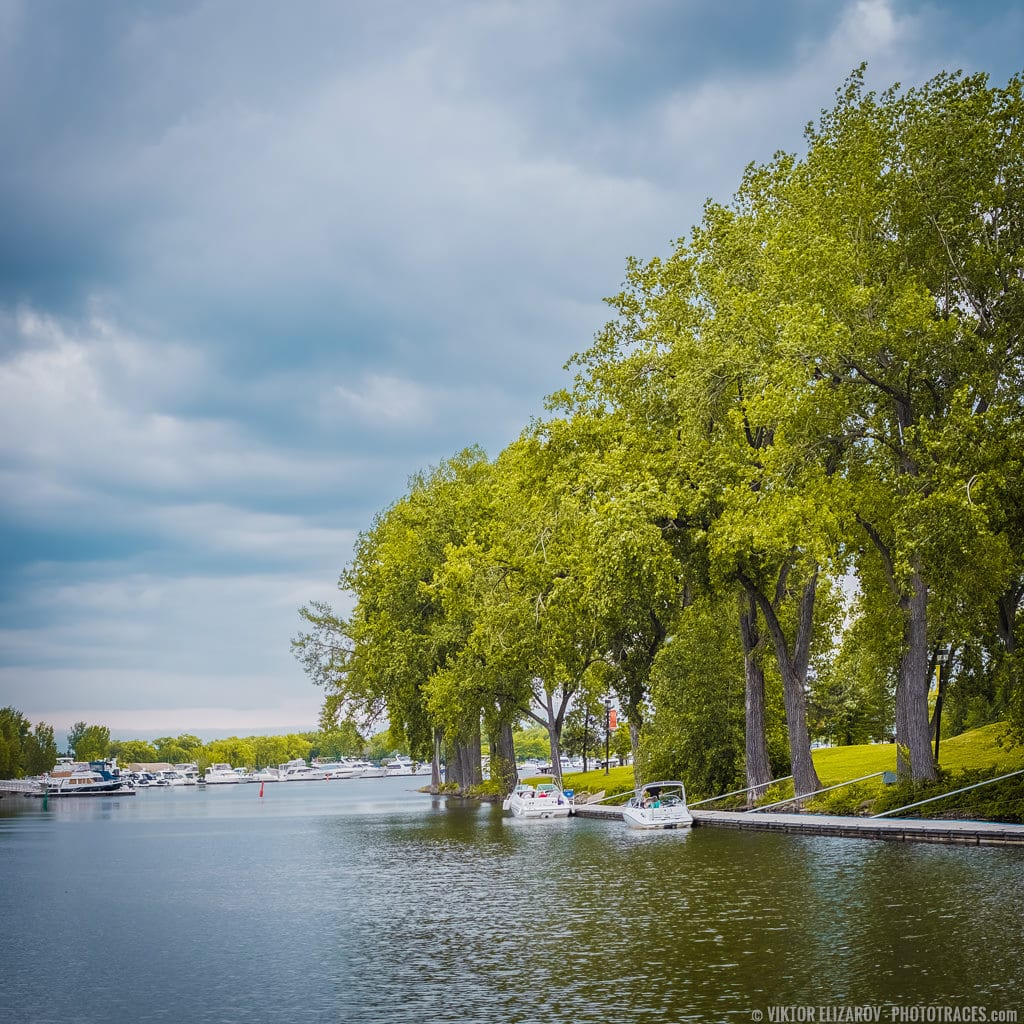
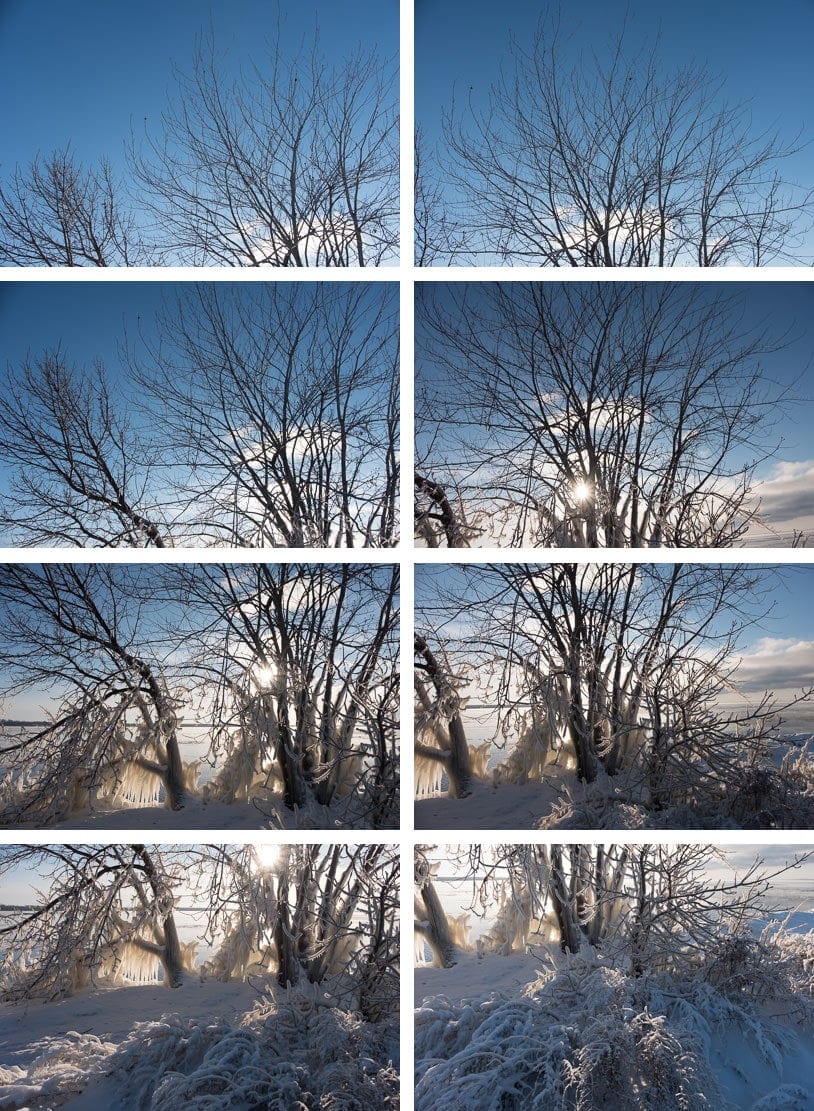
Here’s an example of what a non-panoramic image looks like:
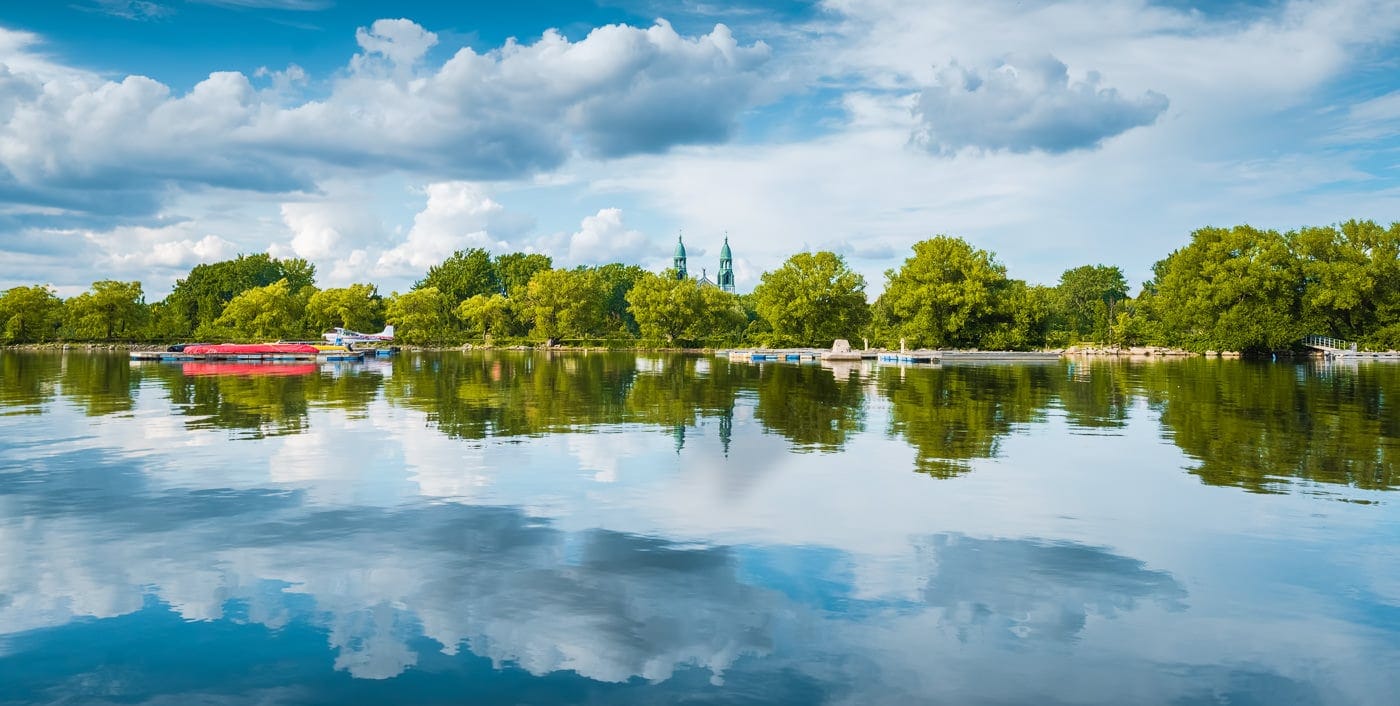
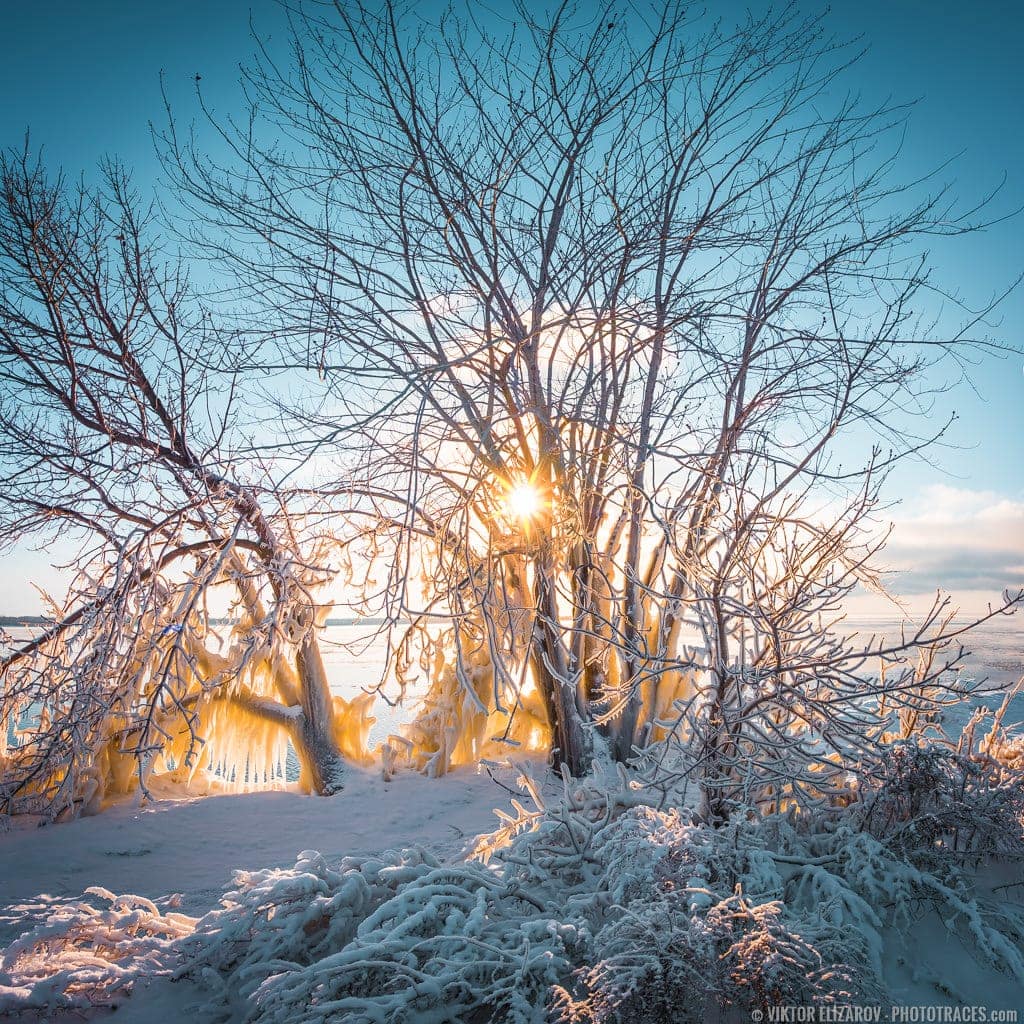
And here’s the same scene but photographed as a panorama:
The panorama image is a lot more encompassing, right? You get more of the scene than your camera-lens combination could capture with a single shot.
Reasons for Shooting Panoramas
I’ve already talked about what a panorama photo actually is.
But why would you want to shoot one? What’s the value in capturing a panoramic photo, especially when panoramas take far more time to set up than single photos?
It turns out there are four simple reasons why you might want to shoot a panorama.
Let’s take a look at each one in turn:
1. To Capture a Bigger/Wider Slice of Reality
This is the most popular reason for doing panoramic photography:
It lets you show more within a single final image.
So if you’re standing before a mountain range, you won’t have to decide which peak to photograph; instead, you can use a panorama to encapsulate the entire scene.
Note that you can do this with telephoto lenses, wide-angle lenses, or anything in between because there’s no focal length restriction when it comes to panoramic photography.
Just remember that a panorama will display a wider field of view than your current lens can provide (so a telephoto panorama might give you the equivalent field of view to a wide-angle lens, and a wide-angle lens might give you the equivalent field of view to an ultra-wide lens).
2. To Avoid Perspective Distortion of Wide-Angle Lenses
The wider your lens, the more it’ll be affected by perspective distortion, where closer objects loom large in the frame and distant objects look tiny. While this isn’t always a problem–in fact, it’s what allows landscape photographers to emphasize foreground subjects–there are times when you want to keep all objects looking similar in size.
That’s when you turn to panoramic photography.

Remember how I said you could get a wide-angle field of view using a telephoto lens? That’s what the goal is, here: to shoot with a longer focal length, unaffected by wide-angle perspective distortion, yet still get the wider, expansive field of view.
So by shooting your “wide” panorama with a telephoto lens, you can get a much less distorted image.
3. To Produce Higher Resolutions for Printing
The more resolution you have to work with, the bigger you can print, and the better your print will look when viewed from close up.
Now, a normal image taken with a 24 MP sensor might allow you to comfortably print a 14×20 image.
But with a 3-shot panorama, you’re working with 72 MP of data, not 24 megapixels of data. And though parts of the images will overlap (see my discussion of how to actually take a panorama, below), you’ll still have a lot more data to work with, which translates to enhanced printing capabilities.
For instance, you might end up with around 48 unique megapixels, which means you could print at around 26 x 20 and get a nice result, even when viewing the print from close up.
Make sense?
4. To Create Ultra Wide-Angle Images
Here’s the final reason to do panoramic photography:
If your widest lens isn’t wide enough.
Say you want to capture a shot of a waterfall, one that shows off the grandeur of the falls without leaving anything to the imagination. But you’re standing on a ledge and you still can’t include the entire scene in your frame.
That’s when you shoot a panorama. You capture several shots that encompass the entire falls, then you stitch them together later for an ultra-wide result.
Types of Panoramas
Depending on the result you’re after, you’ll want to consider one of these three panorama types:
Single Row Wide Panoramas
These are standard panoramas, using several images merged together to create a wider image than you’d normally be able to capture.
The final result is horizontal in its orientation, but–generally speaking–the original RAW images will be vertical.
Vertical Panoramas
Vertical panoramas are like wide panoramas, but oriented vertically.
So instead of capturing a sweeping shot that encompasses the entire landscape, you can use them to photograph a vertical subject, such as the landscape plus the sky, a huge waterfall, or a giant mountain.
Note that vertical panoramas generally start as separate horizontal images that are then stitched to become a single vertical image.
Multi-Row Panoramas
Multi-row panoramas are like deluxe panoramas, because you capture several rows of panoramic images, all with lots of overlap.
So you might capture three images in the top row, then shift down slightly and capture three images in the middle row, and then shift down again and capture three images in the bottom row.
You’d ultimately end up with nine separate images, which can then be stitched together for one massive, high-resolution result.
Equipment Used for Landscape Panoramas
Here’s the equipment you need for perfect panoramas:
Essential Equipment
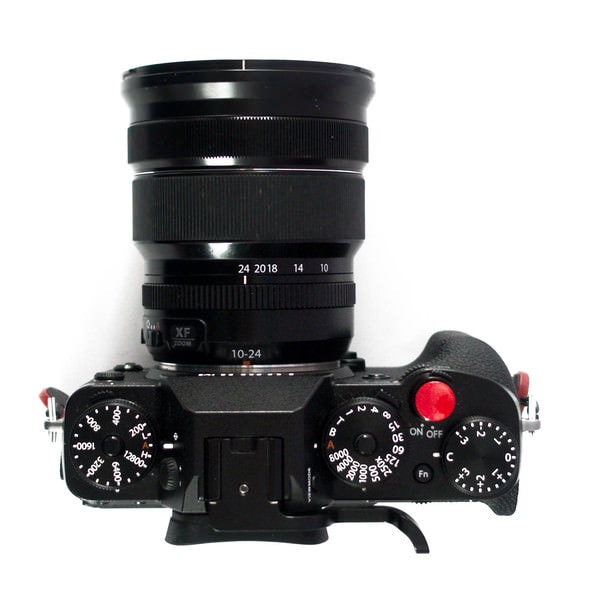
If you want to capture panoramas, you need a camera and a wide-angle lens. That’s all.
You might be wondering:
What about a tripod?
But the truth is, while tripods are very useful for panoramic photography (see the next section!), they’re not necessary. You can do handheld panoramas, or you can perch your camera on something stationary (like a table) before shooting.
Desirable Equipment
If you’re interested in doing panoramas regularly, I recommend getting yourself some dedicated equipment.
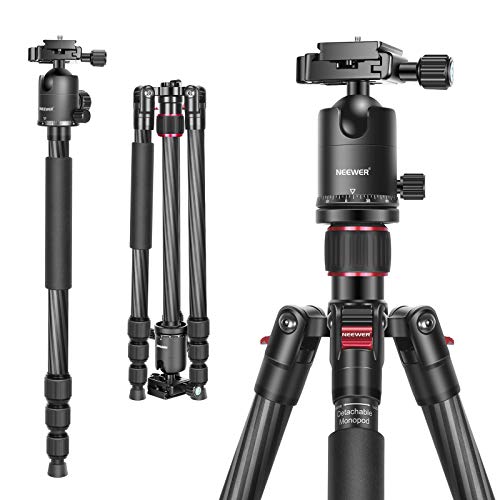
Tripod
First, you’ll want a tripod, ideally one that comes with a level (so that you can ensure the tripod surface is flat before mounting your camera).
Level
If you don’t have a level, you can always purchase one and mount it to the top of your camera (via the hot shoe).
Second, you’ll want a tripod head. There are special panorama heads that allow you to rotate your camera smoothly, but you’ll also do just fine with a standard ball head.
Shutter Remote Release
Third, you should grab a remote release. This will allow you to trigger your camera’s shutter remotely–to prevent camera shake from pressing the shutter button. While it’s possible to use the self-timer, I personally prefer a remote release, which is faster and less annoying to work with.
Professional Panoramic Setup
If you’re a professional who specializes in panoramic photography, or you simply need to consistently capture expert-level panoramas, then you’ll want to consider adding a special tripod head to your kit, one designed for panoramic work.
You’ll also want to purchase a nodal slide, which is a small piece of metal that positions your camera out over the tripod, like this:
What’s the point of a nodal slide?
Well, a nodal slide is designed to combat parallax. This is something humans experience all the time; when you look at a close object, then move your head, you’ll notice that the close object moves in relation to the background.
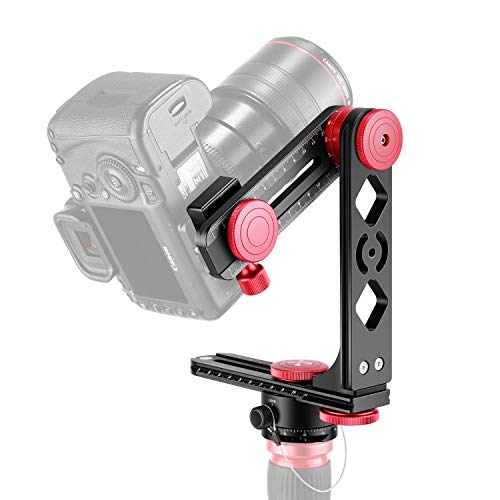
When you’re taking a series of panoramic shots and rotating your camera, you’ll end up with parallax, too, especially if you have any foreground objects in your scene.
The solution is a nodal slide, which repositions your camera so that it rotates around a point (the nodal point, it’s called) and eliminates parallax.
How to Shoot Panoramic Photos
Now that you’re familiar with the different types of panoramic photography and why you might want to take a panorama, the actual shooting process should be a piece of cake!
Here’s how it works:
Step 1: Compose Your Photos and Choose an Orientation and Direction
A great panorama starts with composition.
Look for interesting foreground elements, interesting middleground elements, and interesting background elements. Try to make sure every part of your scene has a purpose.
Decide whether you’re going to take a vertical panorama, a horizontal panorama, or a multi-row panorama.
Also note any moving objects in the scene. If the objects aren’t essential to the composition, then I’d recommend waiting for them to pass by (though you can always shoot multiple images and mask the moving object out later, or you can just clone it out).
Step 2: Set Up Your Camera, Making Sure It’s Level
Now it’s time to set up your camera.
First, you’ll want to position it in the correct orientation. If you’re doing a vertical panorama, you’ll probably want to go with a horizontal orientation (because it’ll prevent your image from becoming ridiculously tall and very thin), and if you’re doing a horizontal panorama, you’ll probably want to do the opposite.
If you’re handholding, make sure you’re in a stable position. If you’re using a tripod, arrange the legs carefully.
Remember: The more level your camera, the better the panorama will turn out. This is where a spirit level comes in handy, and while you don’t have to work with one, it’ll prevent you from losing detail at the edges of your frame.
Step 3: Set Your Exposure for Every Panoramic Image
For the best results, I recommend using Manual mode to set your exposure. Simply meter off a neutral portion of the scene, then dial in this exposure and don’t change it.
You can also use Aperture Priority, but you’ll need to lock the exposure before the first shot (and keep it locked while shooting).
Your exposure shouldn’t change while shooting. If it does, it isn’t the end of the world–panoramic stitching software can cope with this pretty well–but it’s a good idea to get it right from the beginning.
Step 4: Manually Set Your Focus (Using Standard Depth of Field Calculations)
Next, it’s time to choose your point of focus. You’ll want to aim for the hyperfocal distance, and you’ll need to lock this for the entire series of shots (which is why I’d recommend using manual focus).
Bear in mind that you won’t get any extra depth of field due to a wider panoramic field of view. The final image will make you seem farther away from your subject, but the depth of field will remain the same. So do your hyperfocal distance calculations using your lens’s focal length (as if you were capturing a normal shot).
Step 5: Take the Shots With at Least 30% Overlap Between Each File
Finally, it’s time to capture your panorama.
You’ll want to start at the leftmost (or bottommost) part of the composition, take a shot, shift your camera slightly, take another shot, shift your camera slightly more, and so on, until you’ve captured the entire scene.
Make sure you include sufficient overlap between each shot, so that your stitching software can easily line up the images later; I’d recommend going with at least 30% overlap, and anything more than this will also work fine (but too much overlap will waste shots and take extra time).
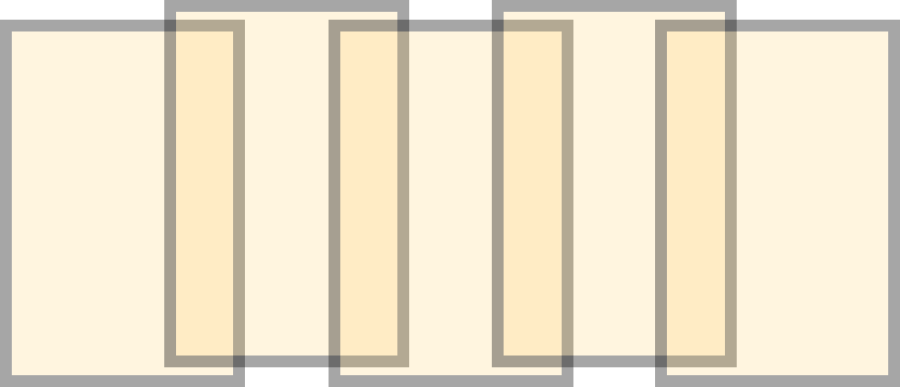
But, when I shoot panoramas handheld, I often go for up to 50% overlap to make sure I have enough pixels for stitching.
Now, if you take a lot of panoramas, then the editing can get confusing. You’ll have hundreds of slightly overlapping files and no way to tell which shots go together.
It’s a good idea to start every panorama sequence with a shot of your finger, and end every panorama sequence with a shot of your fist. If you want to make things even easier, point your finger in the direction of the panorama, so you can easily reconstruct your series of shots later on!
Conclusion
Doing panoramic photography isn’t hard, and it can give you great results!
So make sure you remember the steps from this guide.
And you’ll be able to capture stunning panorama photos whenever you like!
By the way, make sure you check back for our next article, where we’ll show you how to stitch your panorama images together for the best results in Lightroom and Photoshop.